Android, with over 2.8 billion users globally, is the most widely used mobile operating system in the world. However, its default lack of encryption for internet traffic leaves user data vulnerable to prying eyes. Unencrypted data transmitted from an Android device can be easily viewed without the need for hacking or alteration. Therefore, setting up a proxy server on your Android device is crucial to manage your mobile network’s inbound and outbound traffic, ensuring that all your data and information remain safe during transmission.
A proxy server helps maintain online privacy and security by acting as an intermediary between your device and the internet. Android allows you to set up different proxy settings for individual Wi-Fi connections. All requests from your device go through the proxy server, which hides your IP address and encrypts your internet traffic, making it difficult for anyone to intercept or view your online activities.
Requirements:
Before you start, make sure you're using a trusted proxy provider. You'll need your proxy authentication credentials, which include the following:
• Proxy Address
• Port
• Username
• Password
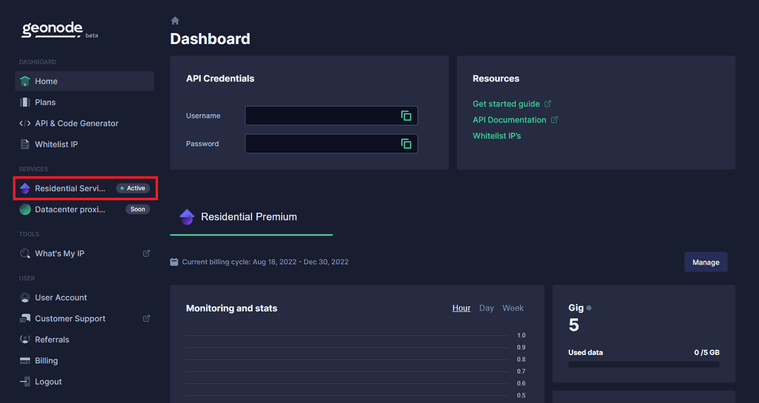
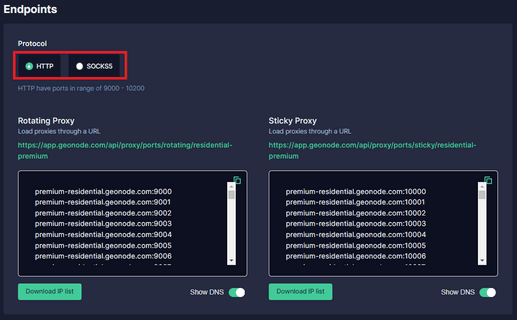
You can get these from your network administrator or from your proxy service provider. Here’s an example of the credentials below using Geonode:
This article provides a comprehensive, step-by-step guide on using proxies with your Android device to help you keep your information secure.
Note: The connection type is HTTP only when using proxies for a mobile network.
Setting Up a Proxy on a Wi-Fi Network
Here are the steps you need to follow:
-
Access Wi-Fi Settings: Open Android’s Settings app and tap “Wi-Fi” to view a list of Wi-Fi networks.
-
Select Network: Long-press the name of the Wi-Fi network you want to change the proxy settings for. Tap “Modify Network” when a menu appears.
-
Expand Advanced Options: Expand the “Advanced options” section on this screen. Tap the “Proxy” option and select either “None” for no proxy, “Manual” to manually enter proxy server settings, or “Proxy Auto-Config” to automatically detect the appropriate settings for your network.
-
Enter Proxy Details: If you select “Manual”, you can manually enter the proxy server’s details. Enter the address of the proxy in the “Proxy hostname” box. You can enter both hostnames like “proxy.example.com” and IP addresses like “192.168.1.100” here. Provide whichever type of address you have. Enter the port the proxy requires in the “Proxy port” box.
-
Bypass Proxy Settings: If you want to have Android bypass the proxy for any addresses, enter them in the “Bypass proxy for” box, separated by commas. For example, if you wanted Android to access howtogeek.com and example.com directly without using the proxy, you’d enter the following text in the box: howtogeek.com,example.com
-
Save Settings: Tap “Save” to save your settings when you’re done.
Setting Up a Proxy on a Mobile Network
Setting up a proxy using a mobile network is slightly different. Here's how to do it:
-
Access Mobile Network Settings: Open Android’s Settings app and tap “Mobile Network”.
-
Access APN Settings: Tap “Access Point Names” or “APNs”.
-
Modify APN: Tap the APN you want to change the proxy settings for.
-
Enter Proxy Details: Enter the proxy server’s address and port into the “Proxy” and “Port” fields.
-
Save Settings: Tap the menu button and select “Save” to save your settings.
Testing the Proxy
After setting up the proxy, it's important to test it to ensure it's working correctly. To verify if you're connected to the internet via the proxy server, use an IP Checker Tool. If the proxy is working, the website should display the IP address of the proxy instead of your actual IP address.
Disabling the Proxy
If you no longer need to use the proxy, you can easily disable it. For Wi-Fi networks, go back to the network settings and change the "Proxy" option to "None". For mobile networks, clear the information in the "Proxy" and "Port" fields in the APN settings.
Remember, each Wi-Fi network has its own proxy server settings, and these settings may vary depending on the version of the Android OS you are using. Even after you enable a proxy server for one Wi-Fi network, other Wi-Fi networks will continue to not use a proxy server by default. This is because the proxy settings are specific to each network and are not universally applied across all networks. Therefore, if you switch between different Wi-Fi networks, you may need to repeat this process to change the proxy server settings for each individual network.
Setting Up Proxy on Alternative Third-Party Apps
You can also set up a proxy using third-party apps like ProxyDroid, Drony, and SocksDroid. These apps provide more flexibility and options for configuring proxies on your Android device. Follow the instructions provided below to set up your proxy.
ProxyDroid
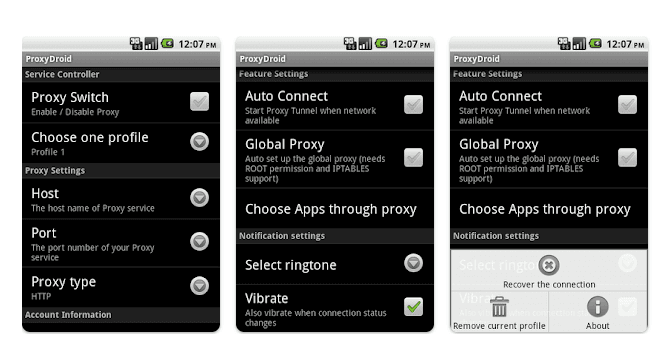
ProxyDroid is a versatile Android application that offers system-wide proxy support for both Wi-Fi and mobile networks, with features like multiple profiles, proxy chaining, and per-app proxy settings.
-
Download and install ProxyDroid from the Google Play Store.
-
Open the app and tap on the '+' button to add a new proxy.
-
Enter the host name and port number of your proxy server. You can also enter a username and password if your proxy server requires authentication.
-
Choose the type of proxy (HTTP, SOCKS4, or SOCKS5).
-
You can also specify which networks or apps should use the proxy by tapping on 'Individual Proxy'.
-
Once you've entered all the necessary information, tap on the 'Save' button.
-
To activate the proxy, tap on the switch next to the proxy you just added. You'll need to grant the app superuser permissions for it to modify your device's network settings.
Drony
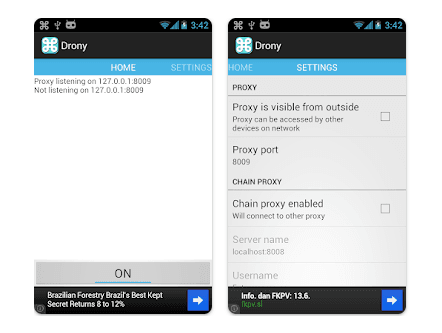
Drony is a robust Android app that allows users to redirect network traffic to a proxy server, supporting HTTP, HTTPS, and SOCKS protocols, and is particularly useful for bypassing network restrictions.
-
Download and install Drony from the Google Play Store.
-
Open the app and tap on the 'Settings' button.
-
Tap on 'Networks' and select the network you want to use the proxy with.
-
Tap on 'Proxy Settings' and enter the host name and port number of your proxy server. If your proxy server requires authentication, enter your username and password.
-
Tap on 'Save' to save your settings.
-
To activate the proxy, go back to the main screen and tap on the 'Start' button.
SocksDroid
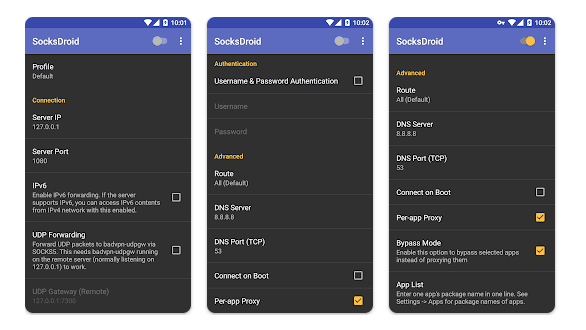
SocksDroid is a powerful Android application that enables users to tunnel their internet traffic through a SOCKS5 proxy server, providing an extra layer of security and privacy.
-
Download and install SocksDroid from the Google Play Store.
-
Open the app and tap on the '+' button to add a new proxy.
-
Enter the host name and port number of your proxy server. If your proxy server requires authentication, enter your username and password.
-
Choose the type of proxy (SOCKS4 or SOCKS5).
-
Tap on 'Save' to save your settings.
-
To activate the proxy, tap on the switch next to the proxy you just added.
In summary, it's important to note that the proxy you configure in the native setting of android will be used by Chrome and other web browsers, but may not be used by other apps. Each app developer can choose whether it uses Android’s proxy or not. This is where the third party proxy authentication apps for Android come into play. These apps can help ensure that your proxy settings are applied across all apps, providing an additional layer of security and privacy.
If you're looking for a reliable and convenient residential proxy service, be sure to check out Geonode's Pay-As-You-Go Residential Proxy. It's a great solution for anyone setting up proxies with Android devices. Simply visit our website to learn more and get started today!

