FoxyProxy is a browser extension tool that allows users to manage all of their proxies. It makes the whole process of switching between proxies much easier and saves users a lot of time and effort. FoxyProxy has a lot of features that make it better than other proxy switchers like setting predefined rules for when a proxy should work or not.
As FoxyProxy is only a proxy manager, you still need a proxy provider that will provide you with all the proxies you need. It’s not recommended to simply use any proxy though, as you still need a reliable proxy provider to deliver your required proxies. Free proxies are especially not recommended as they are unreliable, slow, and most likely already banned by major websites.
The best FoxyProxy proxies would either be residential proxies or datacenter proxies and it just depends on what you want to do or what you prefer. If you want total anonymity and the ability to do advanced tasks like web scraping without getting banned, then residential proxies are your choice. If you want a speed and a faster internet connection while being more budget friendly, then datacenter proxies are what’s best for you.
Let’s set up a FoxyProxy proxy.
For Google Chrome:
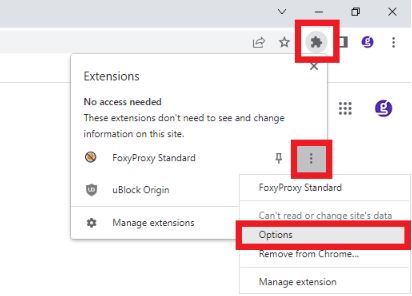
Step 1. Navigate to FoxyProxy’s options on Google Chrome by going to Extensions>Ellipsis>Options.
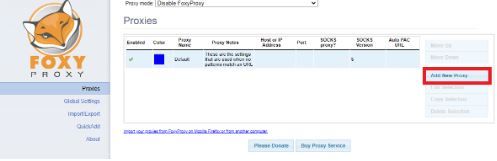
Step 2. Click on Add New Proxy.
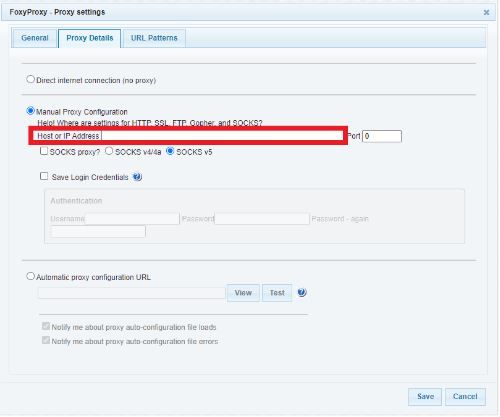
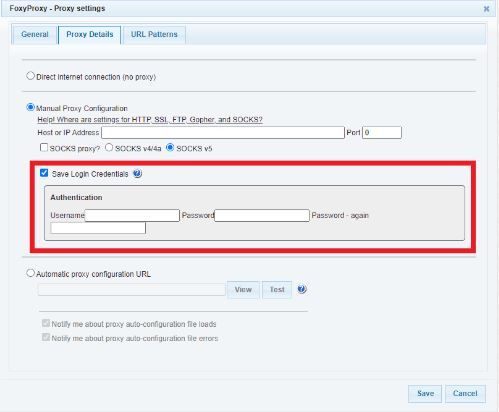
Step 3. Click on Proxy Details and on Manual Configuration.
Step 4. Enter your proxy’s IP address or Hostname.
Step 5. Enter your proxy’s Port Number.

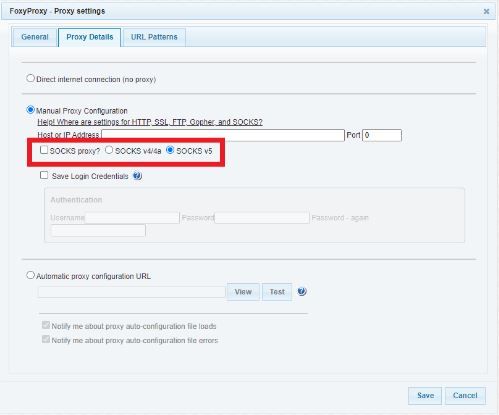
Step 6. Select which Proxy Type you want to use.
Step 7. If required, turn on Save Login Credentials and input your proxy’s Username and Password.
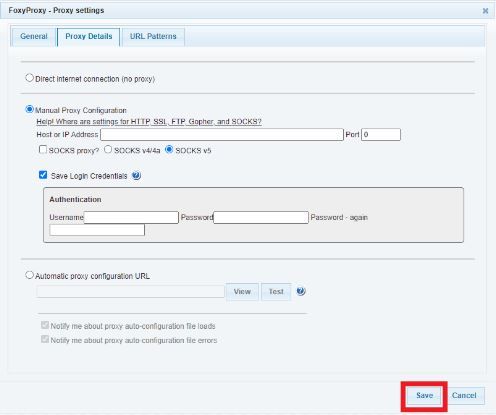
Step 8. Click on Save.
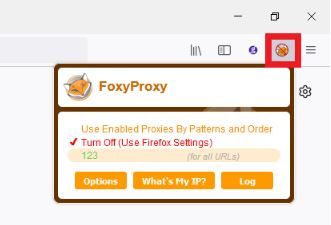
Step 9. To switch between proxies, simply click on Extensions and then on FoxyProxy.

Step 10. Then, click on the proxy/proxies you want to use.
For Mozilla:
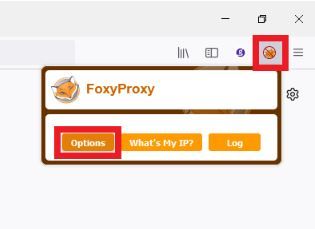
Step 1. Navigate to FoxyProxy’s Options on Mozilla through clicking on FoxyProxy’s icon and then on Options.
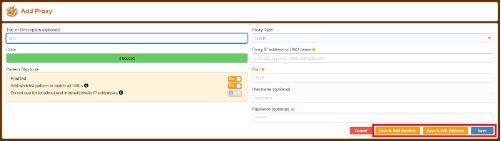
Step 2. Enter the Proxy’s Title or Description. This part is optional.
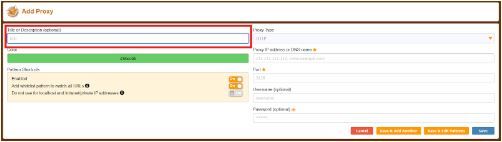
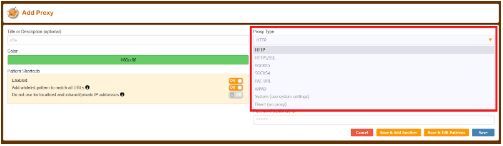
Step 3. Select which Proxy Type you want to use.
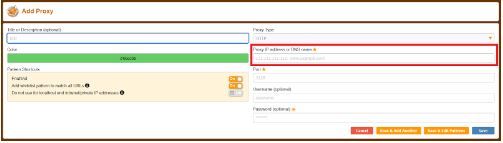
Step 4. Input your proxy’s IP address or Hostname.
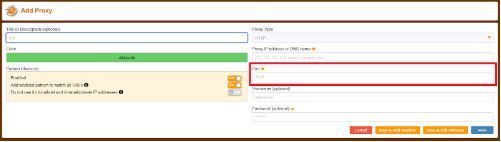
Step 5. Enter your proxy’s Port number.
Step 6. If required, enter your proxy’s Login Credentials.
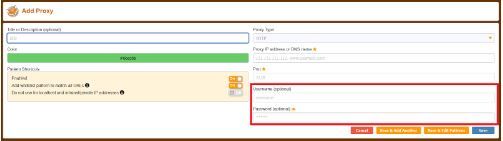
Step 7. If you want to add another proxy, then click on Save & Add Another. If you want to edit patterns for the proxies, then click on Save & Edit Patterns. If you’re satisfied with everything, simply click Save.
Step 8. To switch between proxies, simply click on the FoxyProxy Icon and select which proxy/proxies you want to use.
Congratulations! You have successfully set up a FoxyProxy proxy.
