One of the best browsers available today, Google Chrome’s worldwide popularity comes as no surprise to anybody. It is the most popular browser today with over 2.65 billion users currently using it. It has plenty of features and tools that assist the user in any of their endeavors. One such feature is Google Chrome’s extensions.
Google Chrome has a wide array of extensions that are available to users and range from simple games like adding a chrome piano to developer tools or like a checkbox for testing pages. All of these extensions are also accessible for free, so it’s greatly advised to utilize these free extensions. Another great feature of Google Chrome is its simple configuration for your proxy setting!
Proxy users, especially those who are new to the subject, may sometimes become confused when configuring a proxy server through different applications. Google Chrome makes it simple when you’re configuring a proxy server through it because it simply copies your system’s proxy settings. It doesn’t particularly need any additional settings to be configured for it to work. That’s why it’s a great browser for setting up residential proxies!
Although Google Chrome is a great browser for proxies, it doesn’t necessarily mean that you would get a great proxy service. Geonode is a proxy provider that has a very high success rate when continuously rotating proxies, while offering instant activation through dedicated customer service on a global scale and delivering fast and unlimited data scraping.
To demonstrate our qualifications in proxy integration, we made this guide to show you the step-by-step process of how to integrate proxies with your Google Chrome web browser.
Here are the steps you need to follow:
- Go to your Google Chrome proxy settings
- Choose an option you want to go with: automatically change proxy settings or manually enter them yourself
- Input the necessary information for either option
- Click “OK” to save!
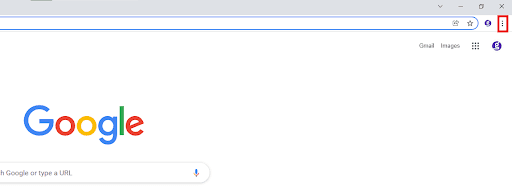
Step 1. Open the Google Chrome browser and click on the three vertically aligned dots at the right corner of your screen.
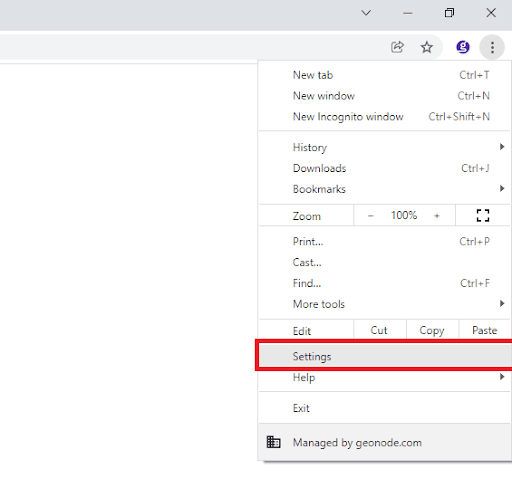
Step 2. From the drop-down box, select "Settings".
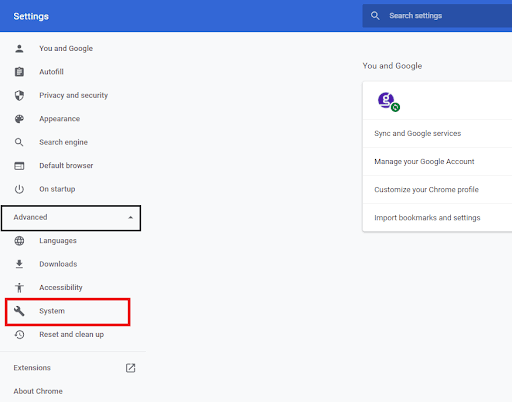
Step 3. From its drop-down menu, select "System".
Step 4. On the system tab, click on "Open your computer’s proxy settings".
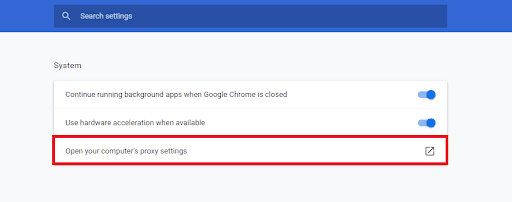
This should then redirect you to your system’s proxy settings. Now, you need to go to your proxy provider and acquire the proxy server details. For example purposes, we’ll be using Geonode. If you already have your proxy server details, you can jump straight to For Windows and For macOS, depending on your operating system.
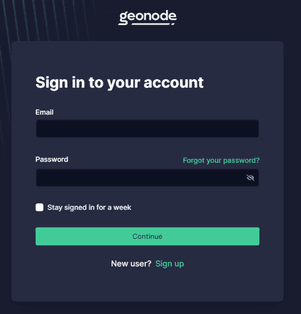
Step 5. Go to Geonode and log in with your existing account or sign up to create a new one.
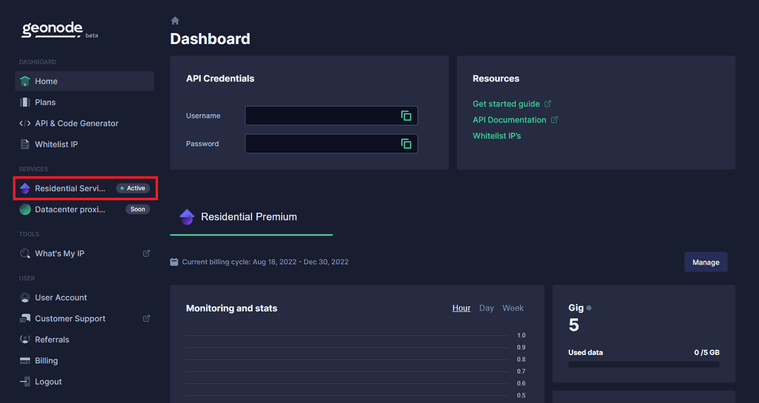
Step 6. On the Home Page, click on “Residential Services”.
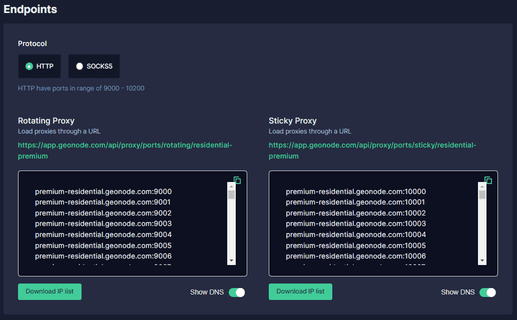
Step 7. Scroll down until you see “Endpoints”.
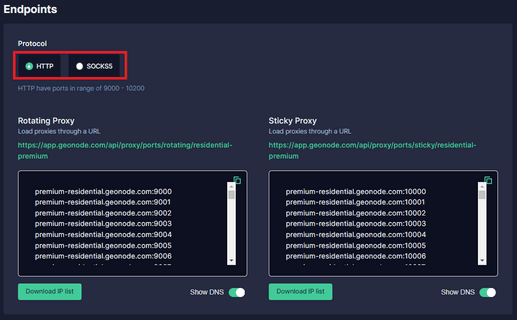
Step 8. Choose which “Proxy Protocol” you want to utilize: “HTTP Protocol” or “SOCKS5 Protocol”.
Step 9. Select which "Session Type" you want to utilize: “Rotating Proxy” or “Sticky Proxy”.
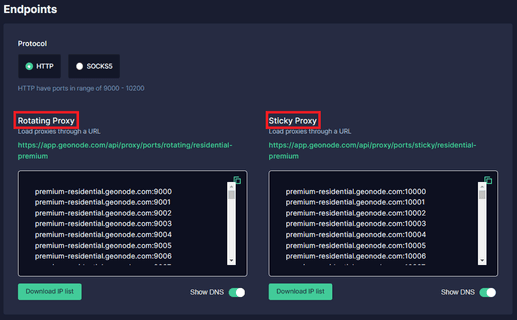
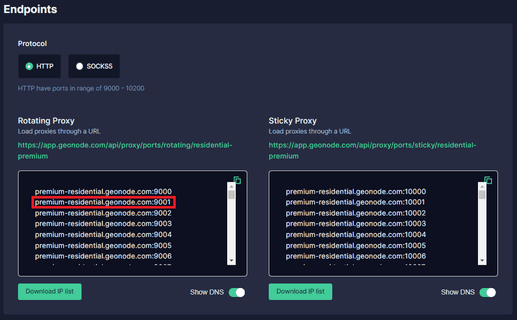
Step 10. Choose which proxy you want to utilize. For example purposes, we’ll be using the highlighted proxy “premium-residential.geonode.com:9001”.
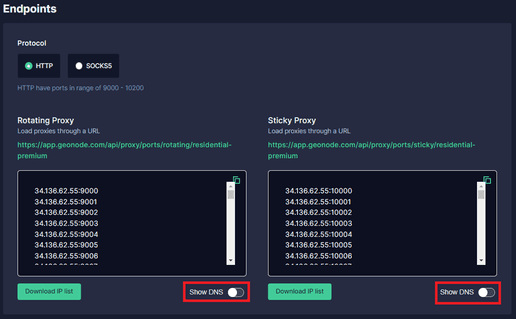
If you want to use an IP address instead of a DNS, simply turn off the Show DNS button, and IP addresses will show up.
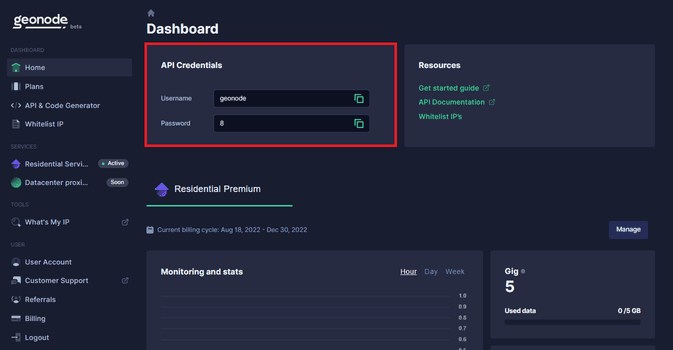
Step 11. Now you need your proxy account’s “Authentication Details”. For Geonode, this is on your account’s home page.
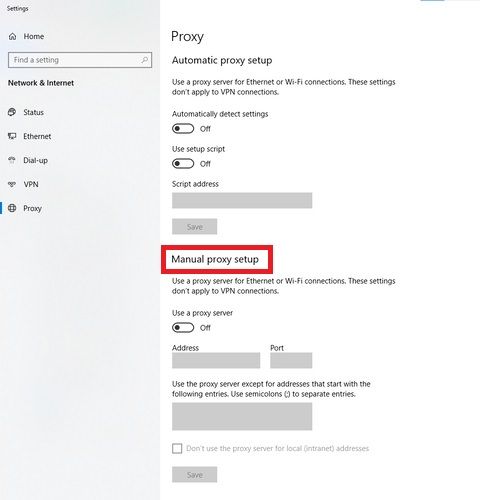
Now that you acquired your proxy server details, go back to your operating system’s proxy settings. There are different steps for Windows and macOS.
For Windows:
Step 1. You’ll be given the choice of “Automatic Proxy Setup” or “Manual Proxy Setup”. For example purposes, we’ll be choosing “Manual Proxy Setup”.
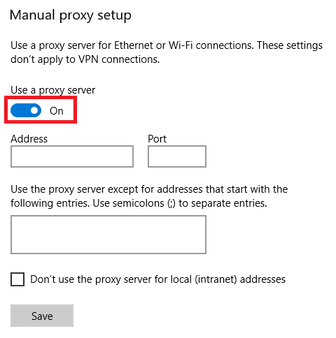
Step 2. Turn on "Use a proxy server".
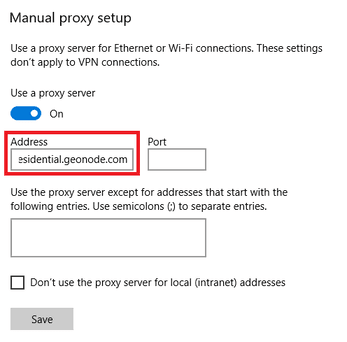
Step 3. Enter your proxy’s “Hostname” or “IP address”. This is the first part before the semicolon, which in our example is “premium-residential.geonode.com”.
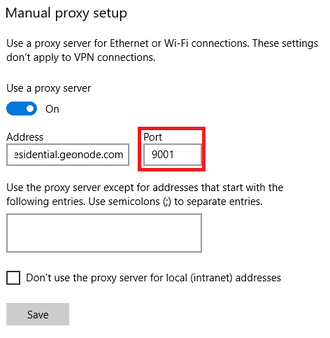
Step 4. Enter your proxy’s “Port Number”. This is the second part before the semicolon, which in our example is “9001”.
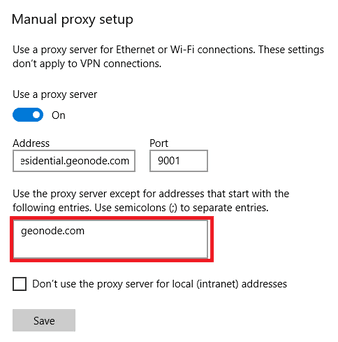
Step 5. Enter any “website addresses” you would like to visit without a proxy.
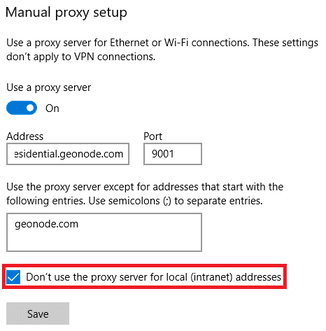
If you want to access a local server without a proxy, turn on the "Don’t use the proxy server for local addresses" check box.
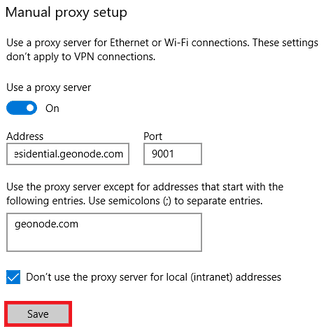
Step 6. Click “Save”.
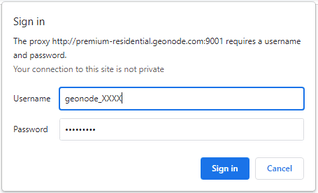
Step 7. Lastly, visit any website on Google Chrome and a pop-up window will appear asking for your account credentials. Enter your account’s “Username” and “Password”. Then, click on “Sign In”.
Congratulations! You have now set up your proxy in the Google Chrome browser.
For macOS:
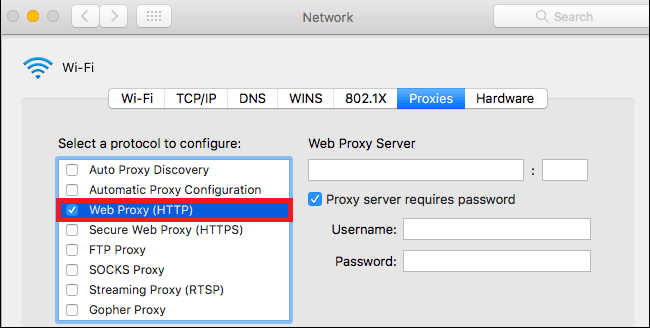
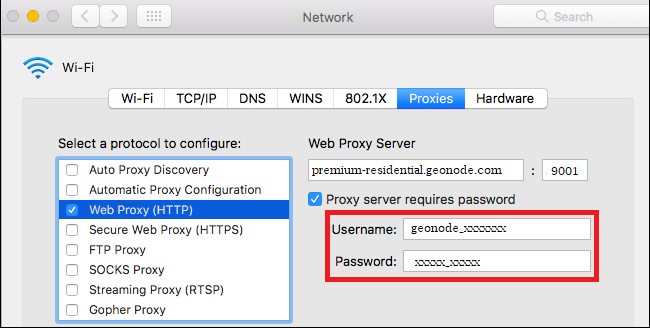
Step 1. Select the correct protocol that you’ll be using. For our example, we’ll be selecting “Web Proxy (HTTP)”.
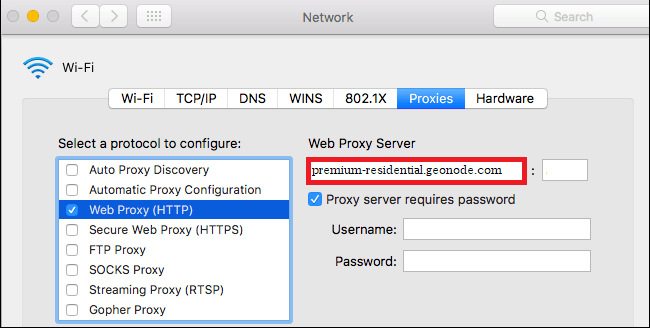
Step 2. Enter your proxy’s “Hostname” or “IP address”. This is the first part before the semicolon, which in our example is “premium-residential.geonode.com”.
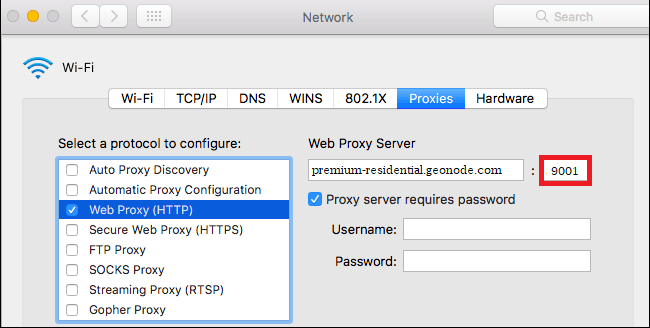
Step 3. Enter your proxy’s “Port Number”. This is the second part before the semicolon, which in our example is “9001”.
Step 4. Turn on “Proxy server requires password”.
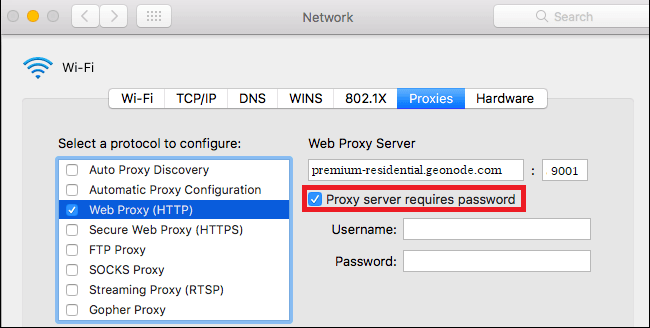
Step 5. Enter your proxy account’s “Username” and “Password”.
Congratulations! You have now set up your proxy in the Google Chrome browser.

