Mac, also known as Macintosh, is a set of computers that are designed and manufactured by Apple. It’s the first widely-sold, mass-market personal computer with a graphical user interface (GUI) and a mouse. The Mac was designed to give its users a natural and user-friendly interface, and its primary operating system is the macOS, now called the Mac OS X.
To fully optimize your time when using a Mac, you should utilize a proxy. There are many use cases for a Mac proxy. An example will be if you want to give yourself full privacy and total anonymity when browsing the web. It will also hide your IP address from any website you visit, which prevents people from accessing your personal information.
Additionally, if you're experiencing slow internet speeds, a proxy for Mac devices can help by connecting you to a faster and stronger internet connection. With a no-limit proxy server, you won't have to worry about slow speeds or buffering anymore.
That said, here’s how to set up a residential proxy for Mac.
macOS’s Proxy Settings
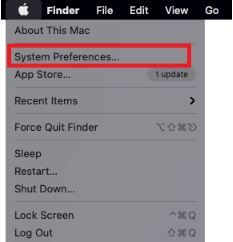
Step 1. Click on the "Apple Icon."

Step 2. On the drop-down menu, click on “System Preferences.”
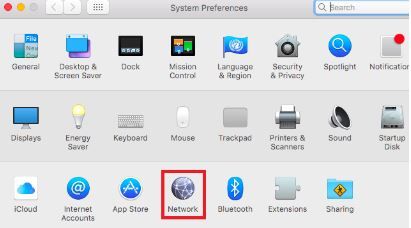
Step 3. Click on “Network.”
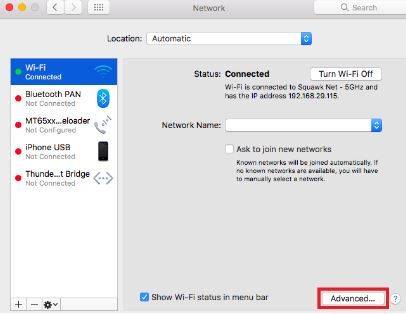
Step 4. Click on “Advanced” Note: Connect to your Wi-Fi first.
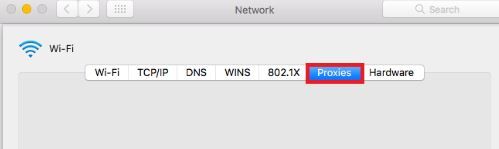
Step 5. Click on “Proxies.”
This should redirect you to MacOS proxy settings. Now, you need to go to your proxy provider and acquire the proxy server details. If you want to get it from Geonode, you can jump to “Acquiring Proxy Server Details With Geonode.”
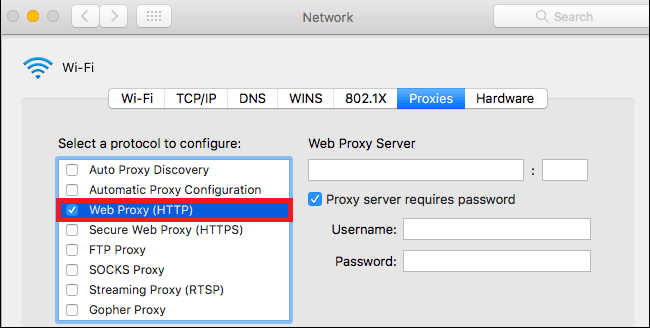
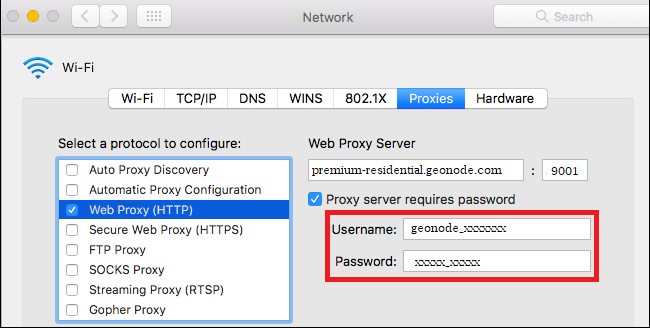
Step 6. Select the correct protocol that you’ll be using. For our example, we’ll be selecting “Web Proxy (HTTP).”
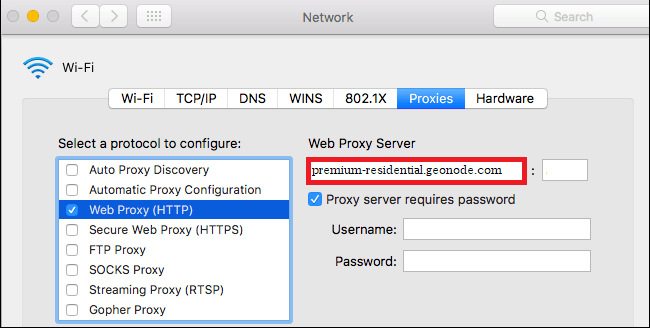
Step 7. Enter your proxy’s “Hostname” or “IP address.” This is the first part before the semicolon, which in our example is “premium-residential.geonode.com.”
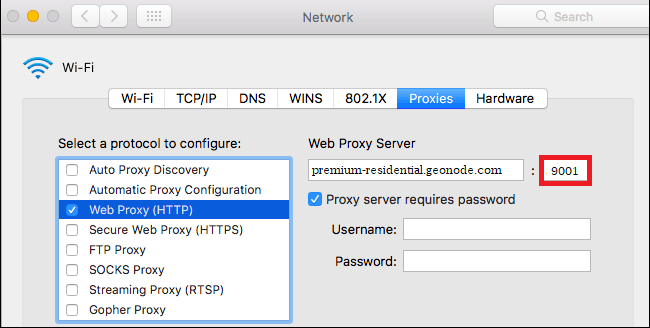
Step 8. Enter your proxy’s “Port Number.” This is the second part before the semicolon, which in our example is “9001.”
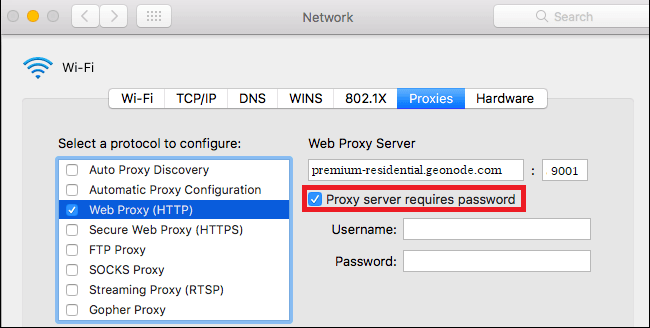
Step 9. Turn on “Proxy server requires password.”
Step 10. Enter your proxy account’s “Username” and “Password.”
Congratulations! You have now set up your proxy for your Mac operating system.
Acquiring Proxy Server Details With Geonode
Step 1. Go to the Geonode dashboard login page and log in with your existing account or sign up to create a new one.

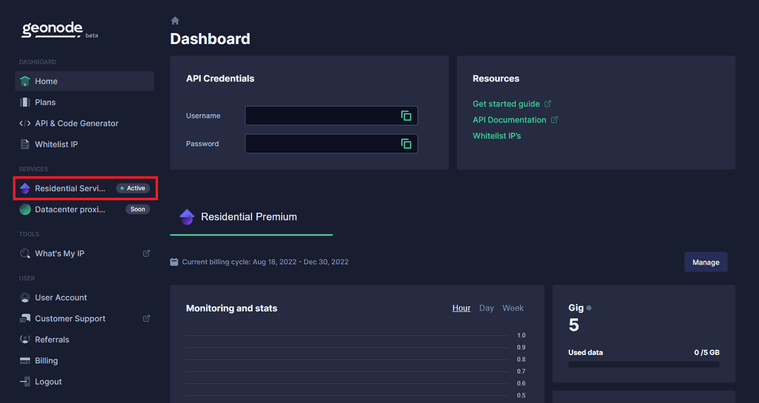
Step 2. On the Home Page, click on “Residential Services.”
Step 3. Scroll down until you see “Endpoints.”
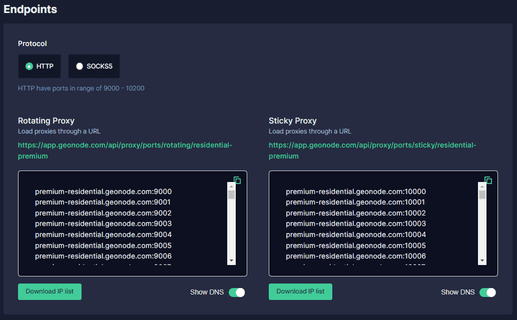
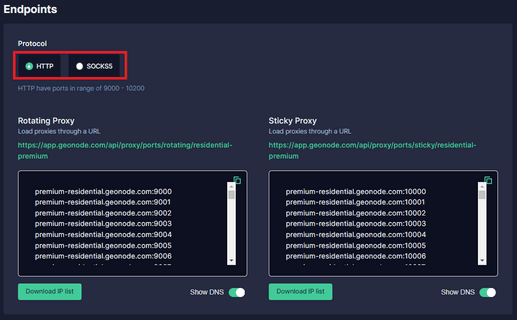
Step 4. Choose which “Proxy Protocol” you want to utilize: “HTTP Protocol” or “SOCKS5 Protocol.”
Step 5. Select which "Session Type" you want to utilize: “Rotating Proxy” or Sticky Proxy.
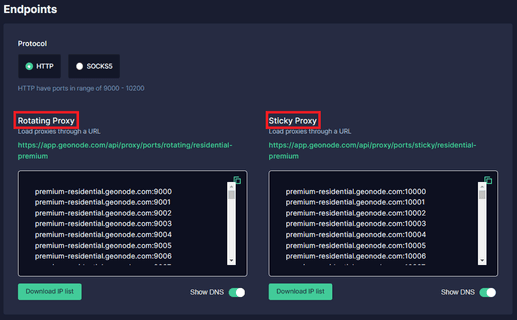
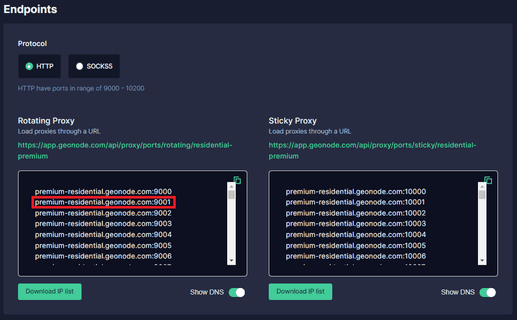
Step 6. Choose which proxy you want to utilize. For example, we’ll be using the highlighted proxy “premium-residential.geonode.com:9001.”
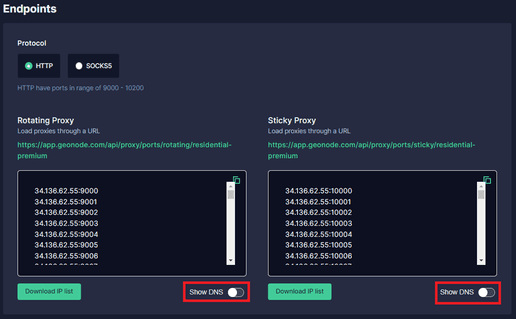
If you want to use an IP address instead of a DNS, turn off the Show DNS button, and IP addresses will appear.
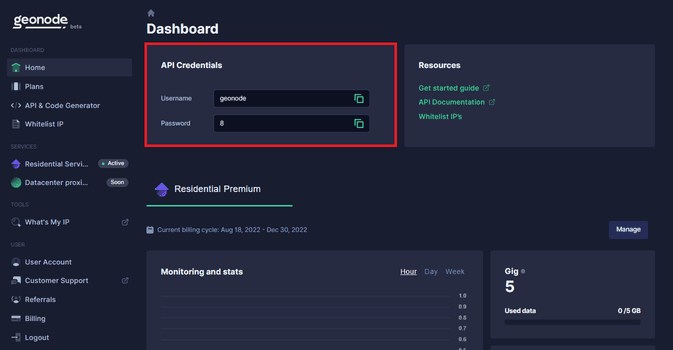
Step 7. Now you need your proxy account’s “Authentication Details.” For Geonode, this is on your account’s home page.
Removing a Proxy for Mac Devices
If you no longer need to use a proxy on your Mac, it's important to know how to remove it. Follow these simple steps to remove a proxy on your Mac:
- Click on the "Apple Icon" on your desktop.
- From the drop-down menu, select "System Preferences."
- Click on "Network."
- Select the network connection you want to remove the proxy from.
- Click on the "Advanced" button.
- Select the "Proxies" tab.
- Uncheck the boxes next to the proxy protocols you want to disable.
- Click "OK" to save the changes.
- Once you've completed these steps, the proxy will be removed from your Mac device.
What Does Bypass Proxy Settings in Mac Mean?
Bypass proxy settings is a feature on Mac computers that allows you to access websites and resources that your proxy server may block. When you enable bypass proxy settings, your Mac will connect directly to the internet instead of going through the proxy server.
This feature can be useful if you need to access certain websites or resources that your proxy server may block. However, it's important to note that bypassing your proxy settings can also increase the risk of security vulnerabilities.
To enable bypass proxy settings on your Mac, follow these steps:
- Click on the "Apple Icon" on your desktop.
- From the drop-down menu, select "System Preferences."
- Click on "Network."
- Select the network connection you want to modify.
- Click on the "Advanced" button.
- Select the "Proxies" tab.
- Check the box next to "Bypass proxy settings for these Hosts & Domains."
- Enter the hosts and domains you want to bypass in the text field below.
Remember only to bypass proxy settings for trusted websites and resources to ensure the security of your Mac device.
It's important to note that your IP address may change when using a proxy, so it's recommended that you use a "What's My IP" tool to verify your new IP address. This ensures that your internet activity remains private and secure.
Setting up a Mac proxy can greatly enhance your browsing experience by providing privacy, anonymity, and faster internet speeds. By following the simple steps outlined in this guide, you can set up a residential proxy on your Mac device and start enjoying these benefits right away.
If you're in the market for a reliable and trustworthy residential proxy for your Mac, be sure to check out Geonode and take your internet experience to the next level!
