Unbeatable Prices on Proxies

đź’Ą
geonode logo

How To Use Proxies With Microsoft Outlook

Microsoft Outlook is an application developed by Microsoft that allows users to manage their email and calendar. Read our quick guide on how to install a proxy server for it!

Carl Gamutan

by Carl Gamutan

Publishing Date: February 15, 2022


Microsoft Outlook is an application developed by Microsoft that allows users to manage their email and calendar, store names and numbers of their contacts, and even track their tasks. It has a lot of features that help users become more organized and productive during work. You can sync with other Microsoft apps which include Microsoft Office, Skype, and OneDrive.

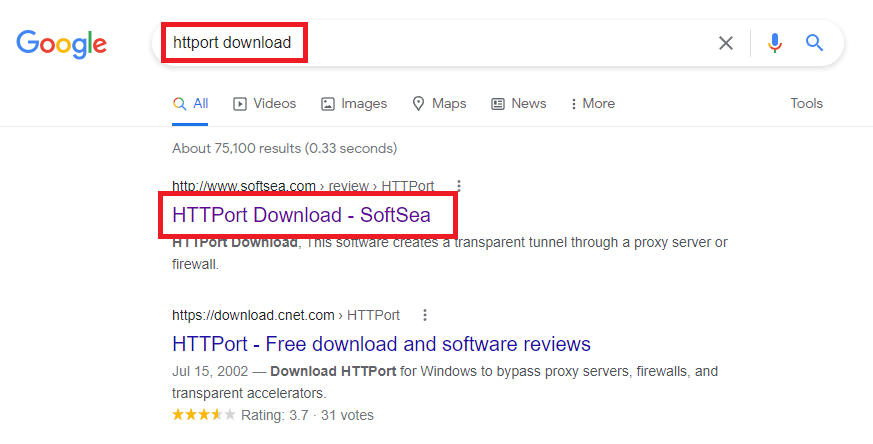
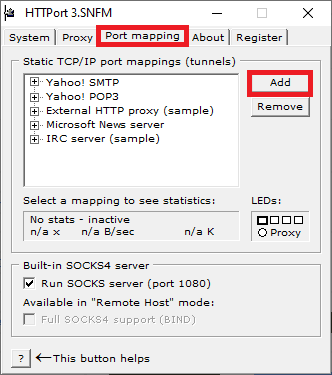
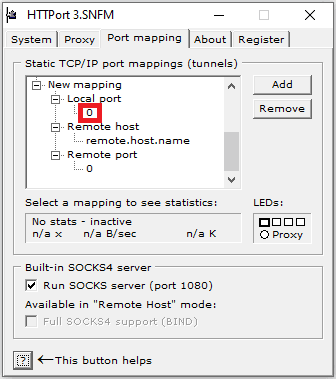
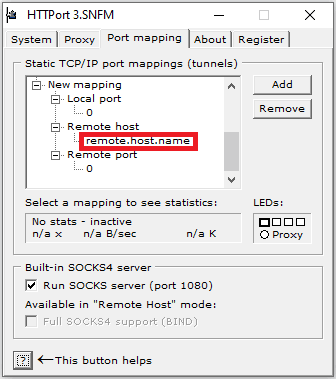
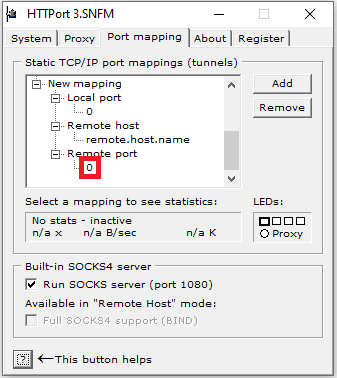
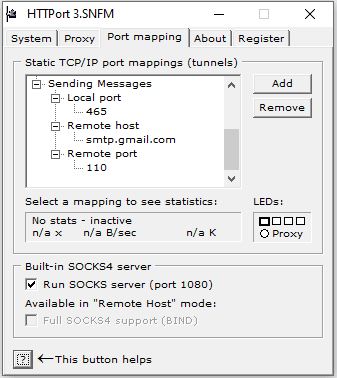
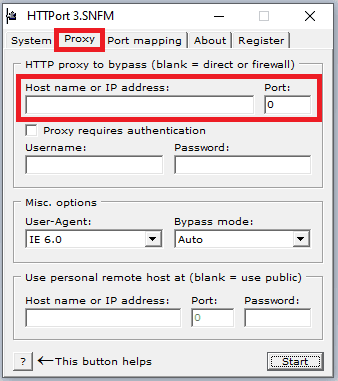
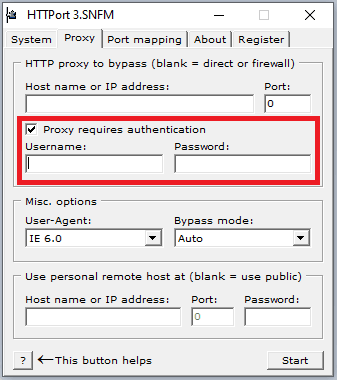
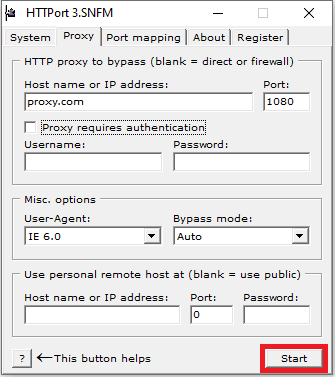
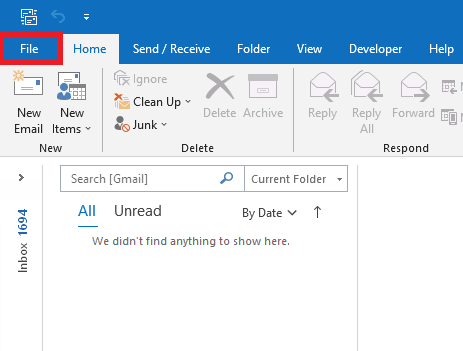
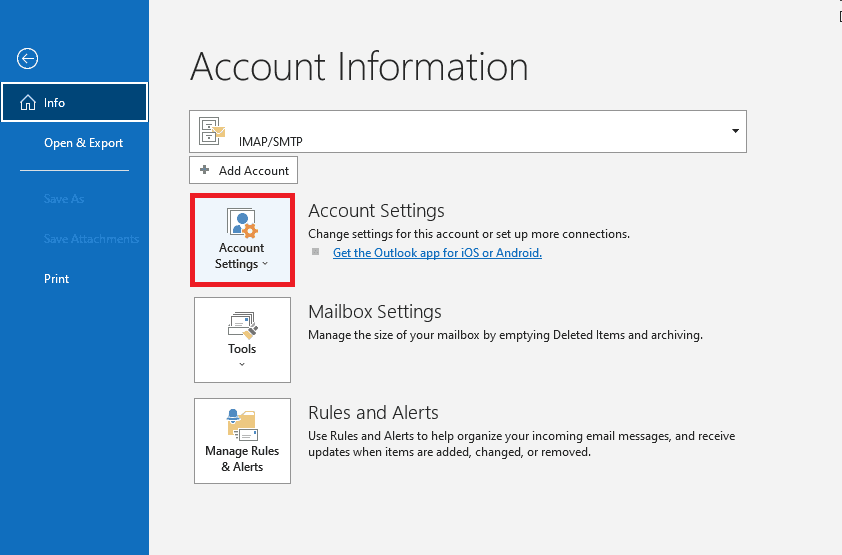
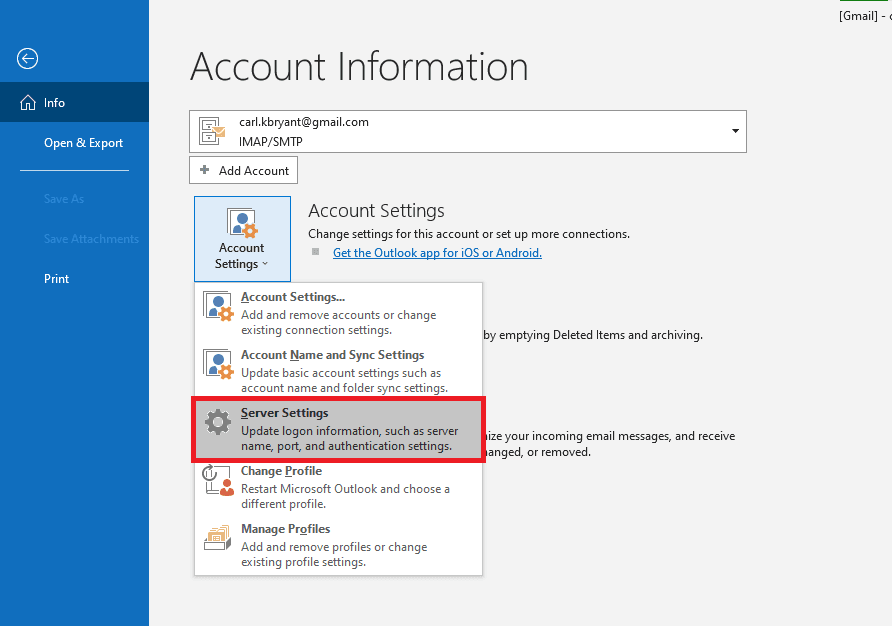
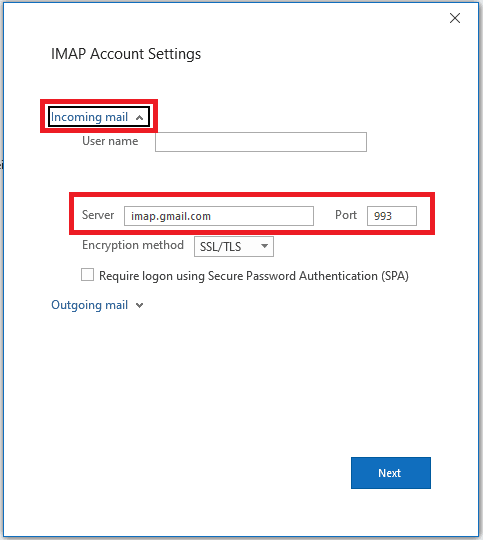
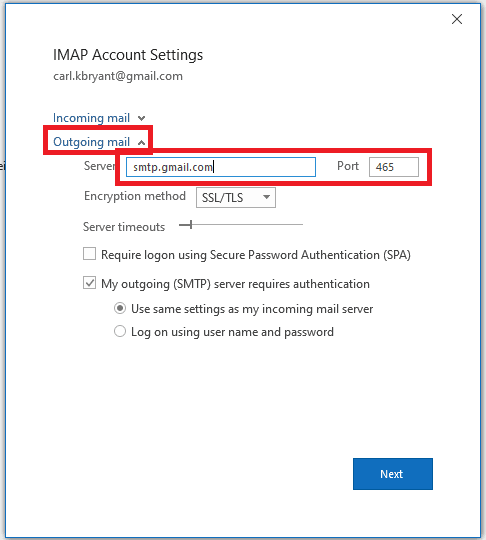
For those who want to further enhance their privacy and security while using Microsoft Outlook, implementing a proxy server is an excellent option. By utilizing a free proxy list for Outlook, you can effectively hide your IP address when sending or receiving emails, adding an additional layer of protection to your account. Keep in mind that setting up Microsoft Outlook to work with a proxy server might be more involved compared to other applications due to the additional steps required. However, don't worry, as we will guide you through the process step-by-step. Make sure to use an HTTPS proxy, as HTTP proxies are not supported by Outlook.

Microsoft Outlook is also backed by enterprise-grade security that ensures the protection of your privacy and annoying spam emails. If you want to avail its premium version, its security features would include the automatic deactivation of unsafe links in your email that may contain phishing scams, viruses, or malware. It would also include ransomware detection and recovery for your important files that are stored in OneDrive.

To add another layer of protection for your email account, you could always install a proxy server when using Microsoft Outlook. This is helpful if you want to hide your IP address when sending or receiving emails. Setting up Microsoft Outlook for a proxy server would take a bit longer compared to other applications as it has a lot more steps involved. You don’t have to worry though, we are here to guide you through it step-by-step. We’ll also be using an HTTPS proxy here so make sure you’re using an HTTPS proxy and not an HTTP proxy as the HTTP proxy has no support for Outlook.

Let’s do it!

How To Use HTTPS Proxies With Microsoft Outlook

Step 1. Download and Install httport3snf.exe on the internet. You can search for “HTTport download”.

outlookhttportdownload.png

Step 2. After installing it, run it and select Port Mapping and then Add.

outlookincomingmail.png

Step 3. Right click on the number below Local Port and select Edit to change it to the local port number for communication. (For example, 993)

outlooklocalport.png

Step 4. Now, right click on the name below Remote Host and select Edit to change it to the name of your POP3 server respectively. (For example, imap.gmail.com)

outlookremotehostname.png

Step 5. Then, right click on the number below Remote port, click on Edit and change it to it’s usual number, 110.

outlookremoteport.png

Step 6. That was for incoming mail for Outlook. For outgoing mail, simply repeat steps 2,3,4,5 but change the values accordingly. Only Remote Port stays the same. (For example, you change 993 to 465 and imap.gmail.com to smtp.gmail.com)

outlookoutgoingmail.png

Step 7. Select Proxy and input your IP address and Port number.

outlookproxyserver.png

If your service provider or network administrator says that authentication is required, then click on proxy requires authentication checkbox and input the details here.

outlookproxyauthentication.png

Step 8. Click Start to start the program.

outlookprogramstart.png

Configure Microsoft Outlook Proxy Settings

Step 9. Open Outlook and click on File

outlooksettings.png

Step 10. Select Account Settings..

outlookaccountsettings.png

Step 11. On the dropdown menu, click on Server Settings.

outlookserversettings.png

Step 12. A window will then pop-up, so click on Incoming Mail and copy the Server name and port number you used on steps 3 and 4.

outlookincomingsettings.png

Step 13. Select Outgoing Mail and also copy the Server name and port number you used on step 6.

outlookoutgoingsettings.png

Step 14. Click Next to save all your settings.

outlooksavingsettings.png

Congratulations! You have now set up a proxy server for Microsoft Outlook.