Unlike Google Chrome which Google is managing, Mozilla Firefox is an open-source software that is managed by a community of professional developers. It was originally from a non-profit organization that has dedicated Firefox to protecting the online privacy of its over 200 million monthly users. Firefox is also the original browser to include add-ons that are widely popular on all browsers today.
As the originator for add-ons, Firefox has a lot of added features to make browsing faster and safer for you. It has a variety of extensions, themes, tab managers, and even youtube customizations. But, perhaps Firefox’s most important add-on would be its strong password managers. Password managers help you save and remember all your complex passwords from multiple accounts. It would even suggest stronger passwords for you to use. This helps in protecting your accounts and having strong security for them.
Another thing with Mozilla Firefox that can help you secure your privacy would be using a proxy server. Proxies help in protecting you from online threats and allow you to browse the internet anonymously. Mozilla Firefox is a great browser option for utilizing proxies because you can easily change Firefox proxy settings to send the web browser traffic through a proxy. Not only will Firefox allow you to directly use proxy settings from your operating system, but Firefox also allows you to use settings that are different from your system's proxy settings.
Here’s a comprehensive guide on how to integrate proxies with your Mozilla Firefox browser. This applies to both Windows and macOS.
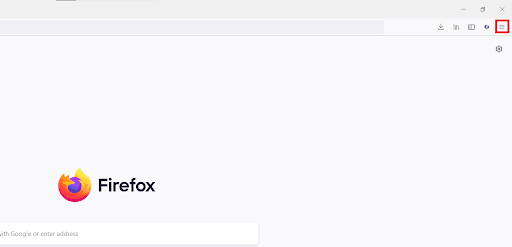
Step 1. Open the Mozilla Firefox browser and click on the three layered lines at the top-right part of your screen.
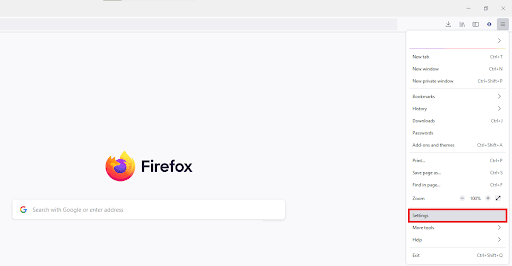
Step 2. From the drop-down box, click "Settings". For MacOS, click on "Preferences".
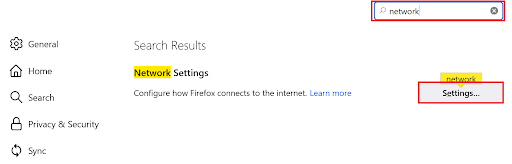
Step 3. On the General tab, scroll down towards the bottom of the page to locate the network settings section and click on “Settings”. Aternatively, you can search “Network” on the search bar located at the top right then click on the settings button in the search results.
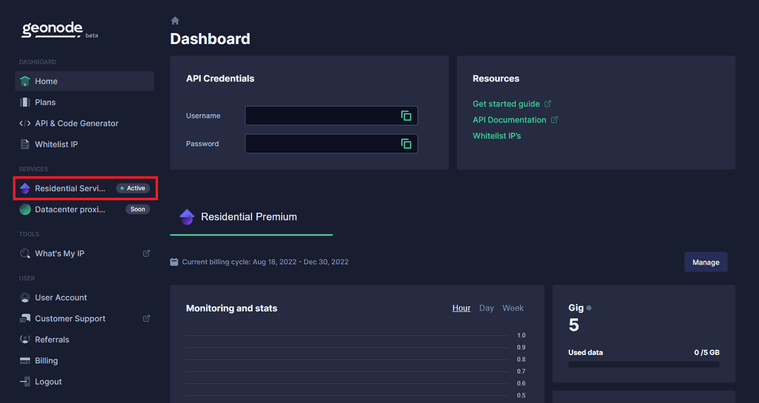
A pop-up window on Mozilla Firefox’s connection settings should then appear. Now, you need to go to your proxy provider and acquire the proxy server details. For example purposes, we’ll be using Geonode. If you already have your proxy server details, then you can skip to Step 11.
Step 4. Go to Geonode and log in with your existing account or sign up to create a new one.

Step 5. On the Home Page, click on “Residential Services”.
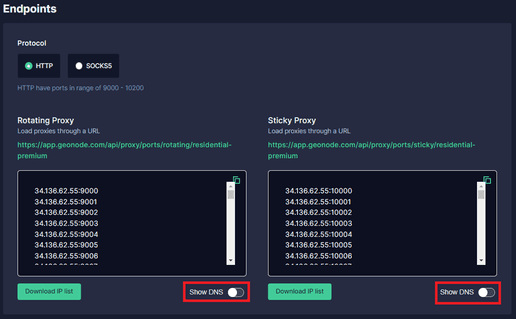
Step 6. Scroll down until you see “Endpoints”.
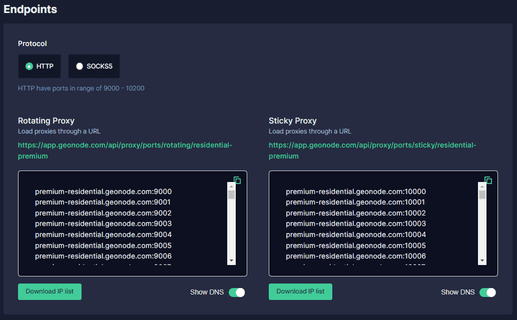
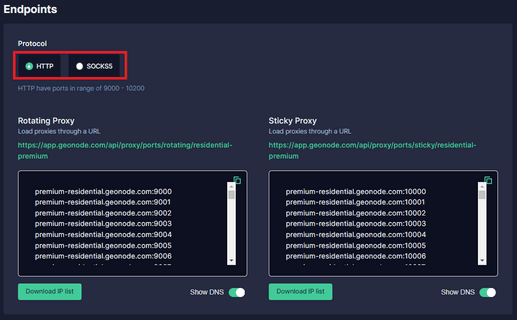
Step 7. Choose which “Proxy Protocol” you want to utilize: “HTTP Protocol” or “SOCKS5 Protocol”.
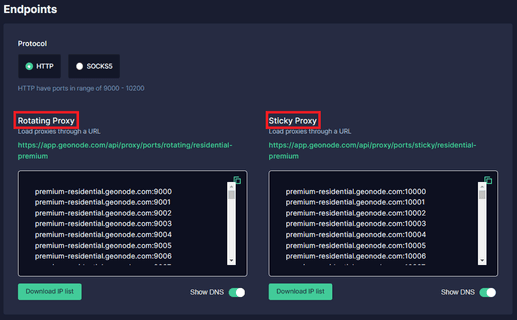
Step 8. Select which "Session Type" you want to utilize: “Rotating Proxy” or “Sticky Proxy”.
Step 9. Choose which proxy you want to utilize. For example purposes, we’ll be using the highlighted proxy “premium-residential.geonode.com:9001”.
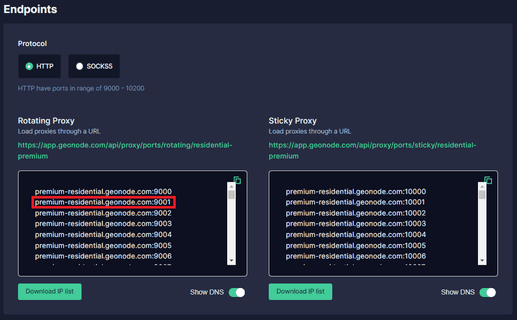
If you want to use an IP address instead of a DNS, simply turn off the Show DNS button, and IP addresses will show up.
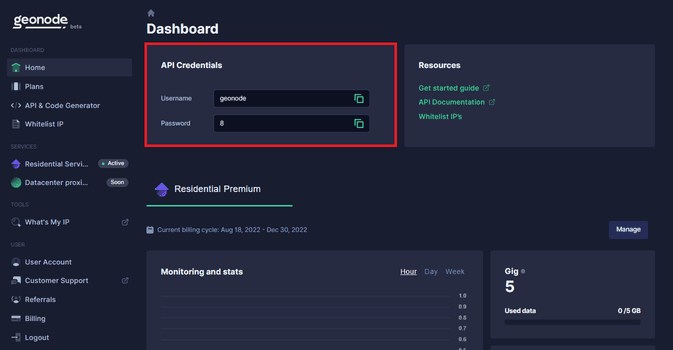
Step 10. Now you need your proxy account’s “Authentication Details”. For Geonode, this is on your account’s home page.
Now that you acquired your proxy server details, go back to Mozilla Firefox’s connection settings.
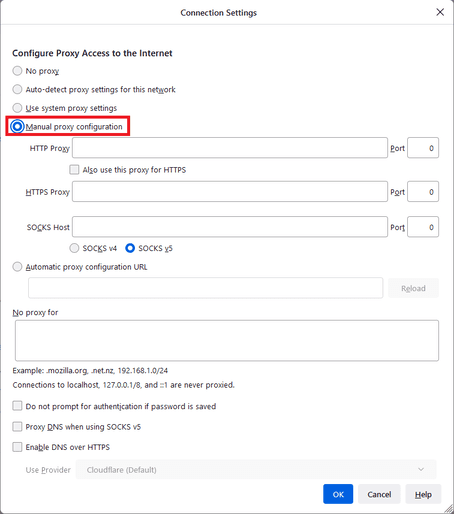
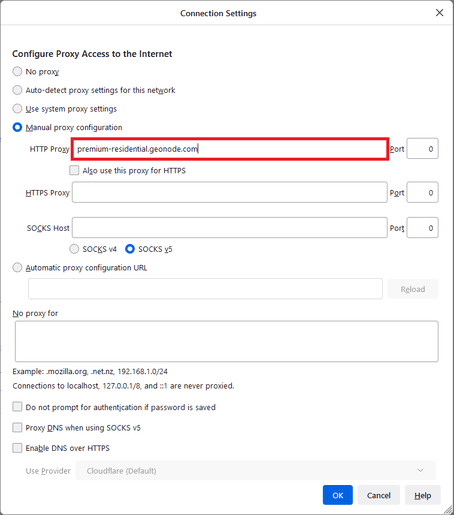
Step 11. Choose which option you want your proxy connection to access the internet with. For example purposes, we’ll be choosing “Manual proxy configuration”.
Step 12. Choose which proxy protocol your selected proxy is. As we chose an HTTP proxy, we’ll be going with the “HTTP Proxy” option.
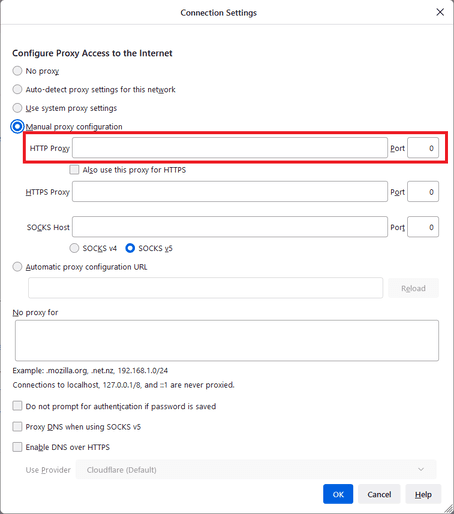
Step 13. Enter your proxy’s “Hostname” or “IP address”. This is the first part before the semicolon, which in our example is “premium-residential.geonode.com”.
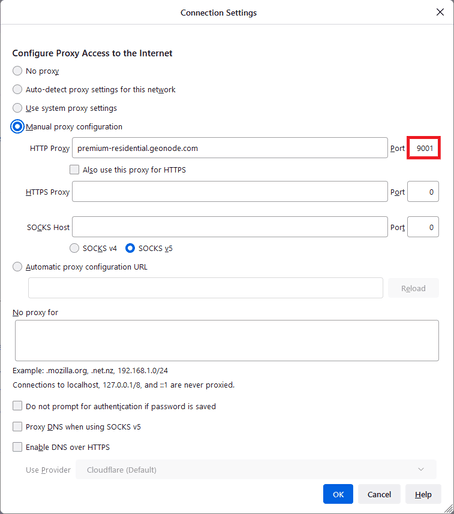
Step 14. Enter your proxy’s “Port Number”. This is the second part before the semicolon, which in our example is **“9001"*.
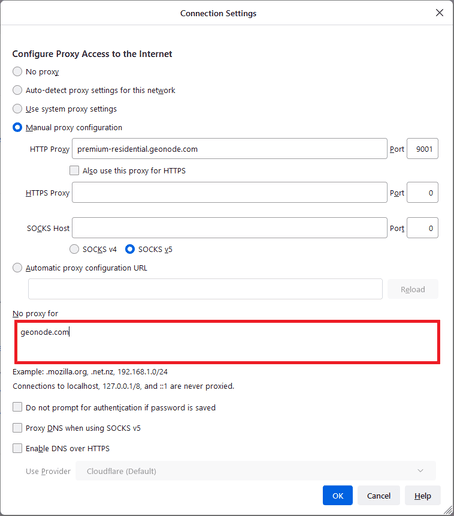
Step 15. Enter any “websites” or “addresses” you would like to visit without a proxy.
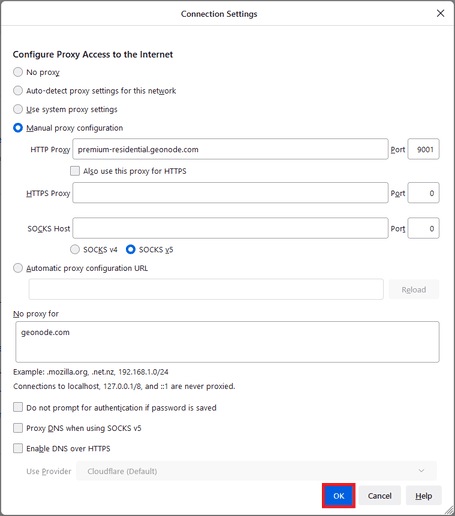
Step 16. Click “OK” to save.
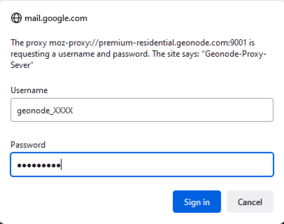
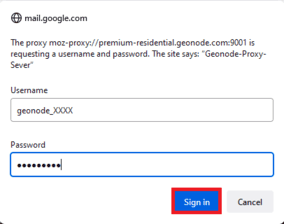
Step 17. Lastly, visit any website on Mozilla Firefox and a pop-up window will appear asking for your account credentials. Enter your account’s “Username” and “Password”.
Step 18. Click on “Sign In”.
Congratulations! You have now set up a proxy server in the Mozilla Firefox browser.

