VMlogin is an anti-detect browser that allows users to create multiple virtual profiles without the need to utilize various computers. Through the VMlogin browser, you can control your browser’s fingerprint, create and manage multiple browser profiles, develop web automation, and many more.
VMlogin makes a lot of use cases, such as social media marketing and web scraping, easier to do. To effectively create a different browser profile with VMlogin, you need the help of a proxy server. Each browser profile needs a separate IP address so that websites won’t know that those profiles come from the same computer.
Fortunately, VMlogin makes it simple to integrate a proxy server when creating a profile. You can use either residential proxies or datacenter proxies, but it’s recommended to use residential proxies because these types of proxies use real IPs, which makes them less likely to get detected.
Let’s set up a VMlogin proxy server.
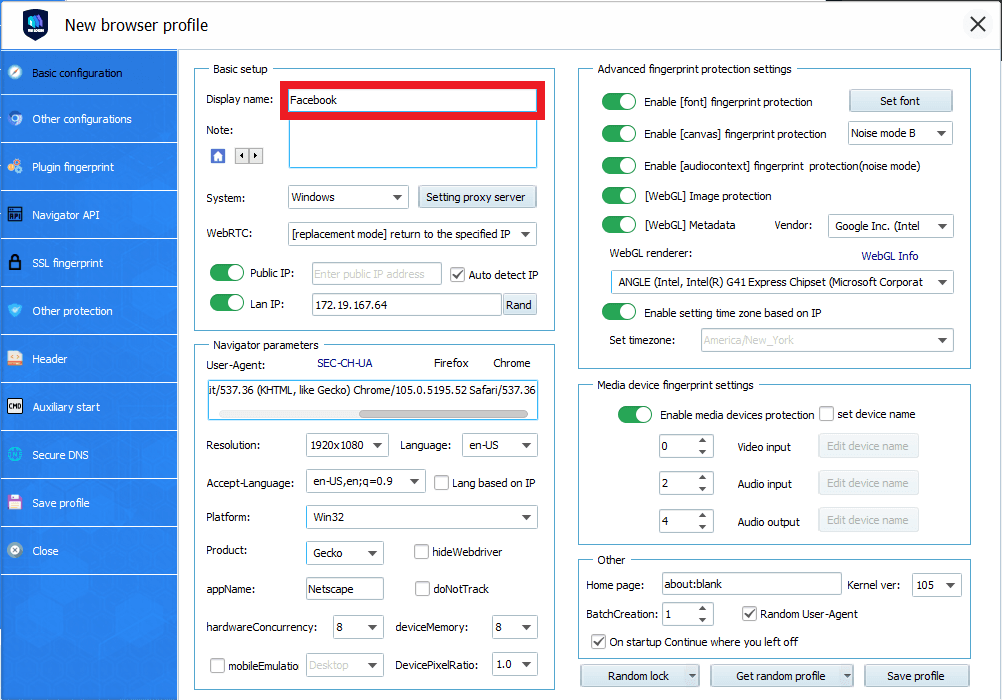
Step 1. Open VMlogin and click on “New Browser Profile”.

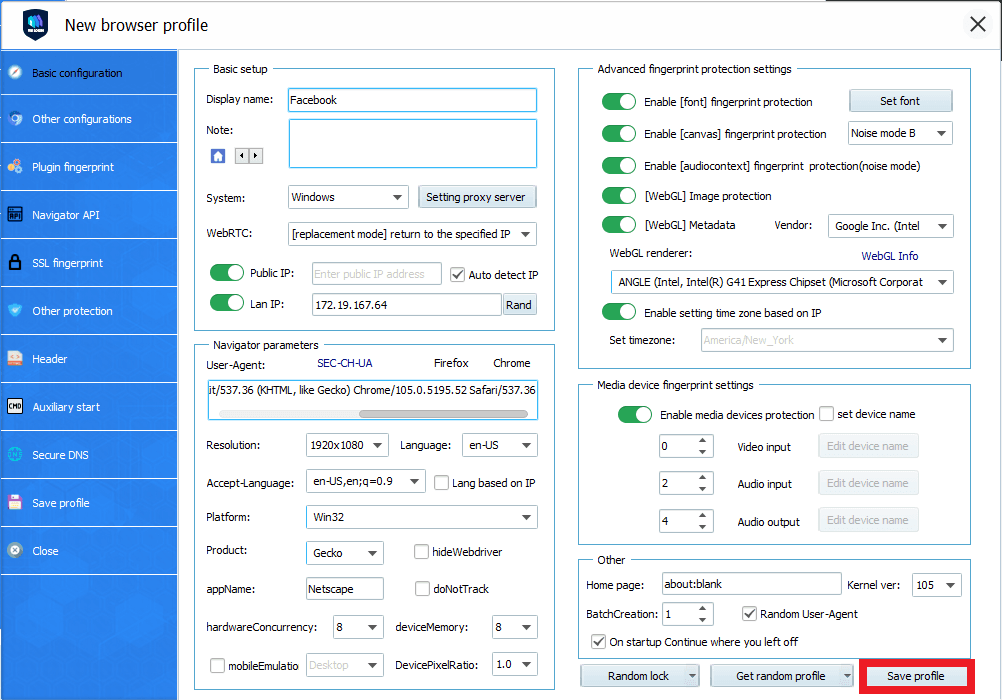
Step 2. The new browser profile window will appear. Input the profile’s “Display name”.
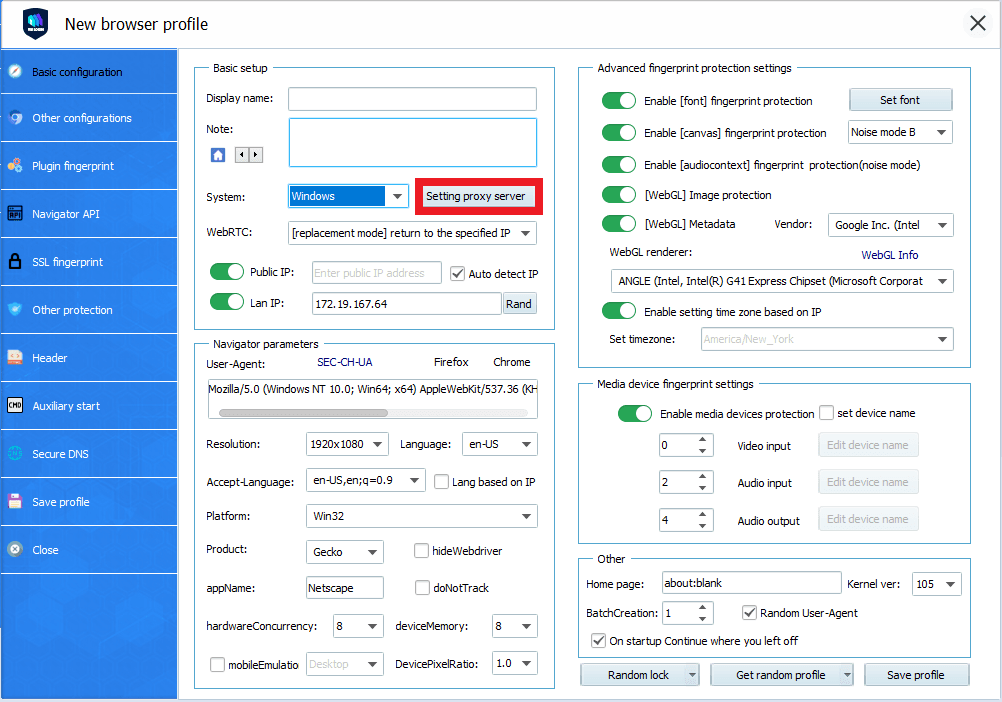
Step 3. Click on “Setting proxy server”.
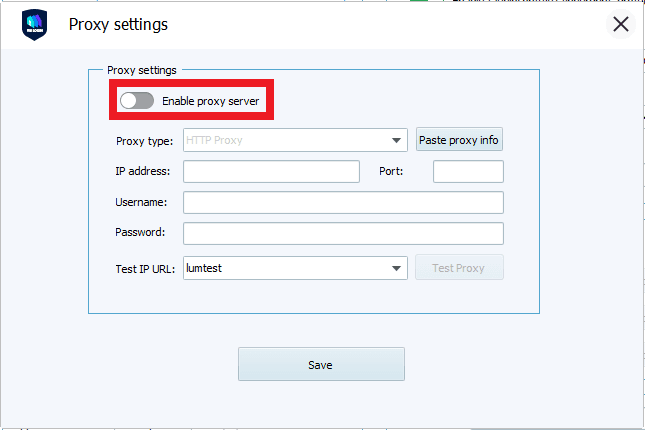
Step 4. The proxy settings window will then appear. Turn on “Enable proxy server”.
Now, you need to go to your proxy provider and acquire the proxy server details. If you want to get it from Geonode, you can jump to “Acquiring Proxy Server Details With Geonode”.
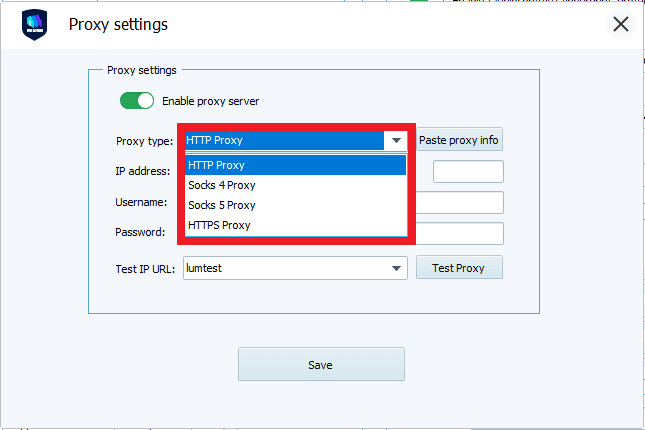
Step 5. Select which “Proxy Type” you want to utilize. For example purposes, will be choosing “HTTP Proxy”.
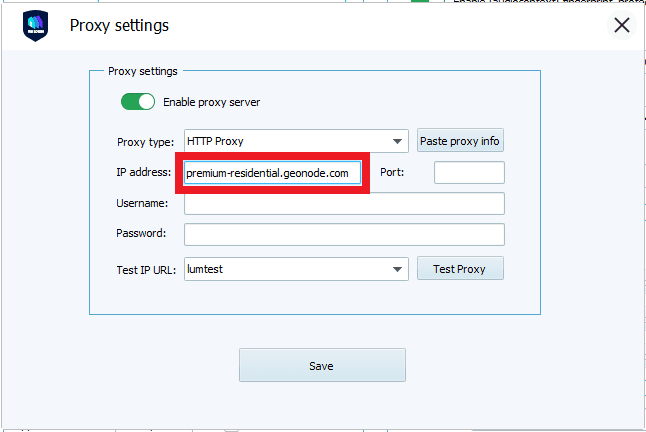
Step 6. Enter your proxy’s “Hostname” or “IP address”. This is the first part before the semicolon, which in our example is “premium-residential.geonode.com”.
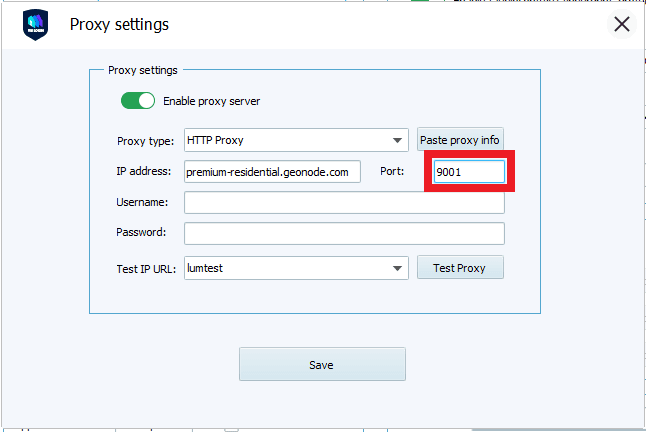
Step 7. Enter your proxy’s “Port Number”. This is the second part before the semicolon, which in our example is “9001”.
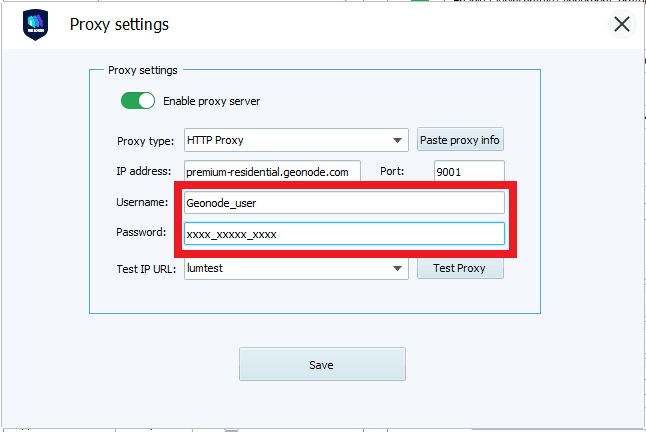
Step 8. Enter your proxy account’s “Username” and “Password”.
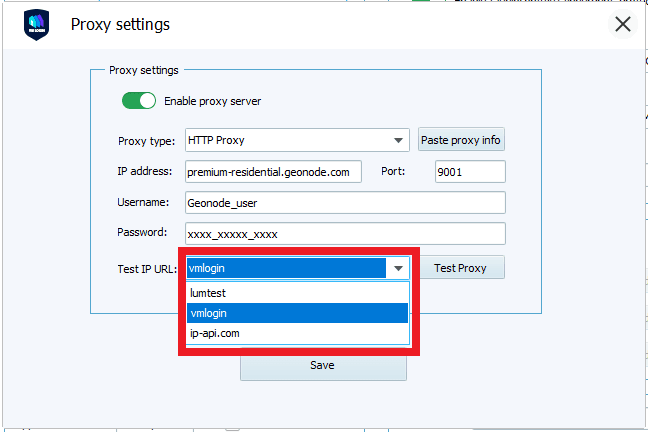
Step 9. If you want to test your proxy, you can select which website you want to test the proxy on.
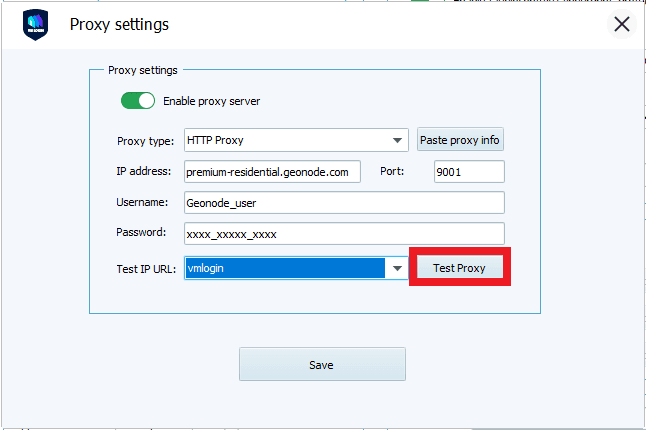
Step 10. Click on “Test Proxy”.
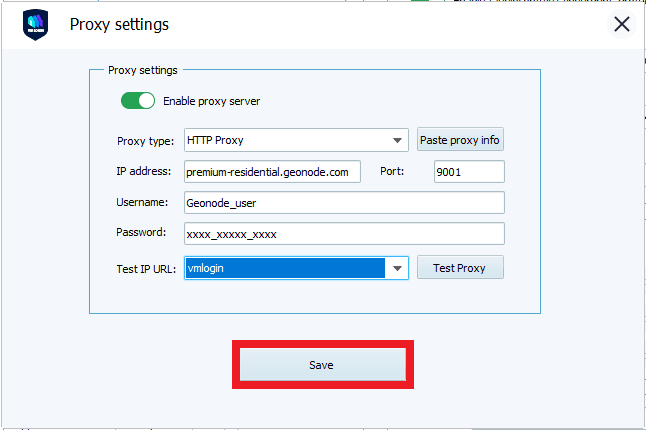
Step 11. After you’re done testing, you can now click on “Save”.
Step 12. If you’re satisfied with your browser profile, you can now click on “Save Profile”.
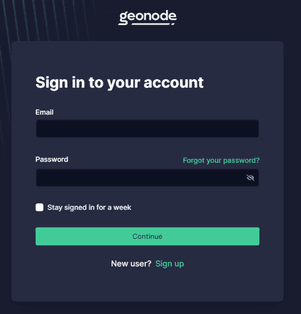
Step 1. Go to Geonode and log in with your existing account or sign up to create a new one.
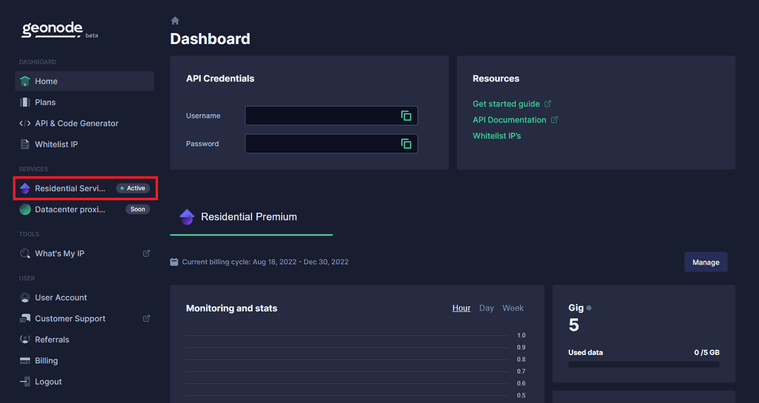
Step 2. On the Home Page, click on “Residential Services”.
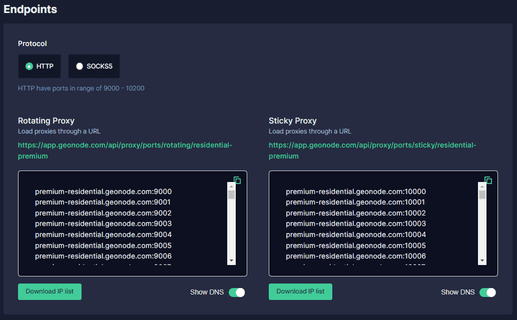
Step 3. Scroll down until you see “Endpoints”.
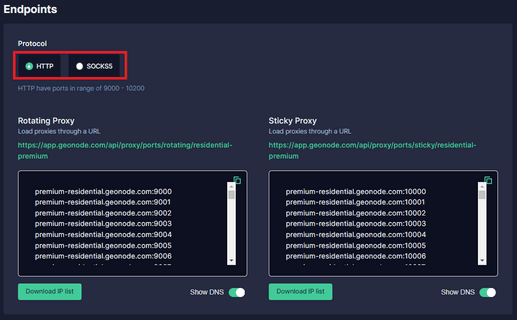
Step 4. Choose which “Proxy Protocol” you want to utilize: “HTTP Protocol” or “SOCKS5 Protocol”.
Step 5. Select which "Session Type" you want to utilize: “Rotating Proxy” or “Sticky Proxy”.
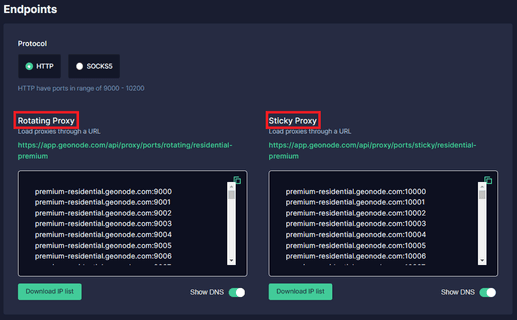
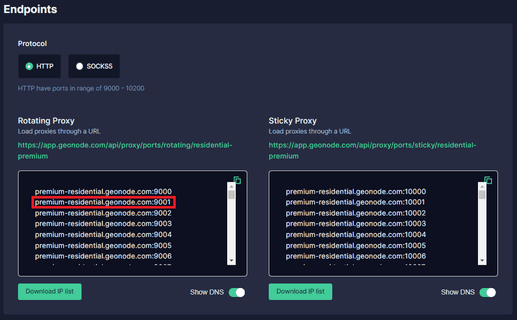
Step 6. Choose which proxy you want to utilize. For example purposes, we’ll be using the highlighted proxy “premium-residential.geonode.com:9001”.
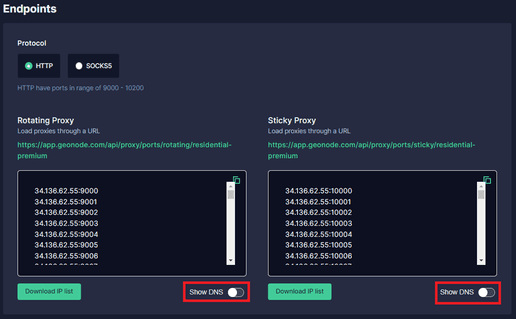
If you want to use an IP address instead of a DNS, simply turn off the Show DNS button, and IP addresses will show up.
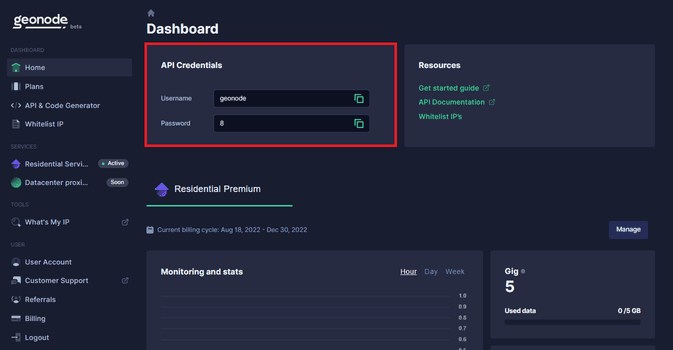
Step 7. Now you need your proxy account’s “Authentication Details”. For Geonode, this is on your account’s home page.