Unbeatable Prices on Proxies

đź’Ą
geonode logo

How To Use Proxies With AdsPower Browser

AdsPower Browser is a web browser that allows users to hide their digital fingerprint. Through it, you can create and manage multiple accounts, set up different fingerprints, and do many other tasks. An AdsPower Browser will also enable you to open multiple, independent browsers. It is a premium service but you can use it for free for a few days.

Carl Gamutan

by Carl Gamutan

Publishing Date: June 19, 2022


AdsPower Browser is a web browser that allows users to hide their digital fingerprints. Through it, you can create and manage multiple accounts, set up different fingerprints, and do many other tasks. An AdsPower Browser will also enable you to open multiple, independent browsers. It is a premium service but you can use it for free for a few days.

You can’t effectively use AdsPower Browser without a proxy as most of its features require a proxy so you won’t get banned. Whether it be automation or the creation of multiple accounts, most websites would immediately ban your account and blacklist your IP address if they detect you’re doing any AdsPower Browser task.

A browser proxy will handle all of your data traffic so any website you visit will only be able to see the IP address of the proxy server. You can assign a different IP address to each browser window and if you utilize residential proxies, it would be nearly impossible for you to be detected and banned by any website.

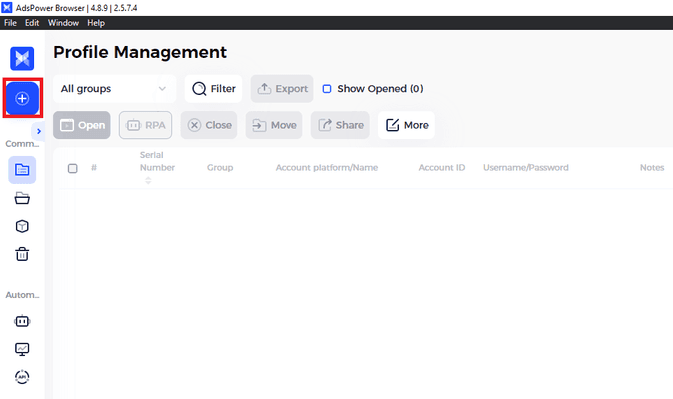
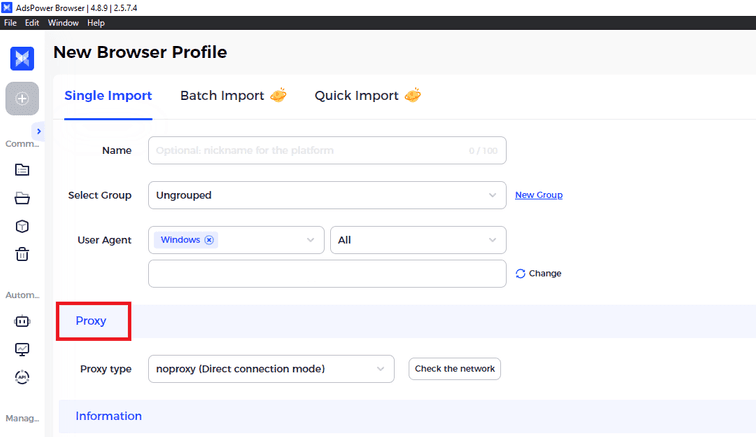
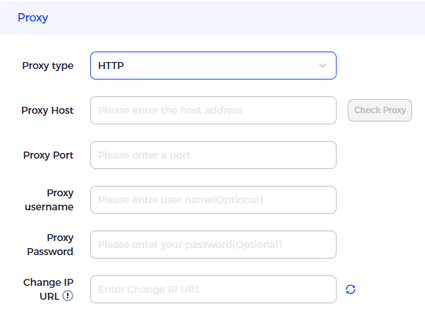
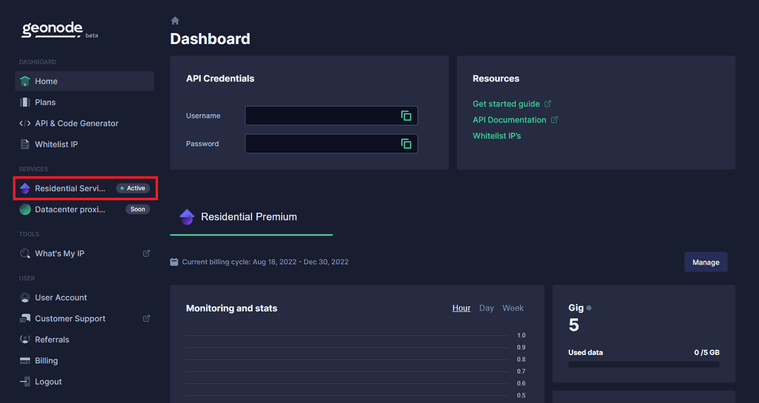
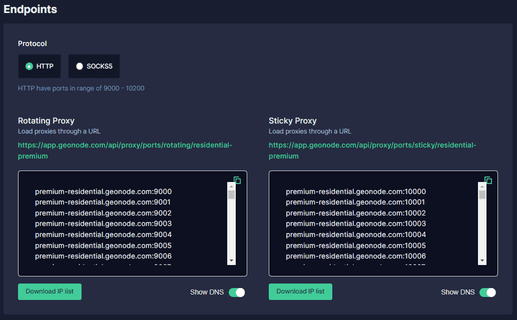
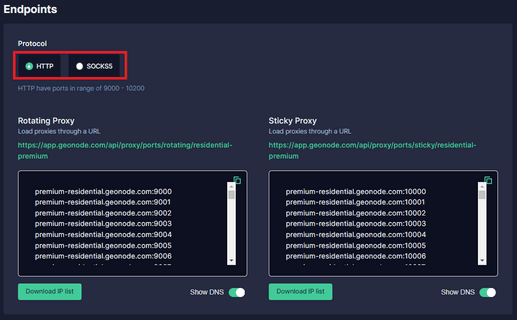
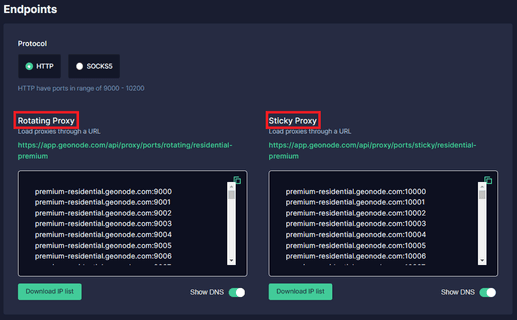
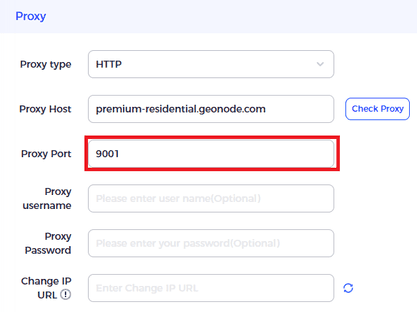
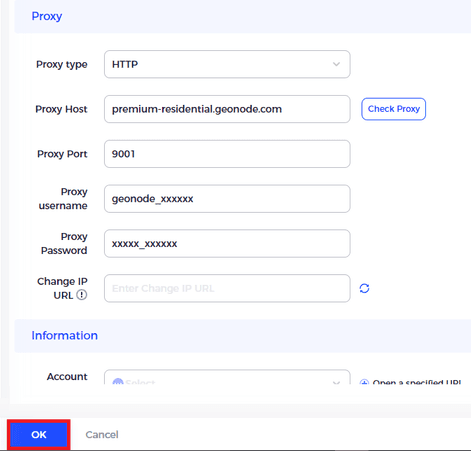
Let’s set up an AdsPower Browser proxy server.

AdsPower Browser’s Proxy Settings

Step 1. Open AdsPower Browser and click on the “Plus” button.

AdsPowerBrowser1.png

Step 2. Input all the other necessary information until you get to “Proxy”.

AdsPowerBrowser2.png

Step 3. Select which “Proxy Type” you want to use. For example purposes, we’ll be choosing “HTTP”, but there isn’t any difference to the entire process if you choose another one.

AdsPowerBrowser3.png

Step 4. The rest of the “Proxy Settings" would then show up.

AdsPowerBrowser4.png

Now, you need to go to your proxy provider and acquire the proxy server details. You can jump straight to Step 11 if you already have your proxy server details. For example purposes, we’ll be using Geonode.

Step 5. Go to Geonode and log in with your existing account or sign up to create a new one.

geonodelogin.png

Step 6. On the Home Page, click on “Residential Services”.

geonode1.png

Step 7. Scroll down until you see “Endpoints”.

geonodenew1.png

Step 8. Choose which “Proxy Protocol” you want to utilize: “HTTP Protocol” or “SOCKS5 Protocol”.

geonodenew1.png

Step 9. Select which "Session Type" you want to utilize: “Rotating Proxy” or “Sticky Proxy”.

geonodenew3.png

Step 10. Choose which proxy you want to utilize. For example purposes, we’ll be using the highlighted proxy “premium-residential.geonode.com:9001”.

geonodenew4.png

If you want to use an IP address instead of a DNS, simply turn off the Show DNS button, and IP addresses will show up.

geonodenew5.png

Now that you acquired your proxy server details, go back to Adspower Browser’s proxy settings.

Step 11. Input your proxy’s “Host Address”. This is the first part before the semicolon, which in our example is “premium-residential.geonode.com”.

AdsPowerBrowser5.png

Step 12. Enter your proxy’s “Port Number”. This is the second part before the semicolon, which in our example is “9001”.

AdsPowerBrowser6.png

Step 13. Now you need your proxy account’s “Authentication Details”. For Geonode, this is on your account’s home page.

geonode8.png

Step 14. Enter your proxy account’s “Username”.

AdsPowerBrowser7.png

Step 15. Input your proxy account’s “Password”.

AdsPowerBrowser8.png

Step 16. After you’re done filling out the other necessary details for Adspower, click “OK” to save.

AdsPowerBrowser9.png