Dolphin Anty is an anti-detect browser that allows users to create and manage multiple browser profiles from a single device. Each browser profile is given an actual fingerprint, so you’ll look like a regular user when visiting any website. Dolphin Anty makes it easier to conduct any marketing campaign as it automates social media tasks. It is also made with teamwork in mind, so you can seamlessly work with a team of people.
To effectively use the Dolphin Anty browser, you need to pair it with a proper proxy. Proxies are the one that enables you to look like a genuine user of any website you visit. A Dolphin Anty proxy will also let you bypass the account limitations of social media websites and allow you to create as many social media accounts as you want.
A Dolphin Anty proxy will handle all of your web requests for you and give you access to millions of IP addresses. Your IP address will be completely hidden, and any website you visit will only be able to see the IP address of the proxy server. This enables you to easily bypass any limitations, avoid any bans/blocks coming from websites, and ensure your privacy will always be protected.
There are two ways you can set up a Dolphin Anty proxy server. Method 1 is excellent when you want a different proxy for each browser profile you create, while Method 2 is excellent when you want the same proxy for all the profiles you will create.
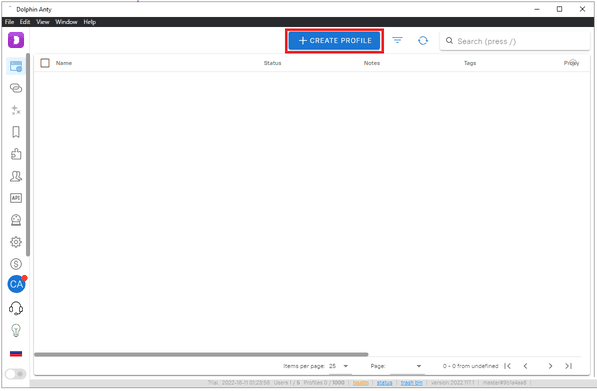
Step 1. Login to Dolphin Anty and click on “Create Profile”.
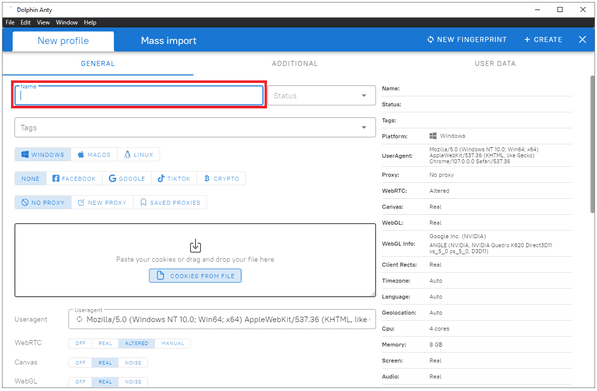
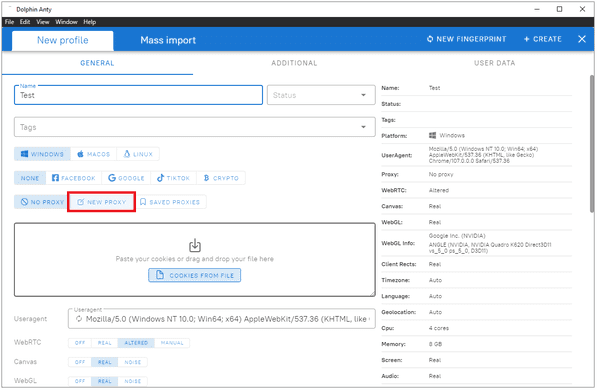
Step 2. Decide what “Name” you want this profile to be.
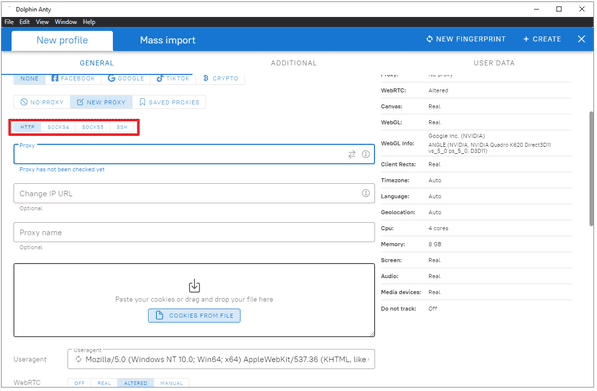
Step 3. Click on “New Proxy”.
Dolphin Anty’s proxy settings should then show up. Now, you need to go to your proxy provider and acquire the proxy server details. For example purposes, we’ll be using Geonode. If you already have your proxy server details, you can jump straight to Step 11.
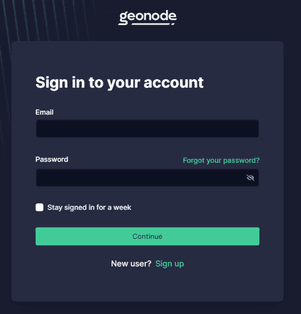
Step 4. Go to Geonode and log in with your existing account or sign up to create a new one.
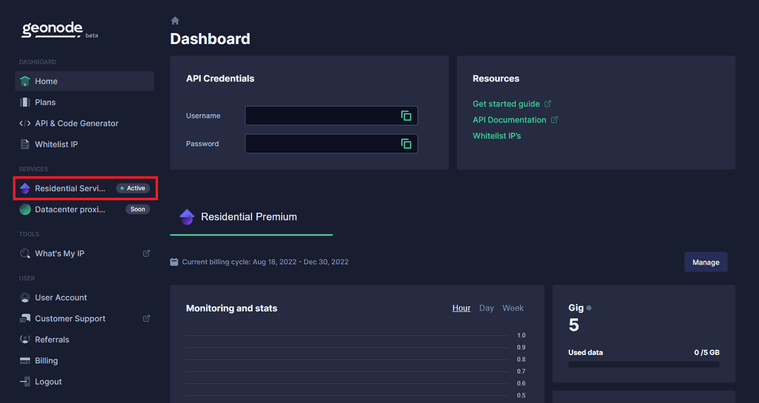
Step 5. On the Home Page, click on “Residential Services”.
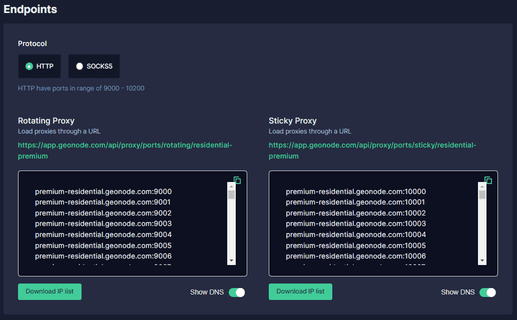
Step 6. Scroll down until you see “Endpoints”.
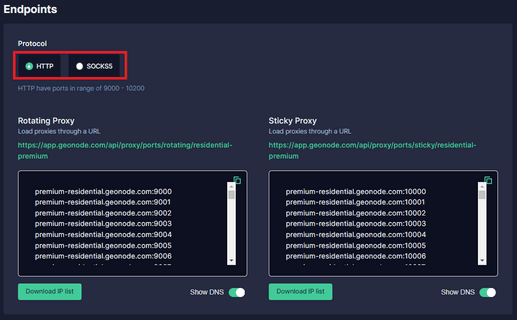
Step 7. Choose which “Proxy Protocol” you want to utilize: “HTTP Protocol” or “SOCKS5 Protocol”.
Step 8. Select which "Session Type" you want to utilize: “Rotating Proxy” or Sticky Proxy.
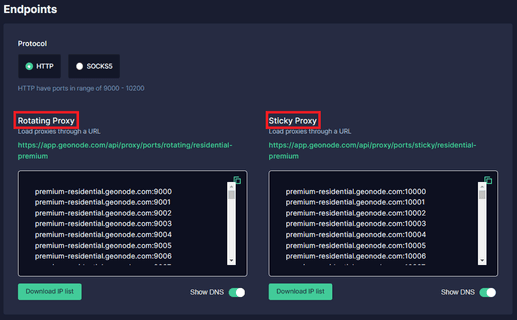
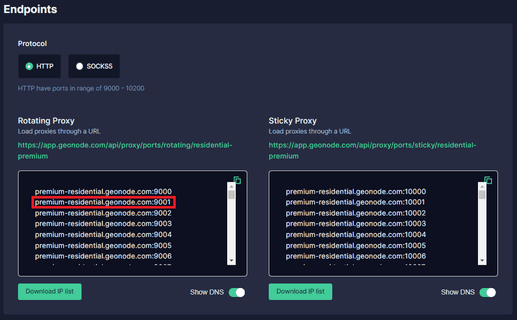
Step 9. Choose which proxy you want to utilize. For example purposes, we’ll be using the highlighted proxy “premium-residential.geonode.com:9001”.
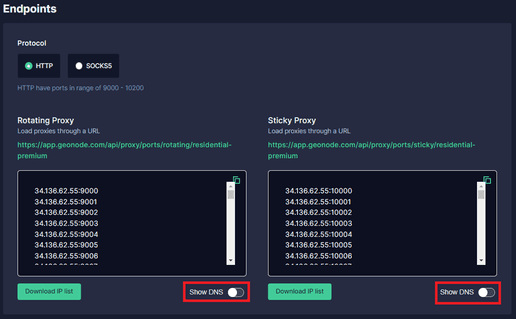
If you want to use an IP address instead of a DNS, simply turn off the Show DNS button, and IP addresses will show up.
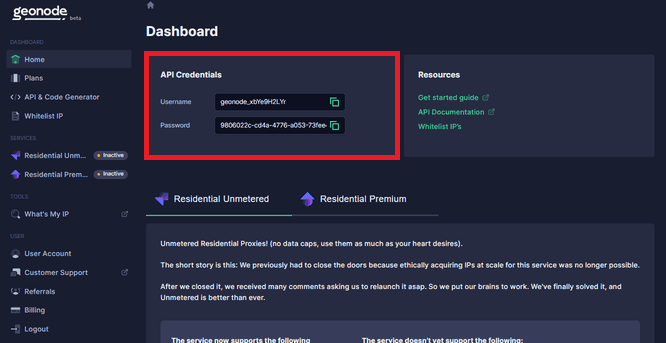
Step 10. Now you need your proxy account’s “Authentication Details”. For Geonode, this is on your account’s home page.
Now that you acquired your proxy server details, go back to your profile’s proxy settings.
Step 11. Select which “Proxy Protocol” you want to use. For example purposes, we’ll be choosing “HTTP”.
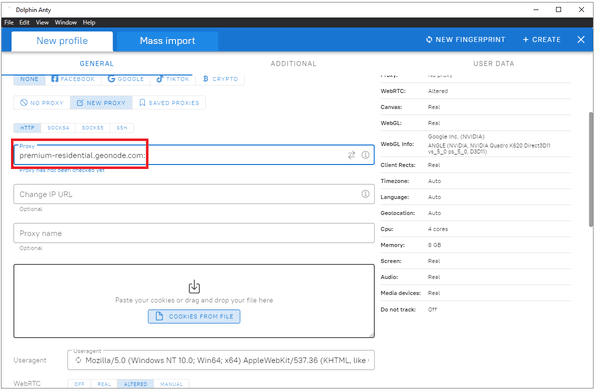
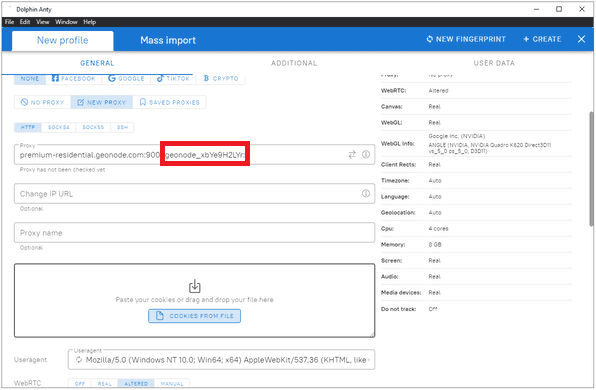
Step 12. Now, you should input your proxy server details. Keep note of the valid proxy formats. For our example, we’ll be using the “host:port:login:password” format.
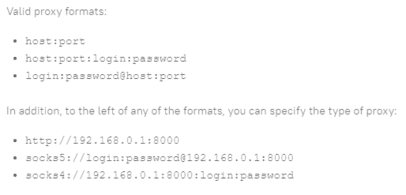
Step 13. Enter your proxy’s “Hostname” or “IP address”. This is the first part of the semicolon, which in our example is “premium-residential.geonode.com”.
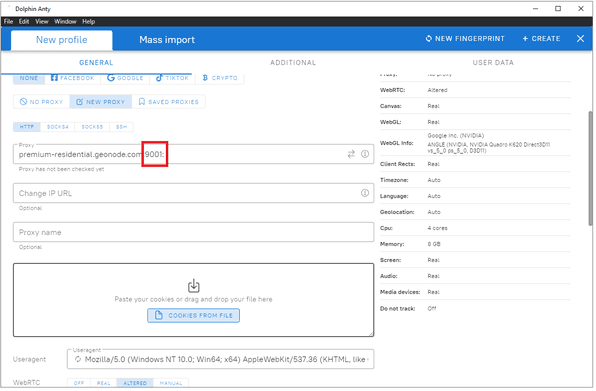
Step 14. Enter your proxy’s “Port Number”. This is the second part of the semicolon, which in our example is “9001”.
Step 15. Input your Geonode username, which in our example would be “geonode_xbYe9H2LYr”.
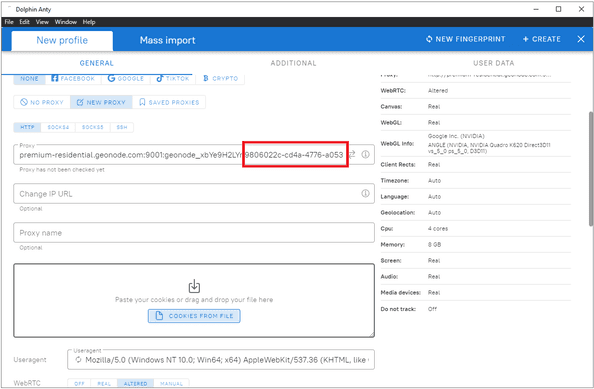
Step 16. Input your Geonode password, which in our example would be “9806022c-cd4a-4776-a053-73fee44344dd”.
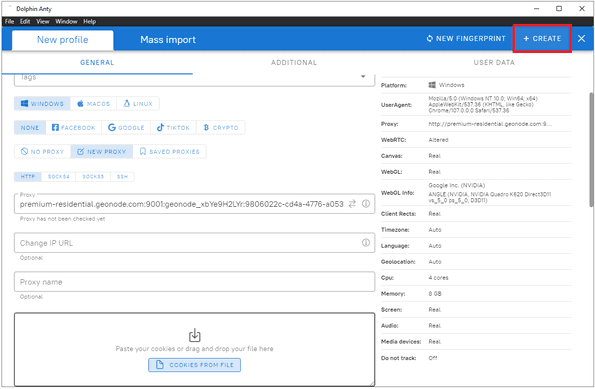
Step 17. Now, you can click on “Create” to save the proxy details.
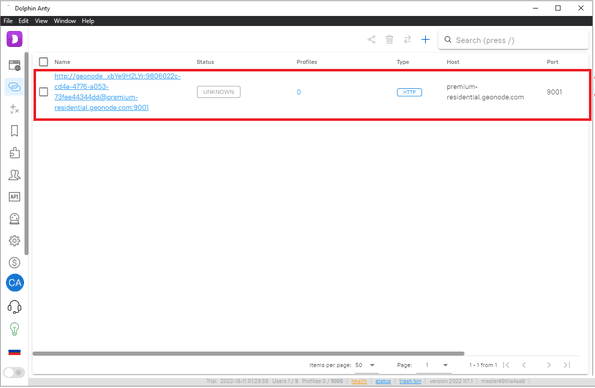
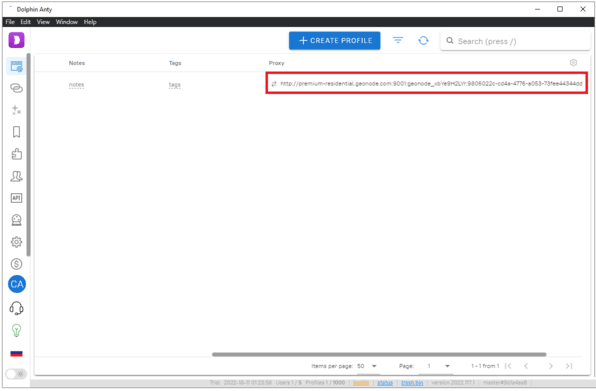
Congratulations! You’ve finished adding a Geonode proxy server to your Dolphin Anty Browser Profile. Your created profile should then show up on Dolphin Anty’s home page, along with your proxy details.
Step 1. Open Dolphin Anty and click on “Proxies”.
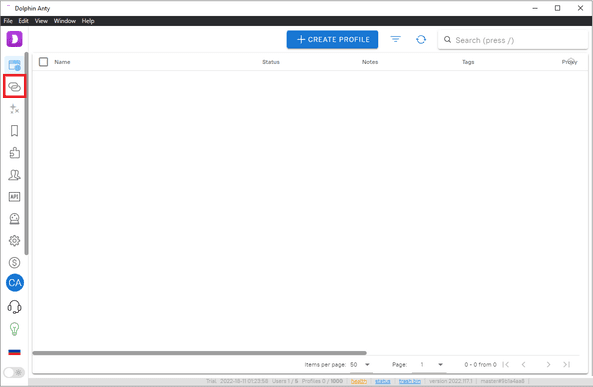
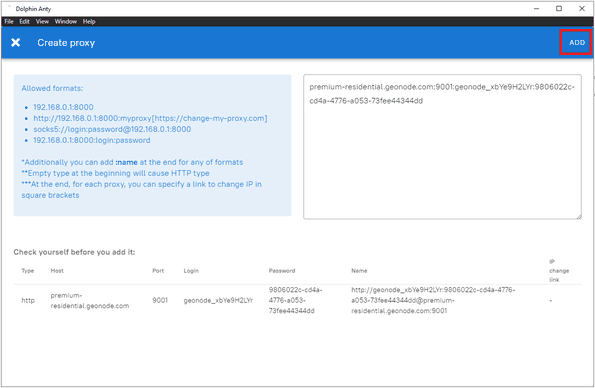
Step 2. Click on the “+” button to create proxies.
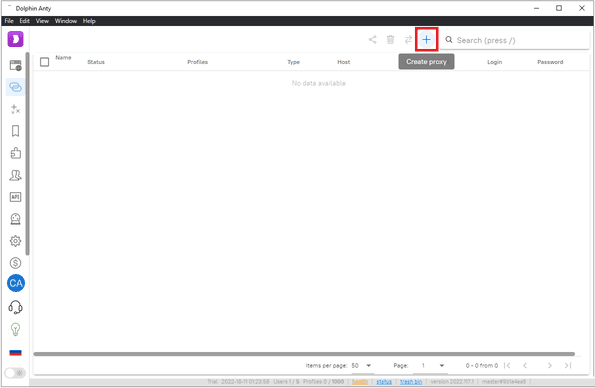
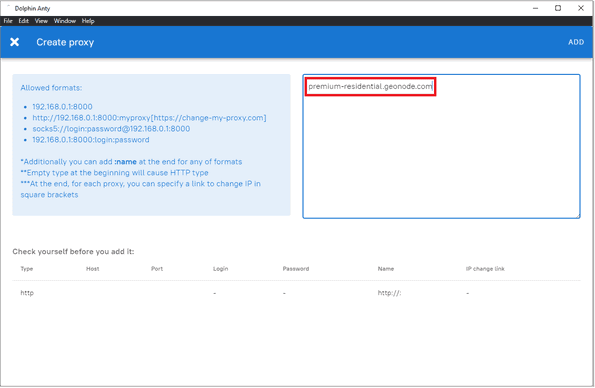
Step 3. Input your proxies here.
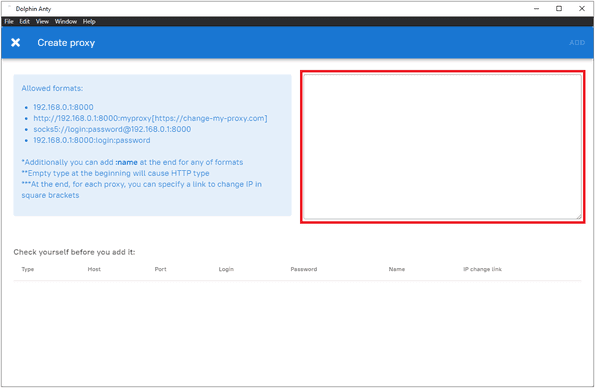
Now, you need to go to your proxy provider and acquire the proxy server details. For example purposes, we’ll be using Geonode. If you already have your proxy server details, you can jump straight to Step 10.
Step 4. On the Home Page, click on “Residential Services”.
Step 5. Scroll down until you see “Endpoints”.
Step 6. Choose which “Proxy Protocol” you want to utilize: “HTTP Protocol” or “SOCKS5 Protocol”.
Step 7. Select which "Session Type" you want to utilize: “Rotating Proxy” or “Sticky Proxy”.
Step 8. Choose which proxy you want to utilize. For example purposes, we’ll be using the highlighted proxy “premium-residential.geonode.com:9001”.
If you want to use an IP address instead of a DNS, simply turn off the Show DNS button, and IP addresses will show up.
Step 9. Now you need your proxy account’s “Authentication Details”. For Geonode, this is on your account’s home page.
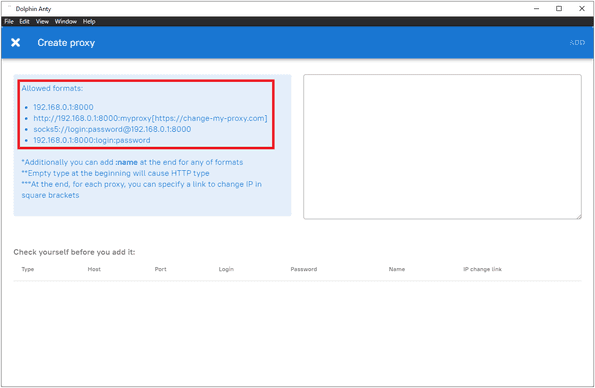
Step 10. Now, you should input your proxy server details. Keep note of the valid proxy formats. For our example, we’ll be using the “host:port:login:password” format.
Step 11. Enter your proxy’s “Hostname” or “IP address”. This is the first part of the semicolon, which in our example is “premium-residential.geonode.com”.
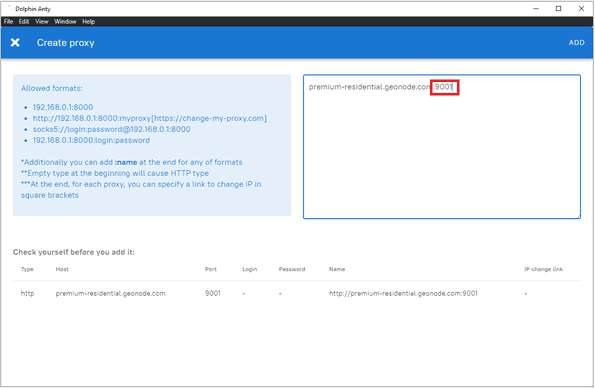
Step 12. Enter your proxy’s “Port Number”. This is the second part of the semicolon, which in our example is “9001”.
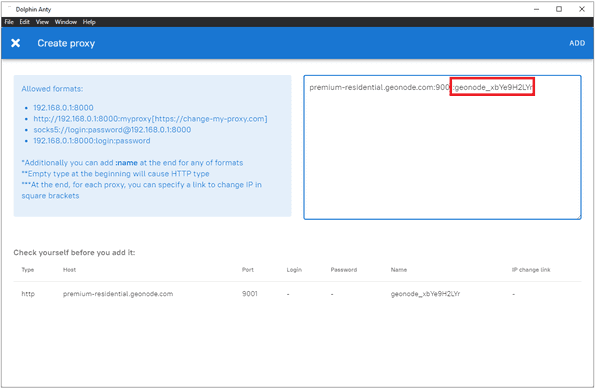
Step 13. Input your Geonode username, which in our example would be “geonode_xbYe9H2LYr”.
Step 14. Input your Geonode password, which in our example would be “9806022c-cd4a-4776-a053-73fee44344dd”.
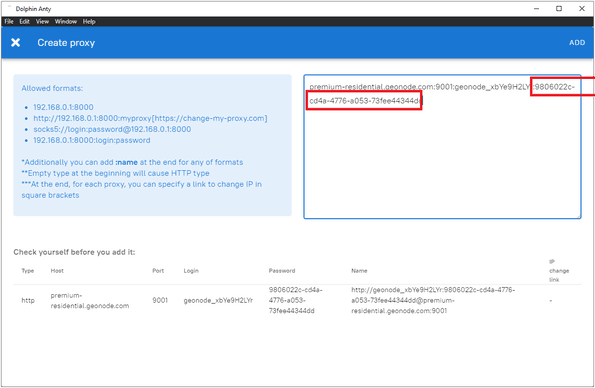
Step 15. Now, you can click on “ADD” to save the proxy details.
Congratulations! You’ve finished adding a Geonode proxy server to any of your Dolphin Anty Browser profiles. Your created proxy settings should then show up on Dolphin Anty proxies’ home page.