Lineage is a massive multiplayer online role-playing game (MMORPG) franchise that’s set in a medieval fantasy world. In the game, there are seven characters that players can choose their avatar to be. They can also join in castle sieges or in a war, though they must be in either a clan or in an allegiance before they can participate. It’s mainly free to play and extremely popular in South Korea.
As an online multiplayer game, you need a Lineage proxy to ensure that your gameplay will always be smooth sailing. You might have a slow internet connection or live in a place that’s geographically far from the Lineage servers. A Lineage proxy will enable you to connect to a faster and more reliable internet connection and to a location that’s geographically close to the Lineage servers. This ensures that you will have low latency and no in-game lag.
A Lineage proxy will also help you if you want to play Lineage anonymously and protect your privacy. Lineage admins have access to your IP address and you can hide your IP address through a Lineage proxy. If you want to use a gaming bot to automate tasks and efficiently play the game, then you will also need a Lineage proxy so that your account and IP address won’t be banned when using a bot.
The best Lineage proxies would be either datacenter proxies or residential proxies, depending on what you want most. If you want a faster internet connection and reduced latency, then datacenter proxies are the best for you. If you want to use a bot, create multiple accounts, and play anonymously then residential proxies are the ones for you.
Let’s set up a Lineage proxy server.
Note: Lineage will automatically copy your operating system’s proxy settings.
For Windows:
To set up proxies in Windows, simply search for “Proxy Settings” in your windows search bar and open the search result.
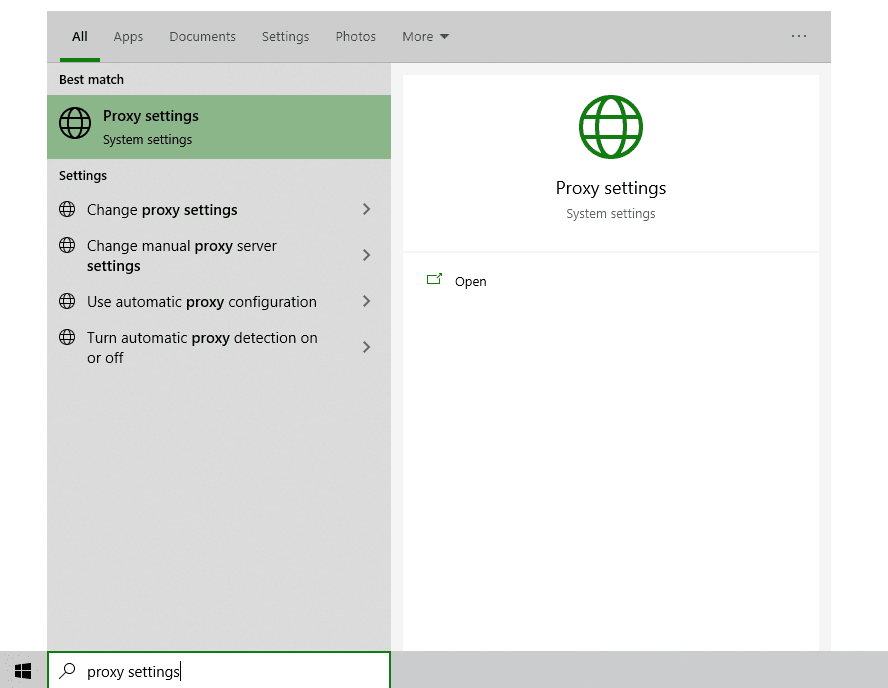
You are then given two options to choose from: Automatic proxy setup or Manual proxy setup. If you want windows to automatically detect your proxy settings, choose the first option. Choose the second option if you want to utilize a specific ip address and port number.
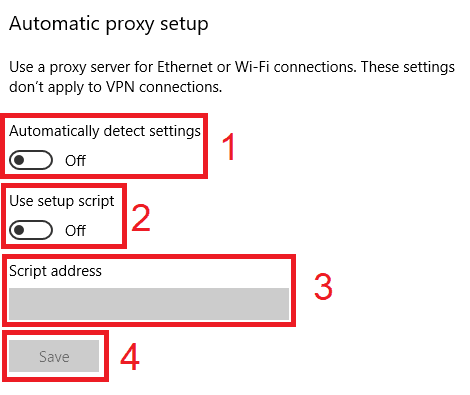
If you chose the first option, then:
- Turn on Automatically detect Settings
- Turn on Use setup script
- Enter the script address
- Click Save
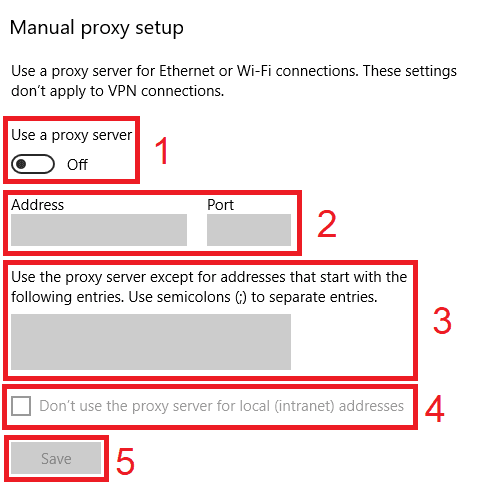
If you chose the second option, then:
- Turn on Use a proxy server
- Input both server address and port number
- If you have any addresses you would like to visit without a proxy, enter them here
- Turn on Don’t use the proxy server for local addresses check box if you want to access a local server without a proxy
- Click Save
For Mac.
To start configuring your proxy settings in MacOS, simply:
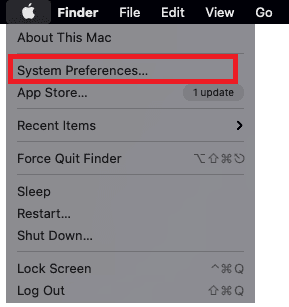
Step 1. Click on the Apple Icon.

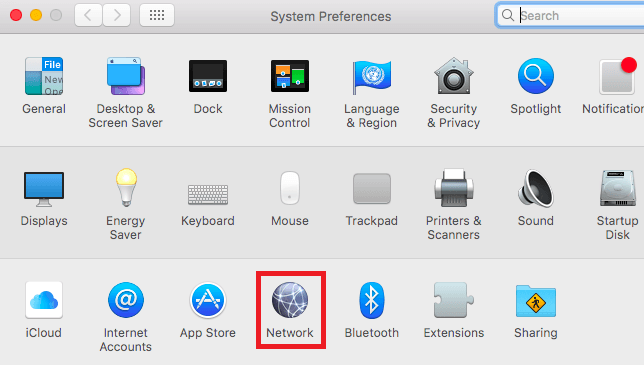
Step 2. On the drop down menu, click on “System Preferences”.
Step 3. Click on “Network”
Step 4. Click on “Advanced”
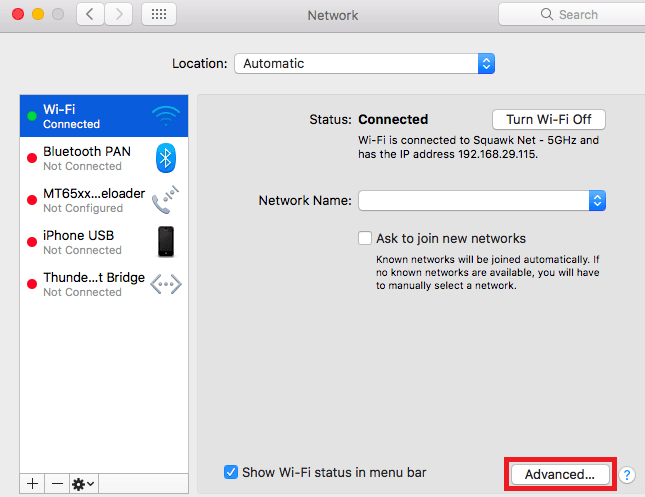
Note: Make sure to connect to your wi-fi first.
Step 5. Click on “Proxies”

This should then redirect you to MacOS proxy settings. MacOS is more straightforward compared to windows. You only have one option which is to manually configure your proxy server.
Here are the steps to follow:
- Select which proxy IP protocol you want to configure. This depends on which protocols your proxy service provider offers.
- Turn on Secure Web Proxy
- Input the Proxy Server Address and Port Number
- Click OK to save the configurations
Note: You may be prompted for your Mac user password to save your settings.
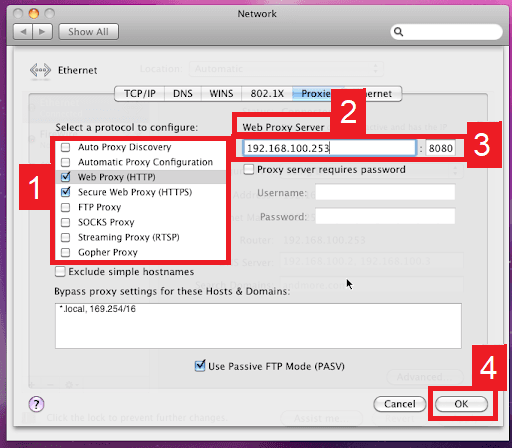 Image Alt Text: Configuring MacOS Proxy Settings
Congratulations! You have now finished configuring a Lineage proxy server for your operating system.


 Image Alt Text: Configuring MacOS Proxy Settings