Minecraft is a sandbox video game and is one of the best selling games of all time. Minecraft’s popularity can be largely attributed to the simplicity of the game and the freedom it gives to its players. There is no real final objective to the game but there are a lot of tasks the player can do like crafting weapons or defeating the ender dragon.
When playing Minecraft, there are many reasons as to why you might need to change your location. For example, the network you’re using has blocked playing Minecraft on their server. You need to change your IP and switch your location to bypass these restrictions. The best way to do so would be through a Minecraft proxy.
A Minecraft proxy will handle all of your web requests for you so any website or application you use would only be able to see the IP address of the proxy server and not your own. You can easily change the IP address of the proxy server and choose any location you want in the world. As Minecraft also releases versions or updates that are region locked like the Minecraft Earth version, you can change your location to where that version is available and be able to play it.
The best and most reliable Minecraft proxies you can use are residential proxies as these types of proxies use actual residential IPs from real devices making it almost impossible to be detected and banned. You can also use datacenter proxies for Minecraft but do keep in mind that, although they’re faster compared to residential proxies, they are a lot less reliable and are more prone to being banned.
Let’s set up a Minecraft proxy server.
Note: Minecraft will automatically copy your operating system’s proxy settings.
For Windows:
To set up proxies in Windows, simply search for “Proxy Settings” in your windows search bar and open the search result.
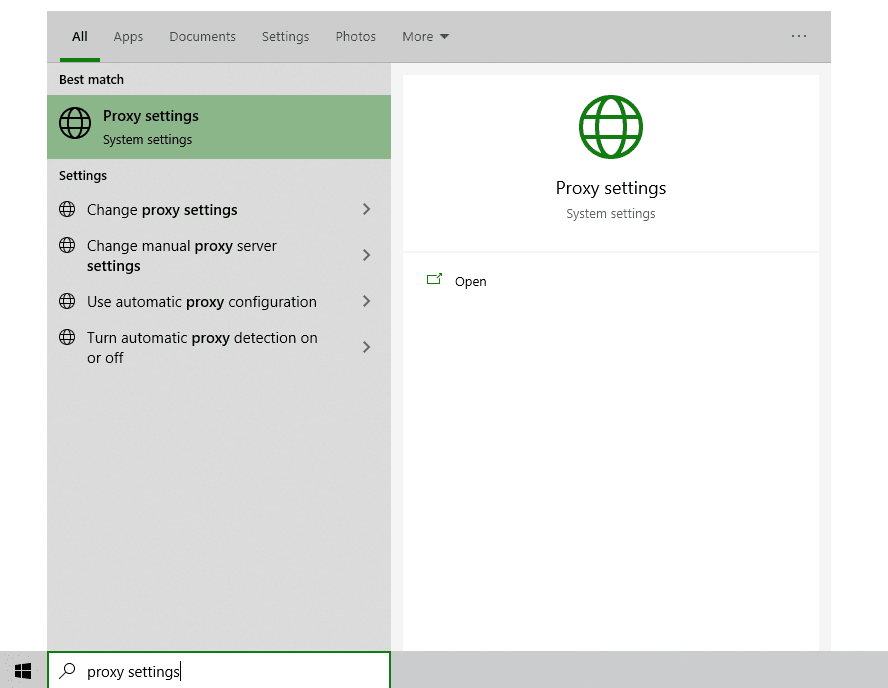
You are then given two options to choose from: Automatic proxy setup or Manual proxy setup. If you want windows to automatically detect your proxy settings, choose the first option. Choose the second option if you want to utilize a specific ip address and port number.
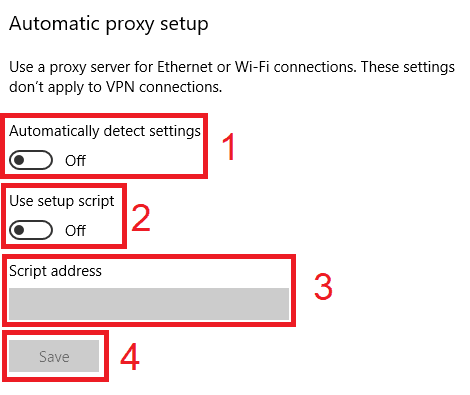
If you chose the first option, then:
- Turn on Automatically detect Settings
- Turn on Use setup script
- Enter the script address
- Click Save
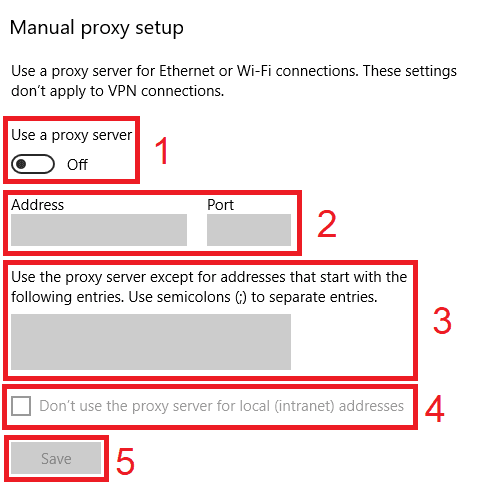
If you chose the second option, then:
- Turn on Use a proxy server
- Input both server address and port number
- If you have any addresses you would like to visit without a proxy, enter them here
- Turn on Don’t use the proxy server for local addresses check box if you want to access a local server without a proxy
- Click Save
For Mac.
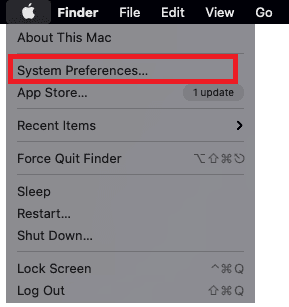
To start configuring your proxy settings in MacOS, simply:
Step 1. Click on the Apple Icon.

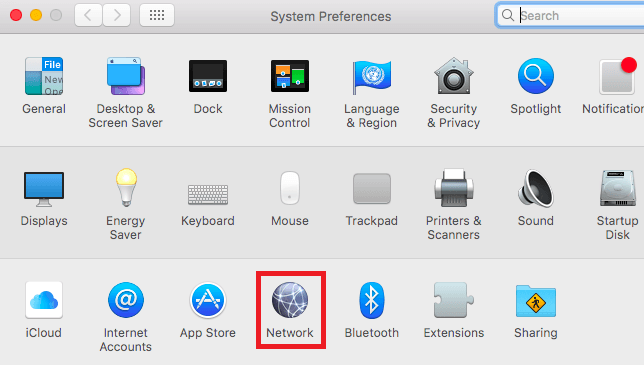
Step 2. On the drop down menu, click on “System Preferences”.
Step 3. Click on “Network”
Step 4. Click on “Advanced”
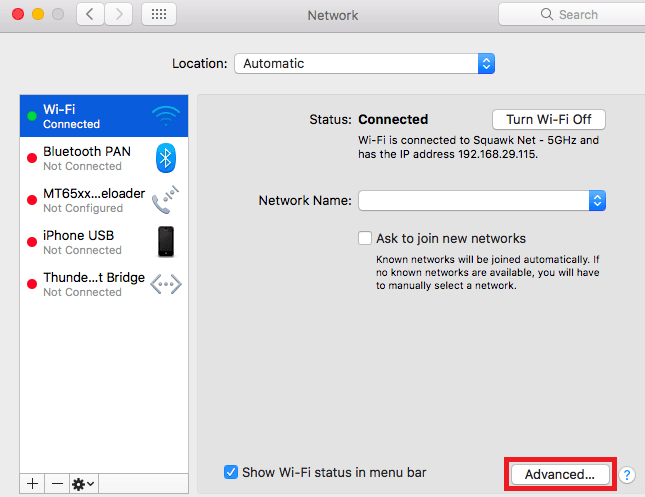
Note: Make sure to connect to your wi-fi first.
Step 5. Click on “Proxies”
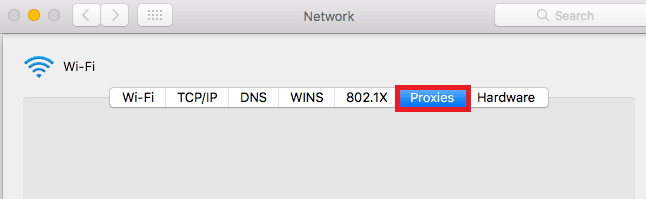
This should then redirect you to MacOS proxy settings. MacOS is more straightforward compared to windows. You only have one option which is to manually configure your proxy server.
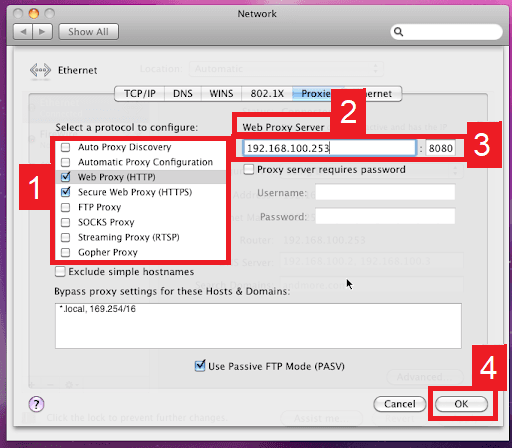
Here are the steps to follow:
- Select which proxy IP protocol you want to configure. This depends on which protocols your proxy service provider offers.
- Turn on Secure Web Proxy
- Input the Proxy Server Address and Port Number
- Click OK to save the configurations
Note: You may be prompted for your Mac user password to save your settings.
Congratulations! You have now finished configuring a Minecraft proxy server. Note that the first time you visit it, there will be a pop up asking for your login credentials.
