Periscope is a live stream, social media platform where users can share and view videos in real-time. It’s an application that’s available on mobile devices and built specifically for Android and iOS. Users don’t have to create an account to view videos on Periscope but you do need a Periscope account if you want to comment, share, chat, and heart a video. You can use your twitter account or your mobile phone number to do this.
There’s a major safety concern that users may encounter when using Periscope and that is the fact that all your public information would become accessible to the public. It would be basically impossible to browse Periscope anonymously without external help. A Periscope proxy setup would be needed if you want to protect your privacy.
Proxies act as a gateway between your mobile device and the internet. This means that any website you visit would only be able to see the IP address of the proxy server and never your own. This effectively protects you from being tracked down via your IP address and shields any blocks from happening to your account.
There are also many other useful cases of a proxy for Periscope. It would help you avoid any IP ban on your account. You can automate your social media activities and manage multiple Periscope accounts without getting banned by Periscope’s anti-bot policy. If you live in a location that has banned Periscope, then you can also change your location through a proxy. Proxies also enables you to browse Periscope anonymously and fully protect your internet privacy.
Let’s work on the Periscope proxy setup.
For Android:
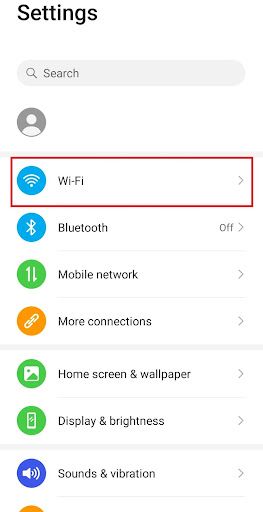
Step 1. Go to your phone’s settings app.

Step 2. Tap on “Wifi”.
Step 3. Long-press the wi-fi network you want to use proxies with.
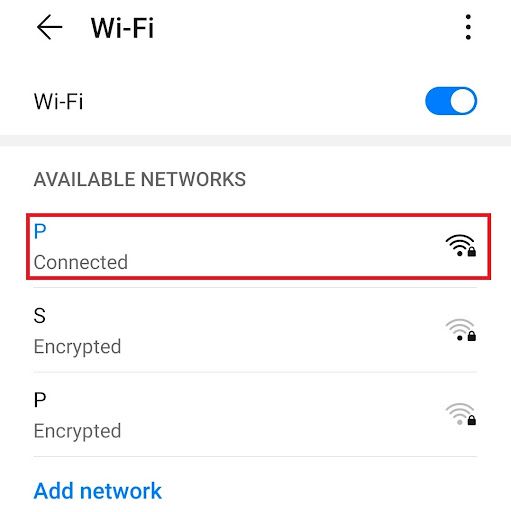
Note: Make sure to connect to the wifi first.
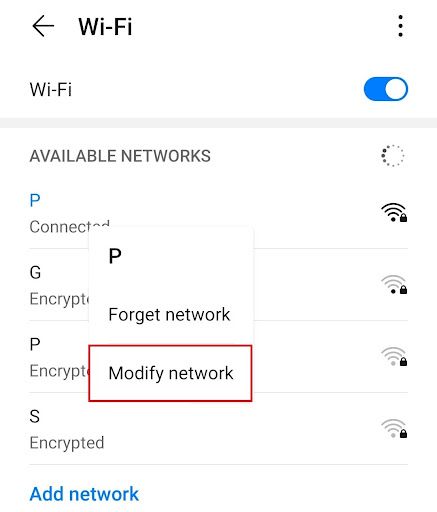
Step 4. Tap on “Modify Network”.
Step 5. Turn on “Show advanced options” and then click on “Proxy”.
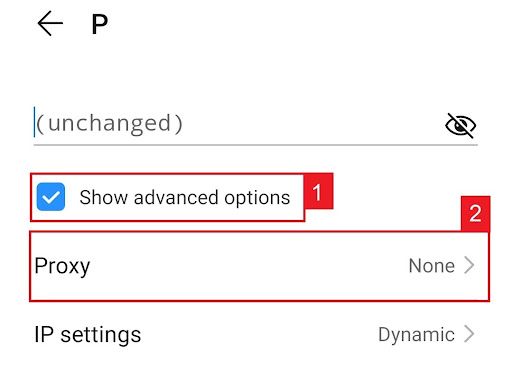
This should then redirect you to your android device's proxy settings. Below is a detailed description of how to configure it.
Configuring Your Android Device’s Proxy Settings
After being redirected to your phone’s proxy settings, you are then given two options to choose from: Automatic proxy setup or Manual proxy setup.
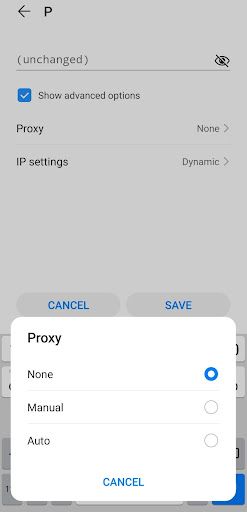
If you want your device to utilize specific proxy server settings, choose the first option “Manual”. Choose the second option, “Auto”, if you want your device to automatically detect your proxy settings.
Note: Older android versions may not have the “Auto” option available.
If you chose Manual configuration, then:
- Enter your proxy hostname
- Input your proxy port number
- Put any websites here that you don’t want to use any proxies on.
- Tap “Save” if you’re finished
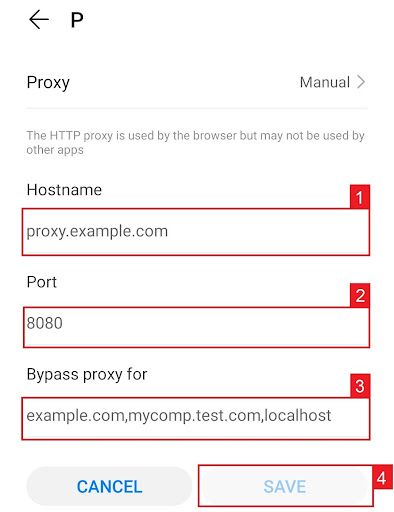
Note: You can enter hostnames or ip addresses here
If you chose Auto configuration, simply:
- Enter your proxy service’s .PAC url.
- Tap “Save”
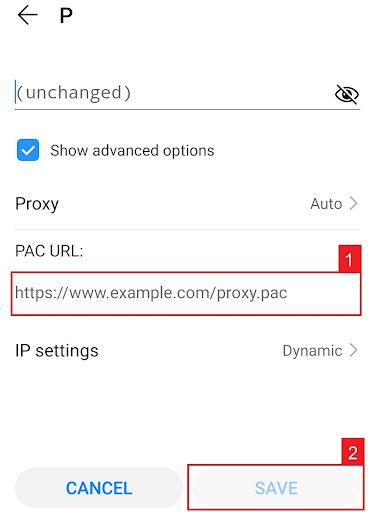
Note: Your service provider or network administrator will give you your required .PAC file.
Congratulations! You have now set up a proxy server in your android mobile device. Do note that the first time you visit a website after setting up a proxy server, a prompt will pop-up asking for your login credentials from your proxy account.
For iPhone:
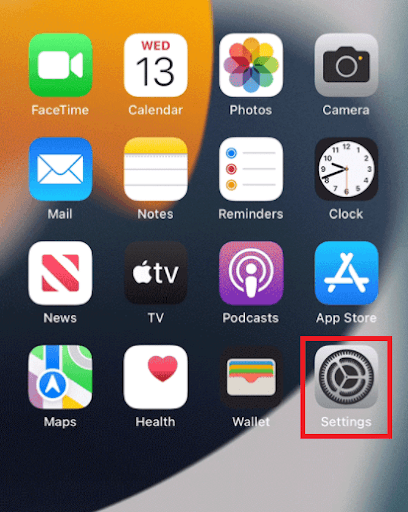
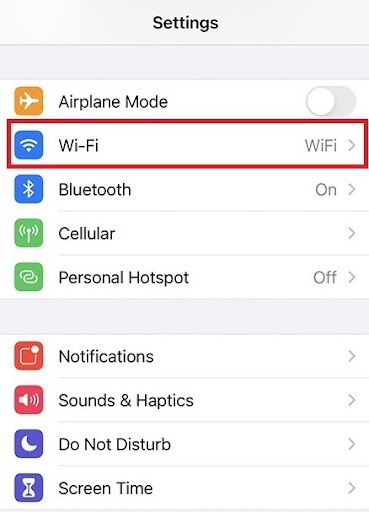
Step 1. Go to your Iphone’s Settings app.
Step 2. Click on “Wifi”
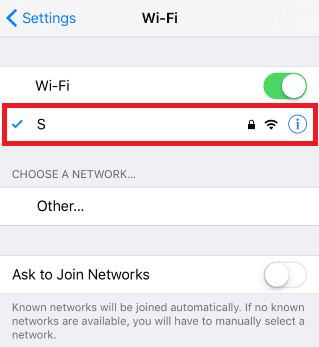
Step 3. Connect to the wi-fi network you want to use a proxy with and then tap on it again.
Step 4. Scroll down to the bottom and you will see the “HTTP Proxy” option
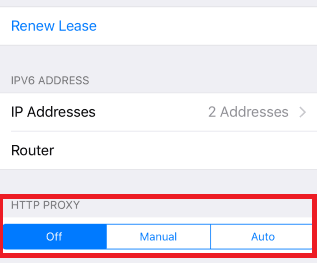
Configuring Your iPhone’s Proxy Settings
After being redirected to your iPhone’s proxy settings, you are then given two options to choose from: Manual proxy setup or automatic proxy setup. If you want automatic proxy detection for your proxy settings, choose the “Auto” option. Choose the “Manual” option if you want to utilize a specific ip address and port number.
If you choose the “Auto” option, your iPhone will then immediately check if a proxy is needed for your current network before automatically configuring your proxy settings. Your iPhone will not use a proxy server if it deems it to be unnecessary, but if you really want to use one then simply obtain an automatic proxy configuration script, or a .PAC file for short, and enter it in the url section as seen below.
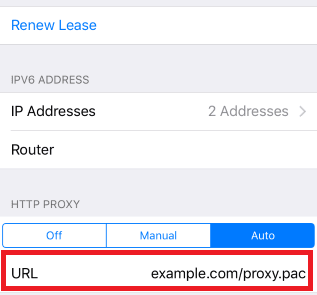
Note: You can get a .PAC file from your proxy service provider or your network administrator.
If you chose the “Manual” option then:
- Enter the server address or a IP address
- Enter the port number
- If your proxy provider says that authentication is required for the proxy server, then turn this on.
- Enter your authentication details
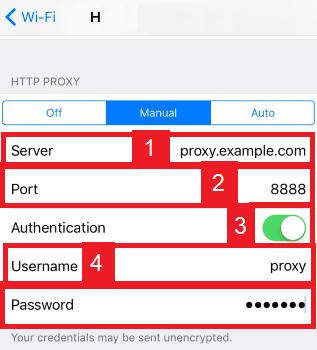
Congratulations! You have now finished configuring a Periscope proxy server.
