Player Unknown’s Battleground, or simply known as PUBG, is a player vs player battle royale game and is largely credited as the game that popularized the battle royale genre. In PUBG, 100 players are dropped into an abandoned wasteland where they loot for gear and win the game by being the last one surviving.
As a shooter game, the importance of having low latency cannot be understated. If you have high ping, your game will constantly stutter causing you to miss all of your shots and lose the game. It will severely hamper your gaming experience. To ensure a low latency and a smooth gaming experience, you need to utilize a PUBG proxy.
Through a proxy network, a PUBG proxy will allow you to connect to a faster and stronger connection that’s geographically close to the PUBG server which ensures that you have low ping and a better gaming experience.
The best PUBG proxies to use would be either datacenter proxies or residential proxies. If you want a faster internet connection and low latency when playing, then datacenter proxies are what’s best for you. If you want to sacrifice a bit of speed to protect your privacy and gain total anonymity, then residential proxies are the way to go.
Let’s configure your PUBG proxy settings.
Note: PUBG will automatically copy your operating system’s proxy settings.
For Windows:
To set up proxies in Windows, simply search for “Proxy Settings” in your windows search bar and open the search result.
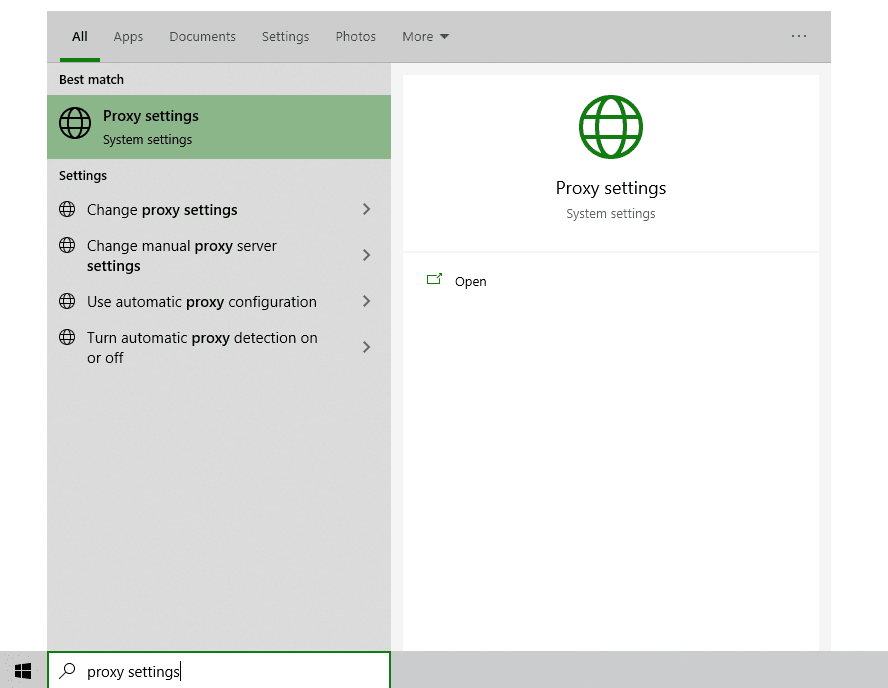
You are then given two options to choose from: Automatic proxy setup or Manual proxy setup. If you want windows to automatically detect your proxy settings, choose the first option. Choose the second option if you want to utilize a specific ip address and port number.
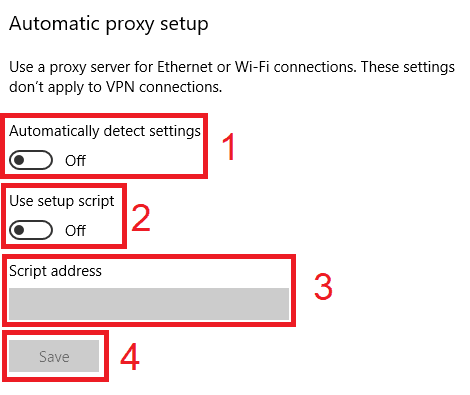
If you chose the first option, then:
- Turn on Automatically detect Settings
- Turn on Use setup script
- Enter the script address
- Click Save
If you chose the second option, then:
- Turn on Use a proxy server
- Input both server address and port number
- If you have any addresses you would like to visit without a proxy, enter them here
- Turn on Don’t use the proxy server for local addresses check box if you want to access a local server without a proxy
- Click Save
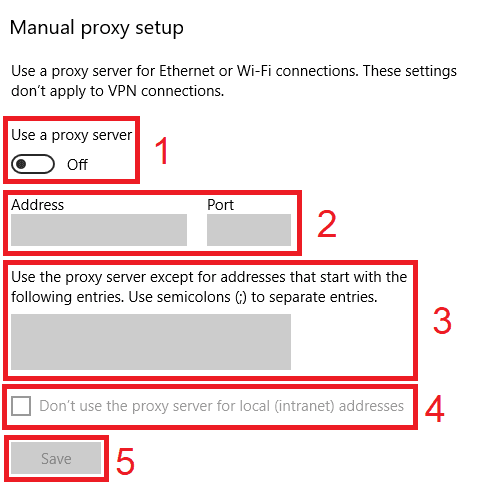 Image Alt Text: Windows Automatic Proxy Setup
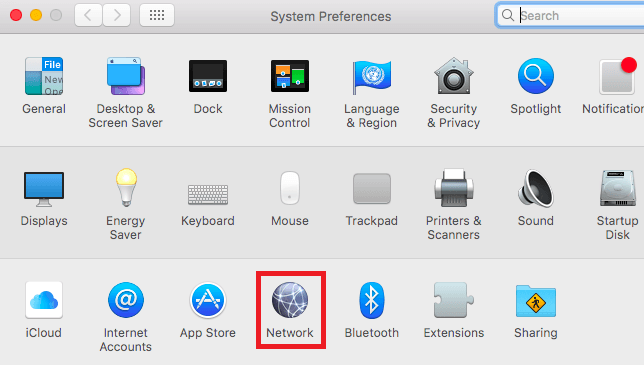
For Mac:
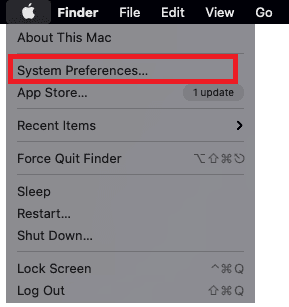
To start configuring your proxy settings in MacOS, simply:
Step 1. Click on the Apple Icon.

Step 2. On the drop down menu, click on “System Preferences”.
Step 3. Click on “Network”
Step 4. Click on “Advanced”
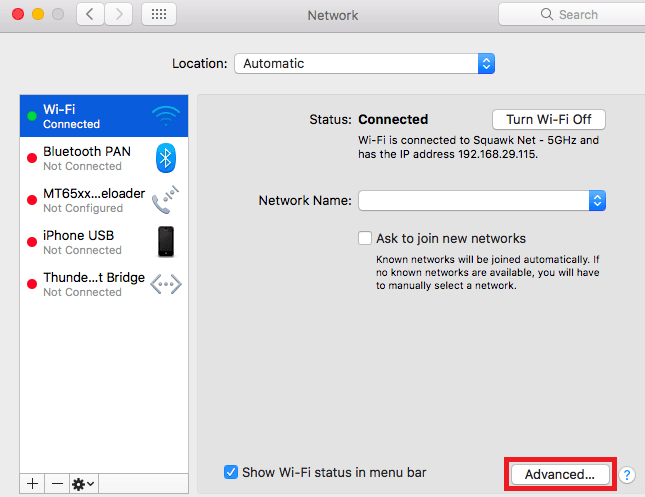
Note: Make sure to connect to your wi-fi first.
Step 5. Click on “Proxies”
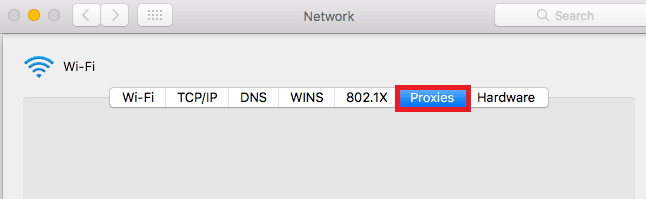
This should then redirect you to MacOS proxy settings. MacOS is more straightforward compared to windows. You only have one option which is to manually configure your proxy server.
Here are the steps to follow:
- Select which proxy IP protocol you want to configure. This depends on which protocols your proxy service provider offers.
- Turn on Secure Web Proxy
- Input the Proxy Server Address and Port Number
- Click OK to save the configurations
Note: You may be prompted for your Mac user password to save your settings.
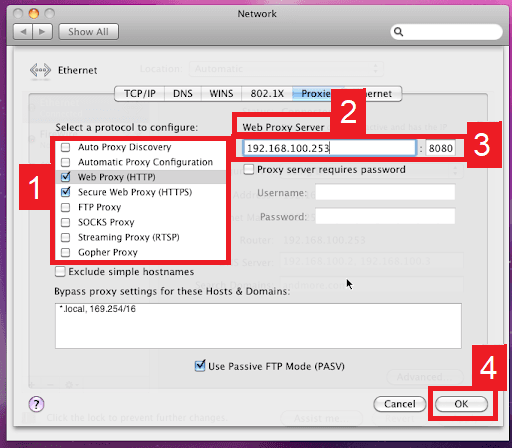 Image Alt Text: Configuring MacOS Proxy Settings
Congratulations! You have now finished configuring your PUBG proxy settings.
