Are you tired of being restricted in your World of Warcraft (WoW) gameplay? Eager to access servers and content that are not available in your region? If so, using proxies may be the perfect solution for you!
In this comprehensive guide, we'll explore the benefits of using proxies for WoW, how to choose the right ones, and provide step-by-step instructions for setting them up.
So, let's dive in and unlock the full potential of your WoW gaming experience!
An Overview of WoW
World of Warcraft, or WoW for short, is a massively multiplayer online role-playing game (MMORPG) that has captivated gamers worldwide since its launch in 2004.
Developed and published by Blizzard Entertainment, WoW is set in the fictional world of Azeroth, where players can team up with others to complete a variety of quests and tasks.
As an online multiplayer game, a reliable connection to WoW servers is essential, and that's where proxies come in!
Understanding Wow Proxies
A World of Warcraft proxy acts as an intermediary between your device and the game servers, handling your data traffic and ensuring a strong connection.
By connecting to a proxy server close to the WoW servers, you can enjoy reduced latency, increased privacy, and the ability to bypass certain restrictions, such as account limitations or regional blocks.
In this section, we'll discuss the types of proxies available, their pros and cons, and how to choose the right one for your needs.
Types of Proxies: Which One is Right for You?
There are several types of proxies that can be used for WoW, including residential proxies, datacenter, rotating, shared, and dedicated proxies. Here's a quick breakdown of their differences:
Residential Proxies
These proxies use IP addresses assigned by Internet Service Providers (ISPs) to residential users. They offer a high level of anonymity and are suitable for tasks like using bots or creating multiple accounts.
Datacenter Proxies
These proxies are hosted in data centers and typically provide faster connections and lower latency, making them ideal for improving your gameplay performance.
Dedicated Proxies
These proxies are exclusively assigned to a single user, offering better performance and reliability than shared proxies, but at a higher cost.
Rotating Proxies
These proxies automatically change your IP address at regular intervals, providing increased anonymity and making it more difficult for others to track your online activity.
Shared Proxies
These proxies are used by multiple users simultaneously, which can lead to slower performance but may be more cost-effective and better than free proxies.
When choosing a proxy for WoW, consider factors such as your budget, desired level of anonymity, and specific use case (e.g., using bots, creating multiple accounts, or simply improving your connection).
The Benefits of Using Proxies for WoW
Proxies offer numerous advantages for WoW players, such as:
Increased Privacy
Proxies hide your IP address, making it harder for other players or servers to track your online activity and access your personal information.
Enhanced Security
By acting as a barrier between your device and the internet, proxies help protect your data from potential hackers and malicious attacks.
Faster Performance: Proxies can reduce latency and improve connection speed, leading to a smoother gameplay experience.
Content Unblocking
Proxies enable you to bypass regional restrictions and access servers or game expansions that might be unavailable in your location, allowing you to enjoy the full range of WoW content.
Account Management
Proxies make it easier to manage multiple WoW accounts simultaneously, especially if you're using bots or engaging in gold farming.
How To Use Proxies With World Of Warcraft
Now that you understand the benefits of using proxies for WoW, let's walk through the process of setting one up.
Step 1: Choose the Right Proxy
As mentioned earlier, there are several types of proxies to choose from. Determine your needs and select the proxy that best suits your requirements. Keep in mind factors such as speed, anonymity, and cost when making your decision.
Step 2: Purchase Your Proxy
Once you've selected the right proxy, visit the provider's website and complete the purchasing process. Many providers offer various subscription plans, so choose the one that fits your budget and usage needs.
Step 3: Retrieve Your Proxy Information
After purchasing your proxy, the provider will send you the necessary information, including the proxy IP address, port number, username, and password. Be sure to keep this information secure and handy, as you'll need it to configure your proxy settings.
Step 4: Configure Your Proxy Settings
To set up your proxy for WoW, follow these steps:
For Windows:
To set up proxies in Windows, simply search for “Proxy Settings” in your windows search bar and open the search result.
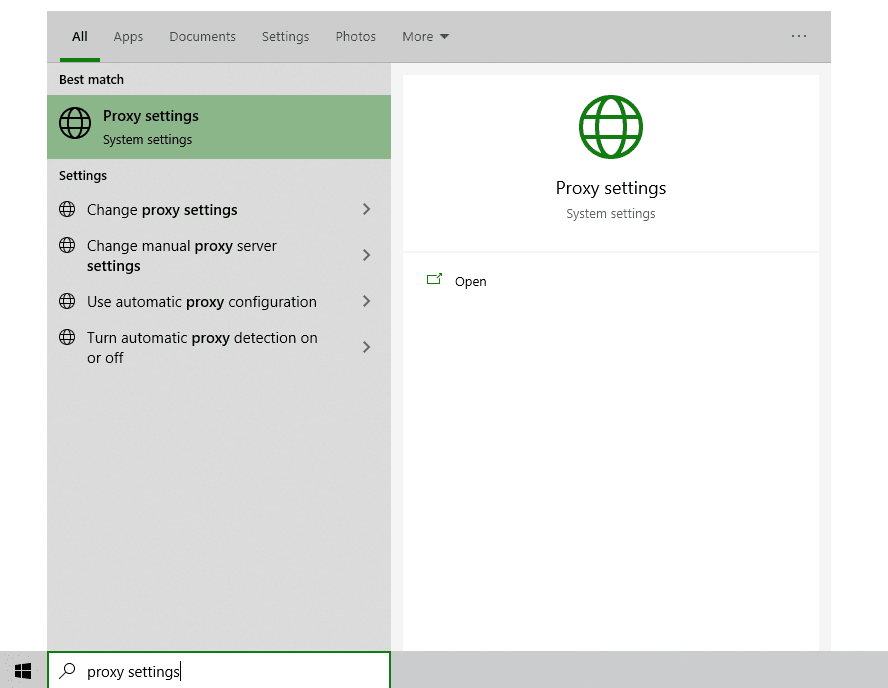
You are then given two options to choose from: Automatic proxy setup or Manual proxy setup. If you want windows to automatically detect your proxy settings, choose the first option. Choose the second option if you want to utilize a specific ip address and port number.
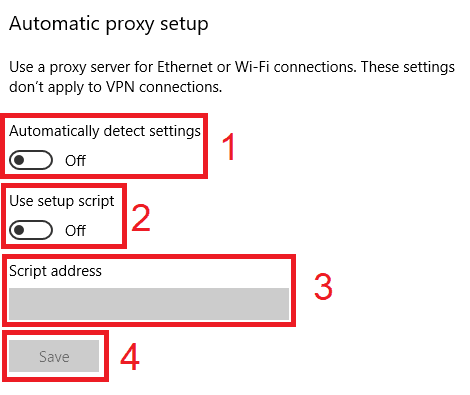
If you chose the first option, then:
- Turn on Automatically detect Settings
- Turn on Use setup script
- Enter the script address
- Click Save
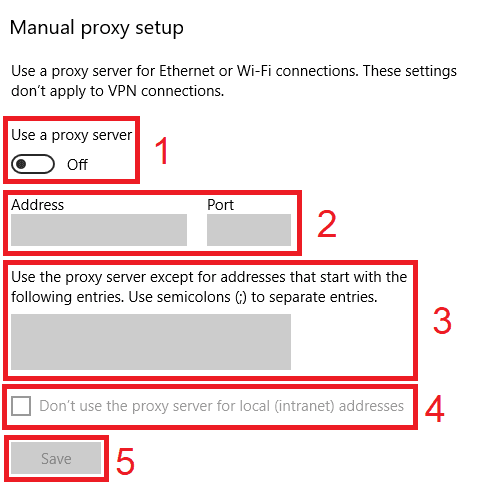
If you chose the second option, then:
- Turn on Use a proxy server
- Input both server address and port number
- If you have any addresses you would like to visit without a proxy, enter them here
- Turn on Don’t use the proxy server for local addresses check box if you want to access a local server without a proxy
- Click Save
For Mac.
To start configuring your proxy settings in MacOS, simply:
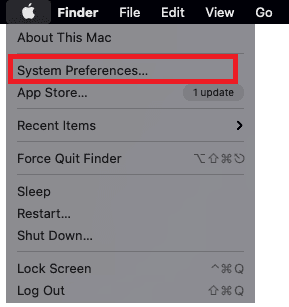
Step 1. Click on the Apple Icon.

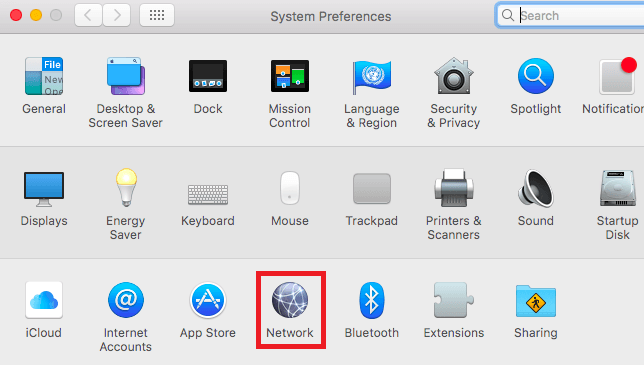
Step 2. On the drop down menu, click on “System Preferences”.
Step 3. Click on “Network”
Step 4. Click on “Advanced”
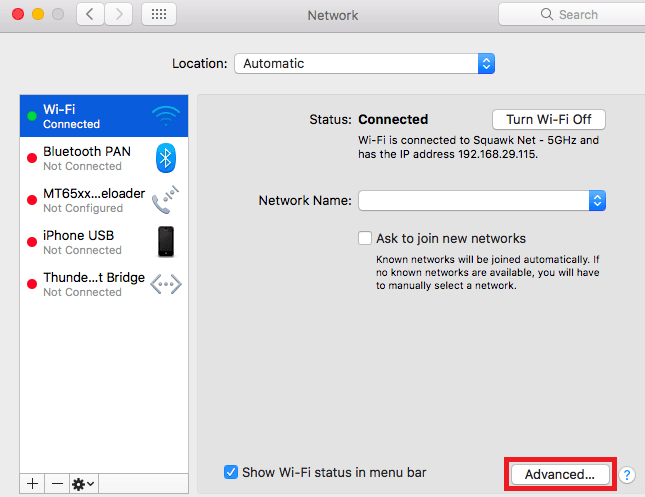
Note: Make sure to connect to your wi-fi first.
Step 5. Click on “Proxies”
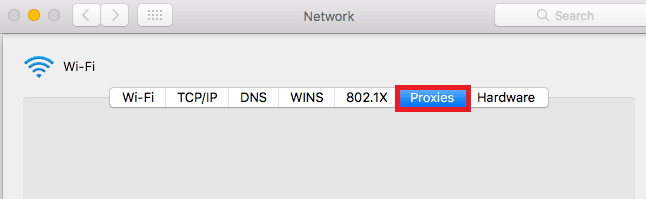
This should then redirect you to MacOS proxy settings. MacOS is more straightforward compared to windows. You only have one option which is to manually configure your proxy server.
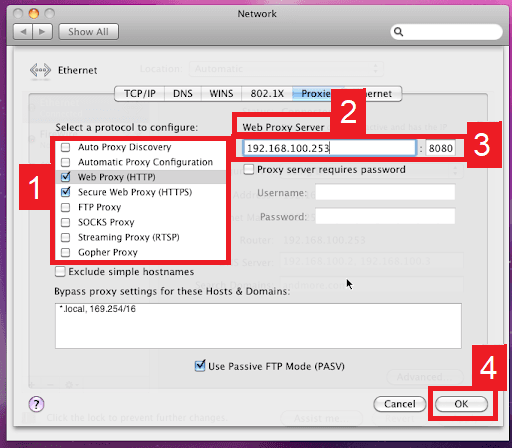
Here are the steps to follow:
- Select which proxy IP protocol you want to configure. This depends on which protocols your proxy service provider offers.
- Turn on Secure Web Proxy
- Input the Proxy Server Address and Port Number
- Click OK to save the configurations
Note: You may be prompted for your Mac user password to save your settings.
Now, your World of Warcraft client should be configured to use your proxy server. Enjoy your enhanced gaming experience!
Tips for Using Proxies with World of Warcraft
To ensure that you get the most out of your proxy for WoW, keep the following tips in mind:
Test Your Connection
Before diving into gameplay, test your connection to ensure that your proxy is working correctly. You can do this by attempting to access a server or by simply logging in to your WoW account.
Choose a Proxy Server Close to Your Desired WoW Server
To minimize latency and improve your gaming experience, select a proxy server that is geographically close to the WoW server you want to access.
Monitor Your Proxy Performance
Keep an eye on your proxy's performance and make adjustments as needed. If you encounter issues such as slow connection speeds or frequent disconnections, consider switching to a different proxy provider or upgrading your subscription plan.
Stay Safe
Never share your proxy information with others, and always use a reputable provider to ensure your data's security.
In Conclusion:
Using proxies for World of Warcraft can significantly enhance your gaming experience, offering benefits such as improved performance, increased privacy, and access to restricted content. By carefully choosing the right proxy and following the steps outlined in this guide, you'll be well on your way to unlocking the full potential of your WoW gameplay. So, gear up, gather your party, and prepare for an epic adventure in Azeroth like never before!
