ZipLocal is a digital marketing service that provides businesses with the opportunity to reach their target audience. It can even help businesses reach a broader audience than their main audience. ZipLocal has many services but its top ones include SEO, or Search Engine Optimization, and Social Media Marketing.
Ziplocal contains a lot of information about various companies and you can use that data to generate leads. Simply getting all of that data manually though would take a lot of time and effort so if you want to extract that information quickly and efficiently, you need to use a web scraping tool and pair it with a ZipLocal proxy.
A ZipLocal proxy will act as a gateway between your device and the internet so any website you visit will only be able to see the IP address of the proxy server and your own IP address will be hidden. Through residential proxies and continuously rotating IP addresses, your web scraper would have a different IP on a set interval which makes your web traffic appear natural so those websites won’t ban you.
Let’s set up a ZipLocal proxy server.
For Windows:
To set up proxies in Windows, simply search for “Proxy Settings” in your windows search bar and open the search result.
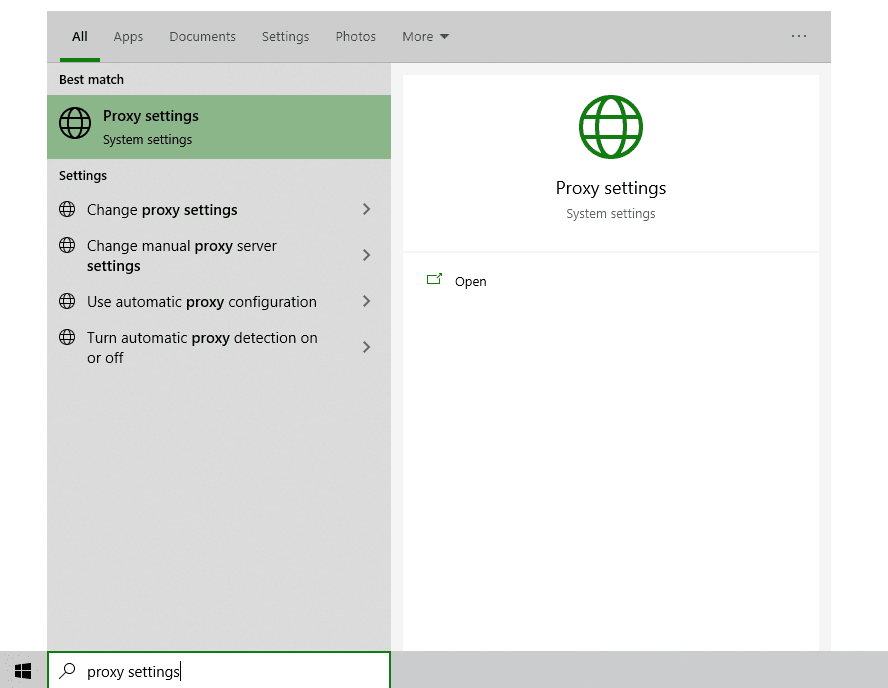
You are then given two options to choose from: Automatic proxy setup or Manual proxy setup. If you want windows to automatically detect your proxy settings, choose the first option. Choose the second option if you want to utilize a specific ip address and port number.
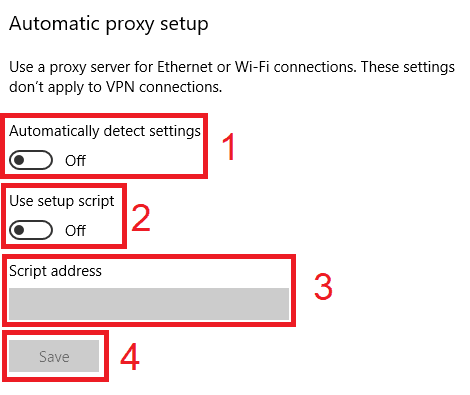
If you chose the first option, then:
- Turn on Automatically detect Settings
- Turn on Use setup script
- Enter the script address
- Click Save
If you chose the second option, then:
- Turn on Use a proxy server
- Input both server address and port number
- If you have any addresses you would like to visit without a proxy, enter them here
- Turn on Don’t use the proxy server for local addresses check box if you want to access a local server without a proxy
- Click Save
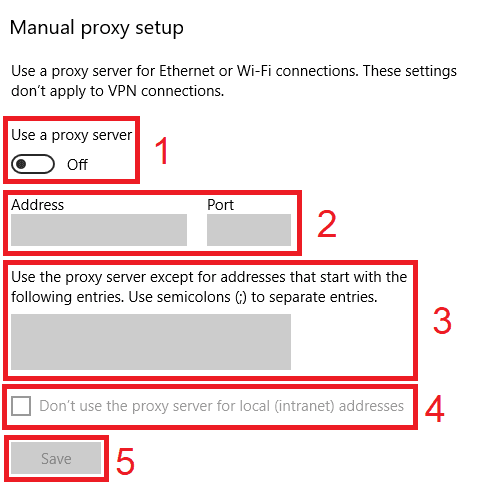 Image Alt Text: Windows Automatic Proxy Setup
For Mac:
To start configuring your proxy settings in MacOS, simply:
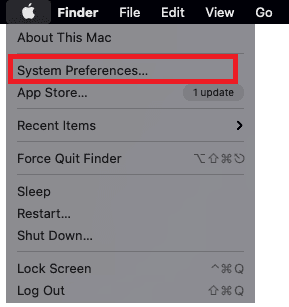
Step 1. Click on the Apple Icon.
Step 2. On the drop down menu, click on “System Preferences”.
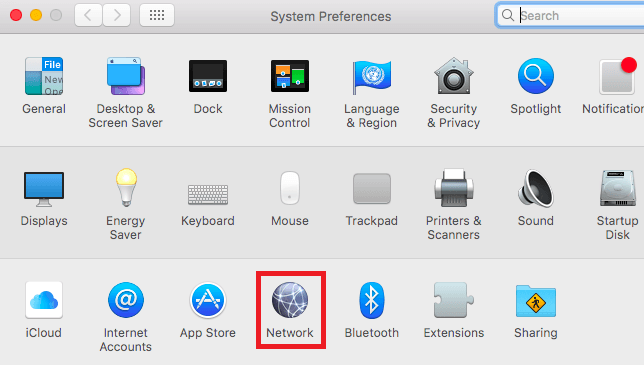
Step 3. Click on “Network”
Step 4. Click on “Advanced”
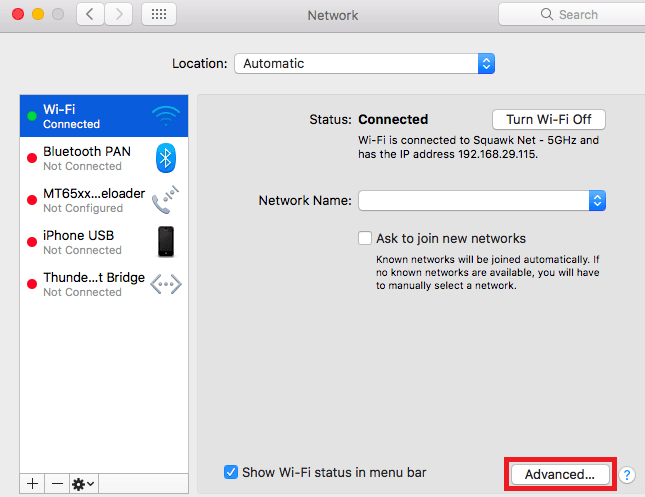
Note: Make sure to connect to your wi-fi first.
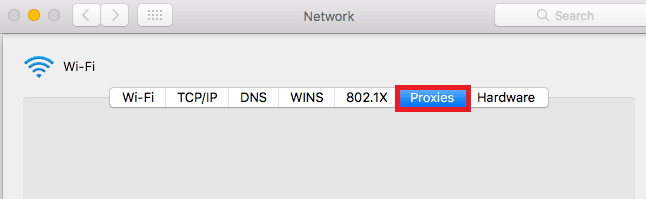
Step 5. Click on “Proxies”
This should then redirect you to MacOS proxy settings. MacOS is more straightforward compared to windows. You only have one option which is to manually configure your proxy server.
Here are the steps to follow:
- Select which proxy IP protocol you want to configure. This depends on which protocols your proxy service provider offers.
- Turn on Secure Web Proxy
- Input the Proxy Server Address and Port Number
- Click OK to save the configurations
Note: You may be prompted for your Mac user password to save your settings.
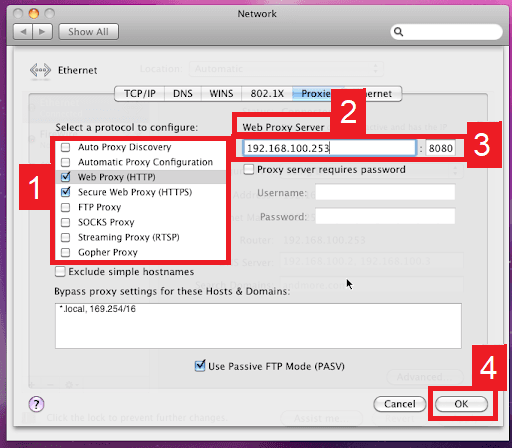 Image Alt Text: Configuring MacOS Proxy Settings
Congratulations! You have now finished configuring a ZipLocal proxy server.
