
Scrapy is an open-source web-crawling framework that can be used for free by anyone on the internet. Scrapy is mainly used for web crawling and web scraping. It is a fast and easy way to extract data from any web page and Zyte is currently maintaining it.
Installing Scrapy
To install Scrapy, you need a Python version of 3.7 or higher. It’s also recommended to install it in a dedicated virtualenv, so you can avoid any conflicts that may arise with your system packages.
Download Scrapy on your preferred platform.
To install Scrapy, you need to install Anaconda or Miniconda, open Python, and run the command:
conda install -c conda-forge scrapy
Alternatively, you can also run:
pip install Scrapy
If you’re using an Ubuntu system, then you need to first install all of these dependencies:
sudo apt-get install python3 python3-dev python3-pip libxml2-dev libxslt1-dev zlib1g-dev libffi-dev libssl-dev
If you’re using a macOS system, then you need to install the Xcode command line tools. You need to open a terminal window and run:
xcode-select --install
Congratulations! You have installed Scrapy on your device. Now, we can try web crawling a website and extracting its data.
Starting A Scrapy Project
To start a new Scrapy project, you need to input a directory where you would like your code to be stored. You need to run:
scrapy startproject scrapetest
Running this code will create a directory named “scrapetest” and inside it would be:
_scrapetest/ scrapy.cfg # deploy configuration file
scrapetest/             # project's Python module, you'll import your code from here
    __init__.py

    items.py

    middlewares.py

    pipelines.py

    settings.py

    spiders/          # a directory where you'll later put your spiders
        __init__.py
_
After you started a Scrapy project, you now need to create a Spider. A spider is necessary because it’s the one that Scrapy uses to extract information from a web page. For example purposes, we’ll be scraping the website “quotes.toscrape.com”.
Firstly, you need to run the code:
_import scrapy
class QuotesSpider(scrapy.Spider): name = "test" #Spider names should be unique for each spider you create
def start_requests(self):
    urls = [
        'https://quotes.toscrape.com/page/1/',	# Change these URLs to
web pages you want to scrape 'https://quotes.toscrape.com/page/2/', ] for url in urls: yield scrapy.Request(url=url, callback=self.parse)
def parse(self, response):
    page = response.url.split("/")[-2]
    filename = f'quotes-{page}.html'
    with open(filename, 'wb') as f:
        f.write(response.body)
    self.log(f'Saved file {filename}')
_
For the spider to start crawling, you need to run:
scrapy crawl test
You should then get an output that shows that you have crawled the “quotes.toscrape.com” website.
If you want to extract certain data from a web page, you can use the “yield” Python keyword, and run the code:
_import scrapy
class QuotesSpider(scrapy.Spider): name = "test" start_urls = [ 'https://quotes.toscrape.com/page/1/', 'https://quotes.toscrape.com/page/2/', ]
def parse(self, response):
    for quote in response.css('div.quote'):
        yield {
            'text': quote.css('span.text::text').get(),
            'author': quote.css('small.author::text').get(),
            'tags': quote.css('div.tags a.tag::text').getall(),
        }
_
This code extracts the texts, author, and tags from the webpage you scraped, which would be shown on the log.
If you want to scrape all the pages in a website, instead of just specific pages, then you can run:
_import scrapy
class QuotesSpider(scrapy.Spider): name = "test" start_urls = [ 'https://quotes.toscrape.com/page/1/', ]
def parse(self, response):
    for quote in response.css('div.quote'):
        yield {
            'text': quote.css('span.text::text').get(),
            'author': quote.css('small.author::text').get(),
            'tags': quote.css('div.tags a.tag::text').getall(),
        }

    next_page = response.css('li.next a::attr(href)').get()
    if next_page is not None:
        next_page = response.urljoin(next_page)
        yield scrapy.Request(next_page, callback=self.parse)
_
Now, you need to store the data that the spider extracted. To store the scraped data, simply run:
scrapy crawl test -O test.json
If you want to append any new content to an already existing file, you can run this code instead:
scrapy crawl quotes -o quotes.jsonl
Congratulations! You finished extracting and storing the data that you scraped with Scrapy. You can still add something to ensure that web scraping with Scrapy would be successful, and that is to utilize Scrapy proxies.
Configuring Scrapy Proxies
A Scrapy proxy will handle all of your web requests for you, so any website you scrape will only be able to see the IP address of the proxy server. Your IP address will be completely hidden. By continuously rotating IPs and utilizing residential proxies, websites will be deceived into thinking that your requests are from genuine users and not just someone using a web scraping bot like Scrapy.
For example purposes, we’ll be using a Geonode proxy. You can jump to “Acquiring Proxy Server Details With Geonode” if you still haven’t gotten your Geonode proxy details.
There are two methods to set up a proxy in Scrapy.
The first method is utilizing Scrapy’s middleware, called HTTPProxyMiddleware, which automatically sets up your proxy parameter as the default proxy.
You can run:
_def start_requests(self): for url in self.start_urls: return Request(url=url, callback=self.parse, headers={"User-Agent": "My UserAgent"}, meta={"proxy": "premium-residential.geonode.com:9001"}) _
The second method would be to create your own middleware. This method is more isolated and gives you a larger degree of freedom.
You can run:
_from w3lib.http import basic_auth_header
DOWNLOADER_MIDDLEWARES = { 'myproject.middlewares.CustomProxyMiddleware': 350, 'scrapy.downloadermiddlewares.httpproxy.HttpProxyMiddleware': 400, }
class CustomProxyMiddleware(object): def process_request(self, request, spider): request.meta[“proxy”] = "premium-residential.geonode.com:9001" request.headers[“Proxy-Authorization”] = basic_auth_header(“geonode_xbYe9H2LYr”, “9806022c-cd4a-4776-a053-73fee44344dd”) _
Congratulations! You have added a proxy server when you scrape any website with Scrapy. If you want to verify if your proxy is working, you can visit https://www.geonode.com/what-is-my-ip.
Acquiring Proxy Server Details With Geonode
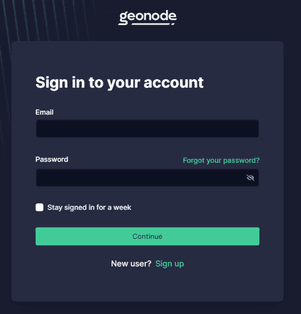
Step 1. Go to Geonode and log in with your existing account or sign up to create a new one.
Step 2. On the Home Page, click on “Residential Services”.

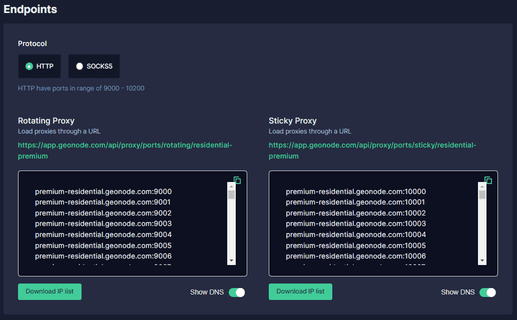
Step 3. Scroll down until you see “Endpoints”.
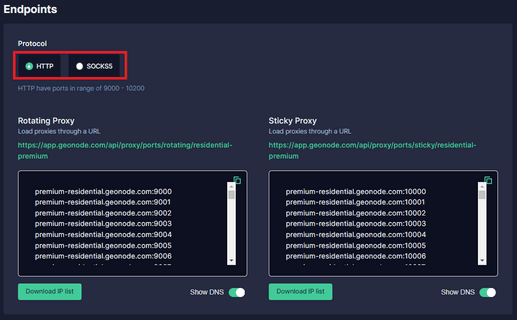
Step 4. Choose which “Proxy Protocol” you want to utilize: “HTTP Protocol” or “SOCKS5 Protocol”.
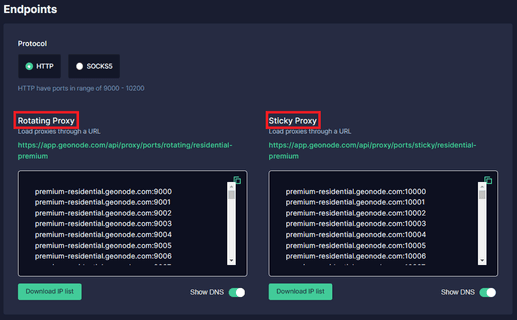
Step 5. Select which "Session Type" you want to utilize: “Rotating Proxy” or Sticky Proxy.
Step 6. Choose which proxy you want to utilize. For example purposes, we’ll be using the highlighted proxy “premium-residential.geonode.com:9001”.
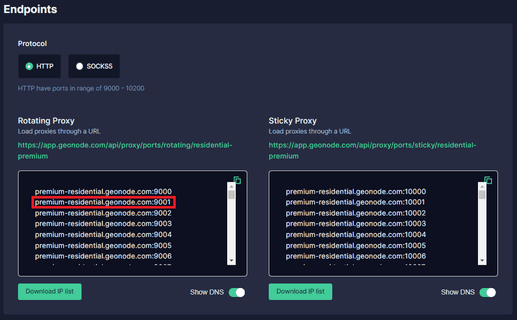
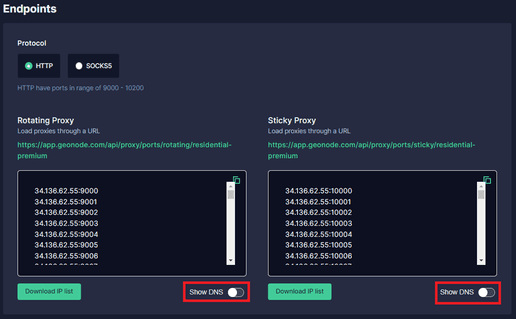
If you want to use an IP address instead of a DNS, simply turn off the Show DNS button, and IP addresses will show up.
Step 7. Now you need your proxy account’s “Authentication Details”. For Geonode, this is on your account’s home page.
