Atlassian Confluence is an incredible collaborative documentation tool that helps teams work together and stay organized. However, as with any web-based platform, security and efficiency are paramount, especially when it comes to extracting data. That's where proxies come in handy! In this comprehensive guide, we'll dive into why proxies are essential for Confluence, the different types of proxies, and, most importantly, how to set them up for your Confluence workspace. Buckle up; it's going to be an enlightening ride!
Why Use Proxies with Confluence?
You might be wondering, "Why on earth do I need proxies for Confluence?" Well, my friend, proxies are crucial for several reasons:
1. Data extraction:
If you're looking to extract large volumes of data from your Confluence space, manual extraction just won't cut it. You'll need a scraper for fast, efficient data extraction. However, Confluence has strict restrictions against bots, so using a proxy is essential to avoid account bans.
2. Enhanced security:
A proxy acts as an intermediary between your device and the internet, masking your IP address and providing an extra layer of security against cyber threats.
3. Bypassing geo-restrictions:
Residential proxies for example can help you access Confluence content that may be restricted due to your location, ensuring seamless collaboration with your global team members.
How To Use Proxies With Confluence
For Windows:
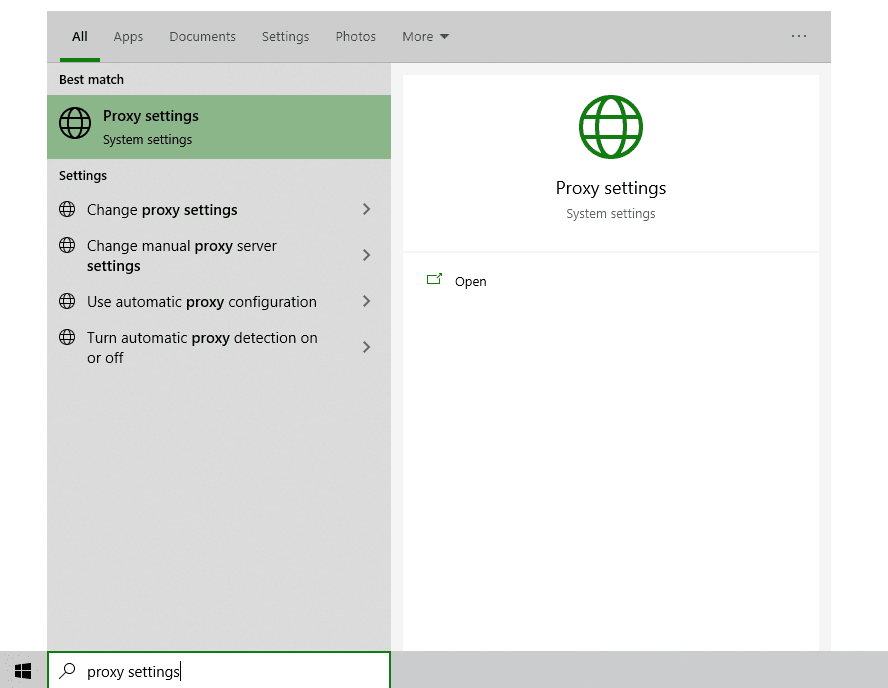
To set up proxies in Windows, simply search for “Proxy Settings” in your windows search bar and open the search result.
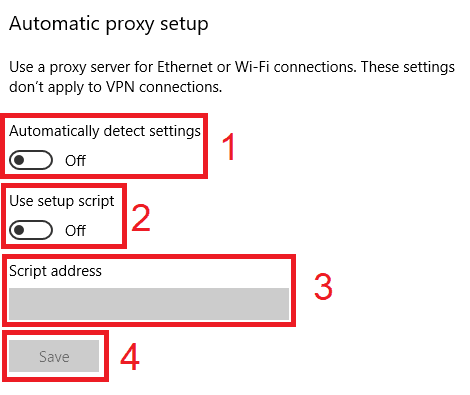
You are then given two options to choose from: Automatic proxy setup or Manual proxy setup. If you want windows to automatically detect your proxy settings, choose the first option. Choose the second option if you want to utilize a specific ip address and port number.
If you chose the first option, then:
- Turn on Automatically detect Settings
- Turn on Use setup script
- Enter the script address
- Click Save
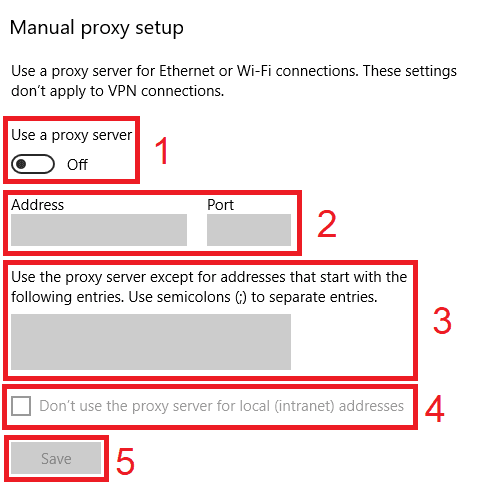
If you chose the second option, then:
- Turn on Use a proxy server
- Input both server address and port number
- If you have any addresses you would like to visit without a proxy, enter them here
- Turn on Don’t use the proxy server for local addresses check box if you want to access a local server without a proxy
- Click Save
For Mac.
To start configuring your proxy settings in MacOS, simply:
Step 1. Click on the Apple Icon.
![]()
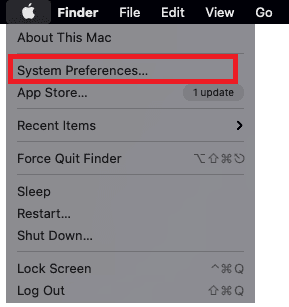
Step 2. On the drop down menu, click on “System Preferences”.
Step 3. Click on “Network”
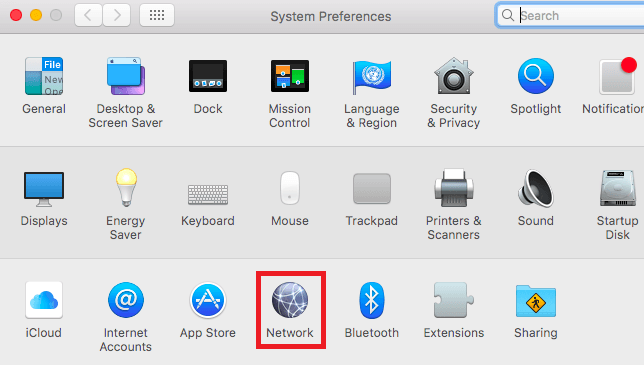
Step 4. Click on “Advanced”
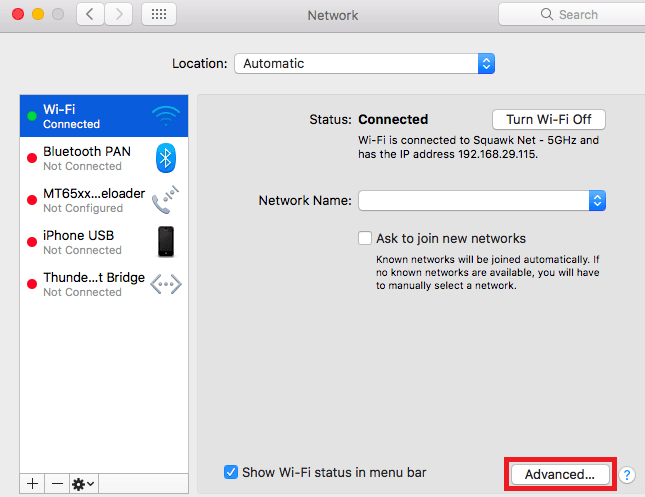
Note: Make sure to connect to your wi-fi first.
Step 5. Click on “Proxies”

This should then redirect you to MacOS proxy settings. MacOS is more straightforward compared to windows. You only have one option which is to manually configure your proxy server.
Here are the steps to follow:
- Select which proxy IP protocol you want to configure. This depends on which protocols your proxy service provider offers.
- Turn on Secure Web Proxy
- Input the Proxy Server Address and Port Number
- Click OK to save the configurations
Note: You may be prompted for your Mac user password to save your settings.
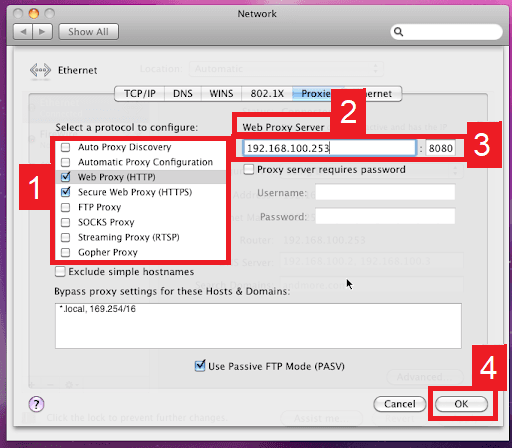
Image Alt Text: Configuring MacOS Proxy Settings
For Mobile:
To set up a Confluence proxy server for your mobile device, simply change your phone’s proxy settings. The Confluence mobile app will automatically copy your phone’s proxy settings whenever you use it. This is applicable for both Android and IOS. Here’s a thorough guide for Android and another one for iPhone.
Congratulations! You have now finished configuring your Confluence proxy server.

