Quicken is a management tool and software that allows users to handle their personal finances efficiently. It acts as a quick solution to managing your spending, paying and viewing bills, creating budgets, tracking investments, and many more. There are four subscription plans you can use and the higher your subscription, the more features you’ll have.
Quicken will record your account’s IP address and location/region. If you log in to another device in a different country, you may be blocked since Quicken’s security is extremely strict. This can prove to be annoying especially if you’re traveling to other countries a lot. To prevent being blocked, you need to utilize a Quicken proxy.
A Quicken proxy will let you change your IP address to your original location. For example, you live in the USA and you’re planning to travel to another country. When you reach that country, you can use a US proxy to change your original IP to a US IP. You won’t have to worry about your account getting banned by Quicken anymore.
The best Quicken proxies to use would be either residential proxies or datacenter proxies, depending on what you want. If you want to effectively bypass any restriction, whether it be a geo-restriction or a network restriction, then residential proxies are the way to go. If you want a faster internet connection and you’re okay with losing a bit of reliability, then datacenter proxies are for you.
Let’s set up a Quicken proxy server.
For Windows:
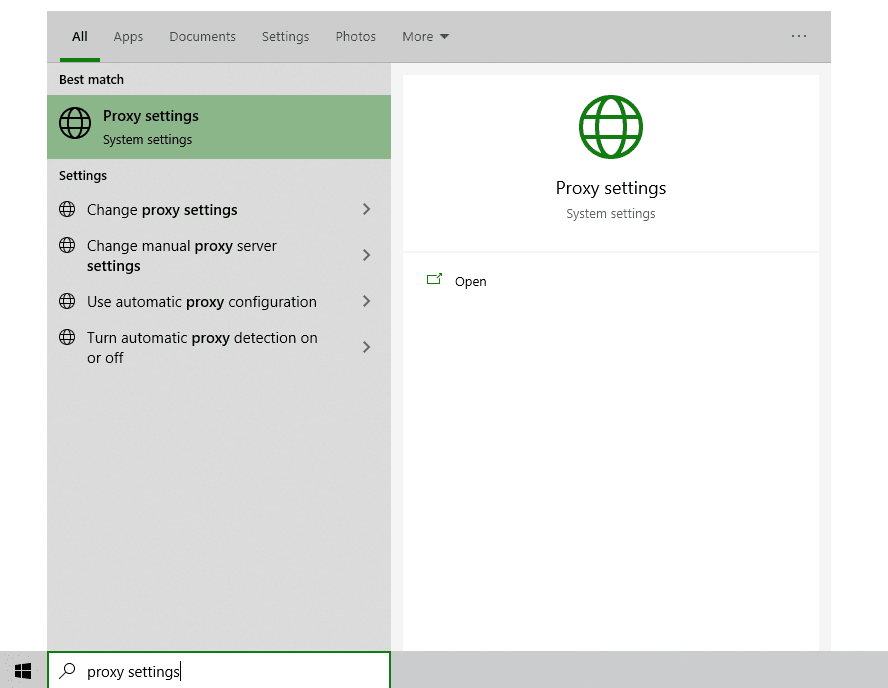
To set up proxies in Windows, simply search for “Proxy Settings” in your windows search bar and open the search result.
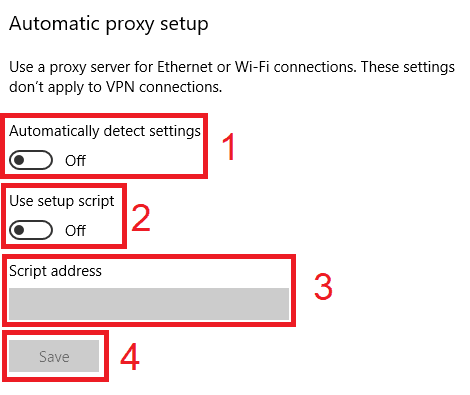
You are then given two options to choose from: Automatic proxy setup or Manual proxy setup. If you want windows to automatically detect your proxy settings, choose the first option. Choose the second option if you want to utilize a specific ip address and port number.
If you chose the first option, then:
- Turn on Automatically detect Settings
- Turn on Use setup script
- Enter the script address
- Click Save
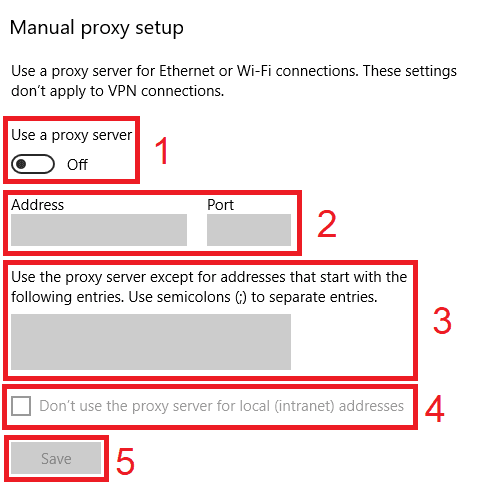
If you chose the second option, then:
- Turn on Use a proxy server
- Input both server address and port number
- If you have any addresses you would like to visit without a proxy, enter them here
- Turn on Don’t use the proxy server for local addresses check box if you want to access a local server without a proxy
- Click Save
For Mac.
To start configuring your proxy settings in MacOS, simply:
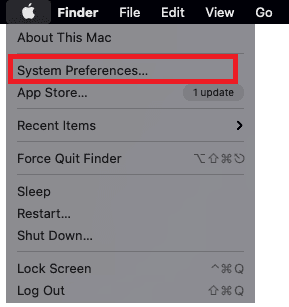
Step 1. Click on the Apple Icon.
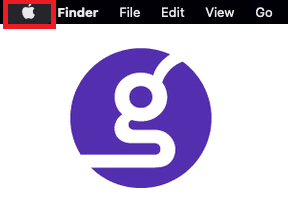
Step 2. On the drop down menu, click on “System Preferences”.
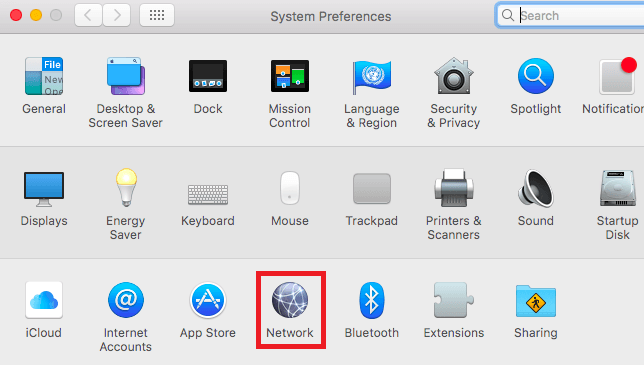
Step 3. Click on “Network”
Step 4. Click on “Advanced”
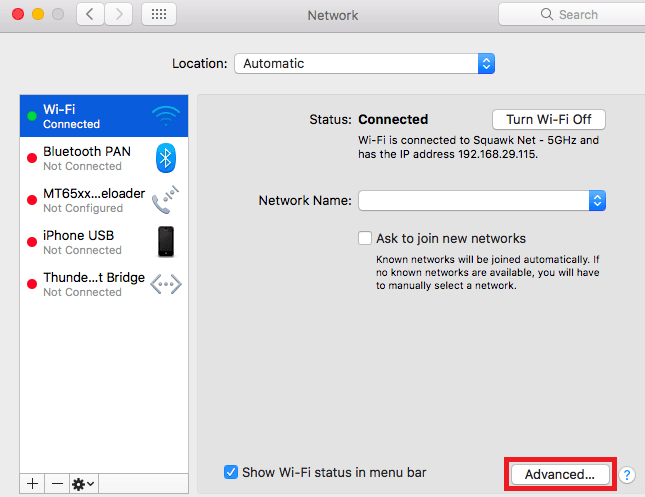
Note: Make sure to connect to your wi-fi first.
Step 5. Click on “Proxies”

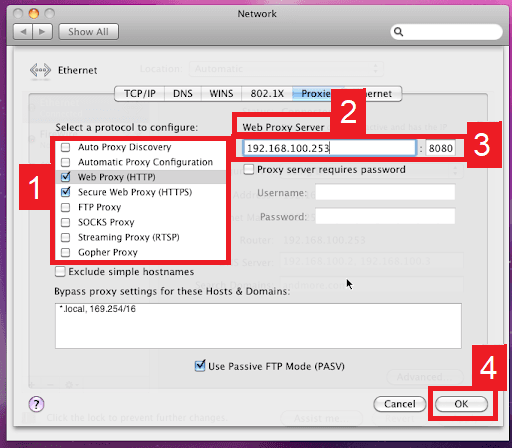
This should then redirect you to MacOS proxy settings. MacOS is more straightforward compared to windows. You only have one option which is to manually configure your proxy server.
Here are the steps to follow:
- Select which proxy IP protocol you want to configure. This depends on which protocols your proxy service provider offers.
- Turn on Secure Web Proxy
- Input the Proxy Server Address and Port Number
- Click OK to save the configurations
Note: You may be prompted for your Mac user password to save your settings.
For Mobile:
For Mobile:
To set up a Quicken proxy server for your mobile device, simply change your phone’s proxy settings. The Quicken mobile app will automatically copy your phone’s proxy settings whenever you use it. This is applicable for both Android and IOS.
Here’s a thorough guide for Android and another one for iPhone.
Congratulations! You have now finished configuring your Quicken proxy server.


