Scraping Robot is a web scraping API that enables users to extract data from any website into JSON. It is built to support the more experienced users like developers and easily allows users to plug in the Scraping Robot API. Scraping Robot also handles all the problems that users may encounter in web scraping like proxy management and CAPTCHA solving so users only have to focus on extracting data.
As an automation tool, websites will ban your account and IP address if they detect that you’re using Scraping Robot on their website. This is because websites have strict restrictions against the use of bots on their site. Without a Scraping Robot proxy, this may happen to you when scraping a website.
A Scraping Robot proxy will handle all of your data traffic and will act as an intermediary between your device and the internet. Through utilizing residential proxies and continuously rotating IP addresses, Scraping Robot would have a different IP address each time it sends a request so websites will be deceived into thinking that those requests come from multiple users.
Let’s set up a Scraping Robot proxy server.
For Windows:
To set up proxies in Windows, simply search for “Proxy Settings” in your windows search bar and open the search result.
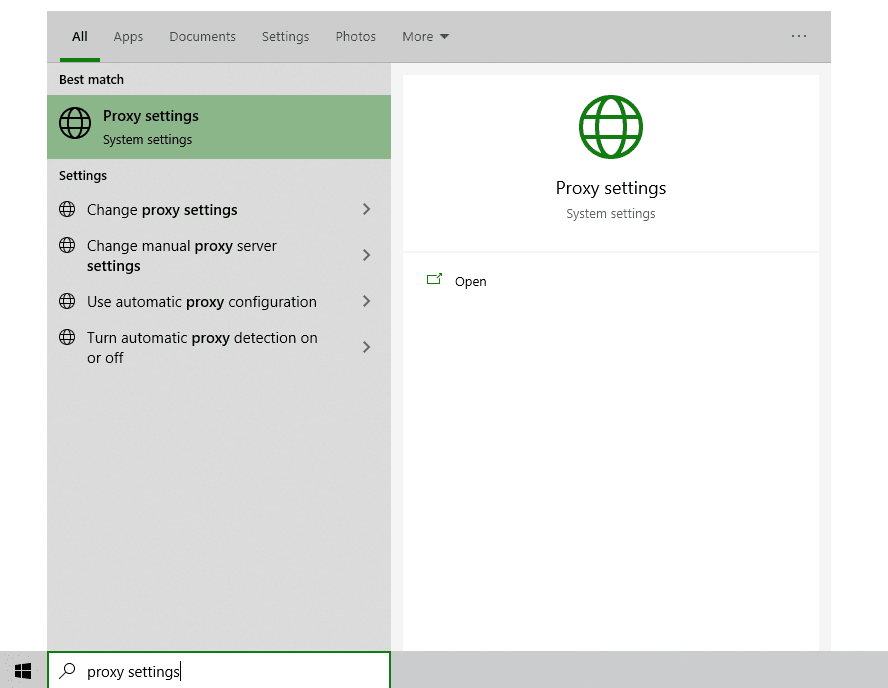
You are then given two options to choose from: Automatic proxy setup or Manual proxy setup. If you want windows to automatically detect your proxy settings, choose the first option. Choose the second option if you want to utilize a specific ip address and port number.
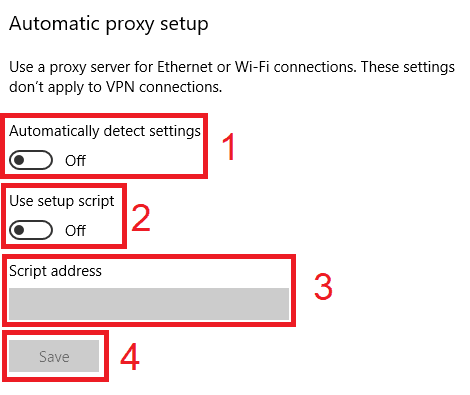
If you chose the first option, then:
- Turn on Automatically detect Settings
- Turn on Use setup script
- Enter the script address
- Click Save
If you chose the second option, then:
- Turn on Use a proxy server
- Input both server address and port number
- If you have any addresses you would like to visit without a proxy, enter them here
- Turn on Don’t use the proxy server for local addresses check box if you want to access a local server without a proxy
- Click Save
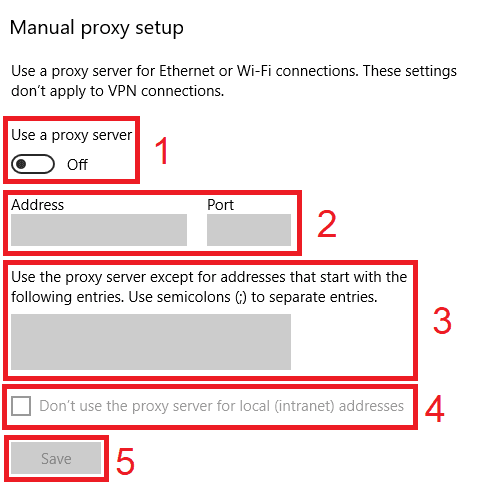 Image Alt Text: Windows Automatic Proxy Setup
For Mac:
To start configuring your proxy settings in MacOS, simply:
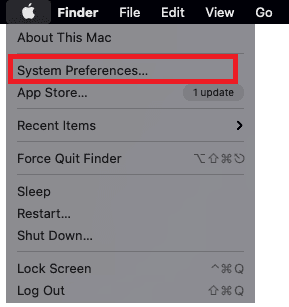
Step 1. Click on the Apple Icon.

Step 2. On the drop down menu, click on “System Preferences”.
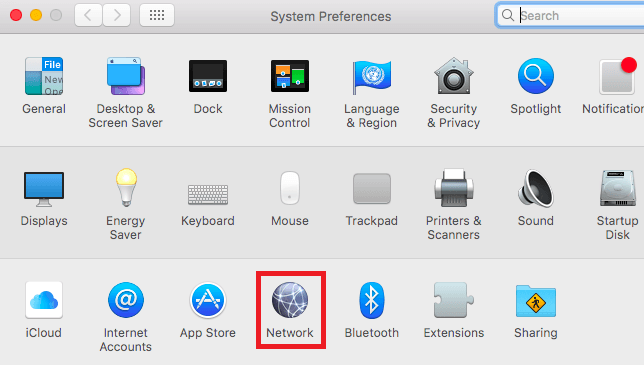
Step 3. Click on “Network”
Step 4. Click on “Advanced”
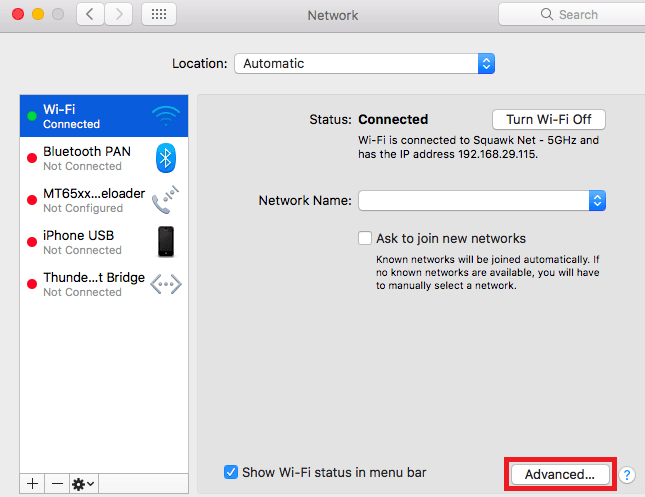
Note: Make sure to connect to your wi-fi first.
Step 5. Click on “Proxies”
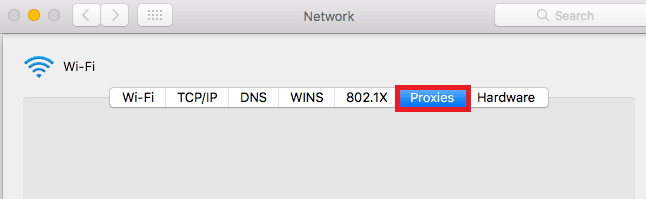
This should then redirect you to MacOS proxy settings. MacOS is more straightforward compared to windows. You only have one option which is to manually configure your proxy server.
Here are the steps to follow:
- Select which proxy IP protocol you want to configure. This depends on which protocols your proxy service provider offers.
- Turn on Secure Web Proxy
- Input the Proxy Server Address and Port Number
- Click OK to save the configurations
Note: You may be prompted for your Mac user password to save your settings.
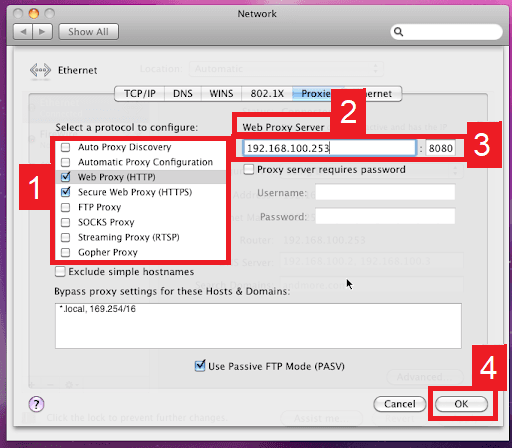 Image Alt Text: Configuring MacOS Proxy Settings
Congratulations! You have now finished configuring a Scraping Robot proxy server.
