Shopify is an e-commerce platform that allows its users to set up online stores and sell their products. It has a subscription based model and a user-friendly application that anyone can use. Shopify has a lot of features and tools that help its users ease their e-commerce experience ranging from amazing themes to seo marketing tools.
Like other popular e-commerce platforms, Shopify has also attracted the attention of marketers that want to scrape data from the various Shopify sites and also from sneakerheads that use bots to get their favourite sneakers. Shopify has strict rules against such behaviors and bans any account’s IP address if it is recognized. The only way around this would be to use Shopify proxies.
Shopify proxies work as standard proxies, where they act as an intermediary between your computer and Shopify sites, and also as a Shopify app proxy, where it can redirect to any other specified URL that the app designer chooses. The proxies can help scrapers gather information from any Shopify store and enable sneakerheads to use sneaker bots on any of the shops that are hosted on Shopify.
The best Shopify proxies are usually residential proxies. Residential proxies are more secure and effectively minimizes the chances of you getting banned by any of the Shopify sites because residential proxies use real IP addresses from actual people from different locations worldwide making your bots appear as “real” people. Datacenter proxies can be used on Shopify sites that have less strict restrictions against scraping, bots, or any other automated tools.
Let’s get started.
For Windows:
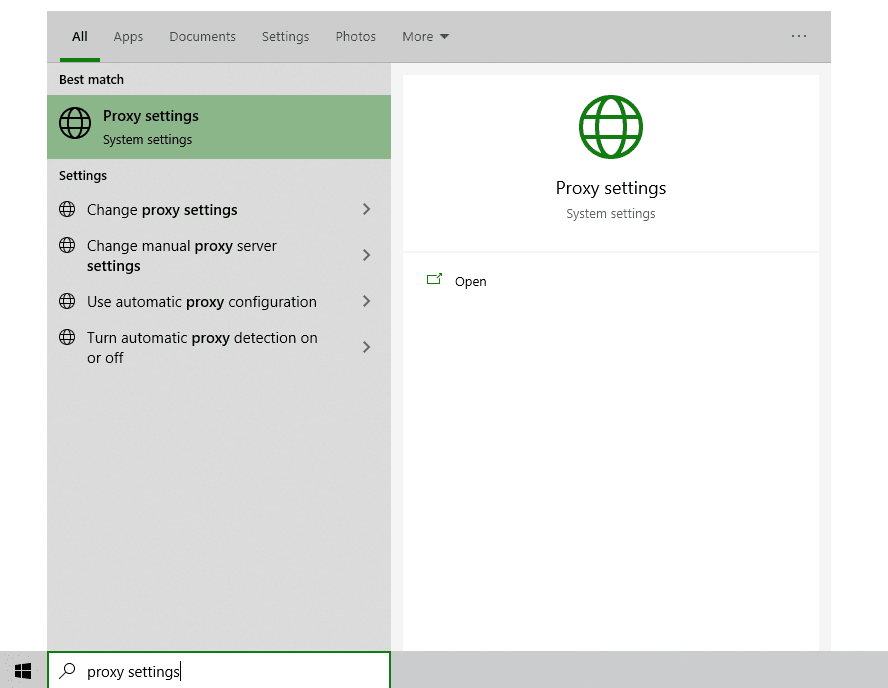
To set up proxies in Windows, simply search for “Proxy Settings” in your windows search bar and open the search result.
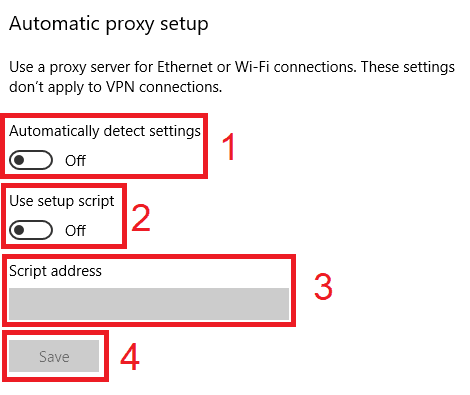
You are then given two options to choose from: Automatic proxy setup or Manual proxy setup. If you want windows to automatically detect your proxy settings, choose the first option. Choose the second option if you want to utilize a specific ip address and port number.
If you chose the first option, then:
- Turn on Automatically detect Settings
- Turn on Use setup script
- Enter the script address
- Click Save
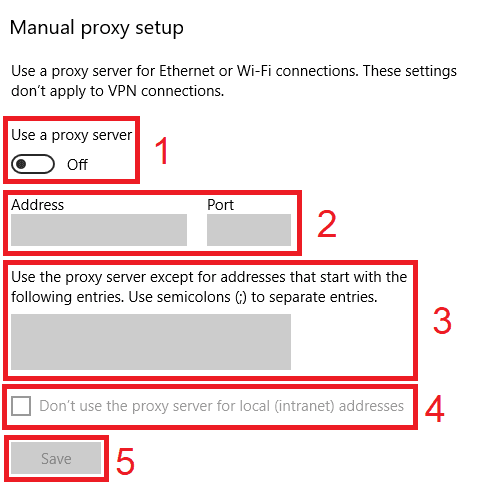
If you chose the second option, then:
- Turn on Use a proxy server
- Input both server address and port number
- If you have any addresses you would like to visit without a proxy, enter them here
- Turn on Don’t use the proxy server for local addresses check box if you want to access a local server without a proxy
- Click Save
For Mac.
To start configuring your proxy settings in MacOS, simply:
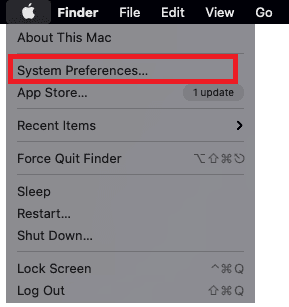
Step 1. Click on the Apple Icon.

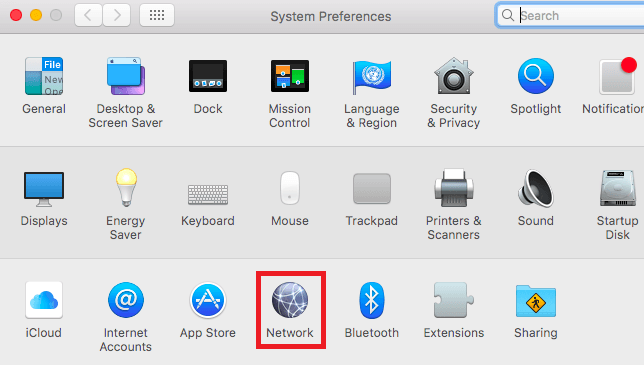
Step 2. On the drop down menu, click on “System Preferences”.
Step 3. Click on “Network”
Step 4. Click on “Advanced”
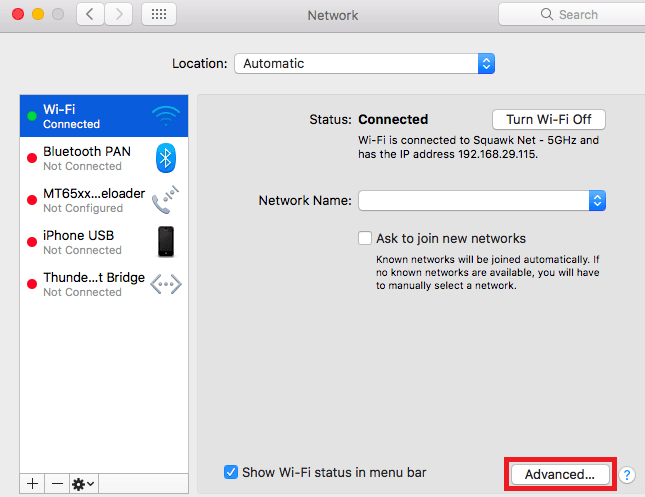
Note: Make sure to connect to your wi-fi first.
Step 5. Click on “Proxies”

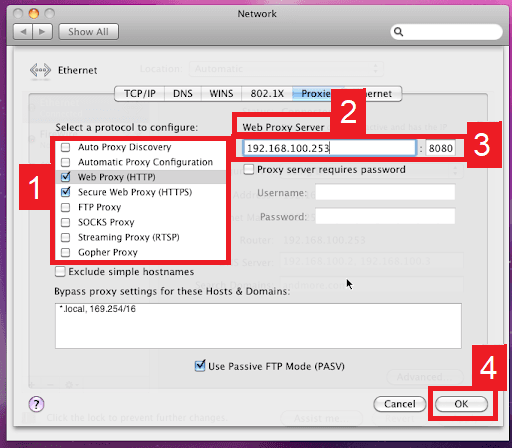
This should then redirect you to MacOS proxy settings. MacOS is more straightforward compared to windows. You only have one option which is to manually configure your proxy server.
Here are the steps to follow:
- Select which proxy IP protocol you want to configure. This depends on which protocols your proxy service provider offers.
- Turn on Secure Web Proxy
- Input the Proxy Server Address and Port Number
- Click OK to save the configurations
Note: You may be prompted for your Mac user password to save your settings.
For Mobile:
To configure Shopify mobile proxies, simply change your phone’s proxy settings. Shopify’s proxy settings are copied from your phone’s proxy settings whenever you use it. This is applicable for both Android and IOS.
Here’s a thorough guide for Android and another one for iPhone.
Congratulations! You have now set up a proxy server for Shopify. Note that the first time you visit it, there will be a pop up asking for your login credentials.
Note: Make sure that the web browser you’re using for Shopify is automatically copying your system’s proxy settings. It’s recommended to use Google Chrome because it automatically does this.


