SoundCloud is an audio distribution platform where users can create, share, and discover various music and audio. It is the largest online community of independent artists, bands, and any other audio creators. As a user, you can stream and download music from any of your favorite artists for free, although there is a paid subscription to avoid ads.
Similar to other social media platforms, standing out from the rest of the crowd is quite difficult. You’re competing with a large number of other talented musicians and the chances of you naturally getting noticed would be pretty low. This is where SoundCloud bots come into play.
Through bot automation, you can stream and repost your music with no limits to increase your popularity rank, get higher on the charts, and attract new listeners. A single IP address would only count as one new viewer though, so you would need various different IP addresses that can be provided by using SoundCloud proxies.
SoundCloud proxies mask your IP address and makes any website you visit see a different IP address. With rotating proxies, you can change this IP address at a set interval. This allows your SoundCloud automation bot to have a different IP address each time it reposts your music. The best proxy for SoundCloud would be residential proxies as these types of proxies use actual IP addresses from real devices.
Proxies also have other useful cases. For example, you want to stream songs that are geo-restricted. Artists sometimes limit their songs to a specific audience and country. A SoundCloud proxy can unblock these songs by changing your location to that specific country or location. Proxies also give you an increase in internet security and total anonymity when browsing the internet.
Let’s set up a SoundCloud proxy server.
Note: Make sure that the web browser you’re using for SoundCloud is set to automatically copy your computer’s proxy settings. Google Chrome automatically does this, so it’s recommended to use it.
For Windows:
To set up proxies in Windows, simply search for “Proxy Settings” in your windows search bar and open the search result.
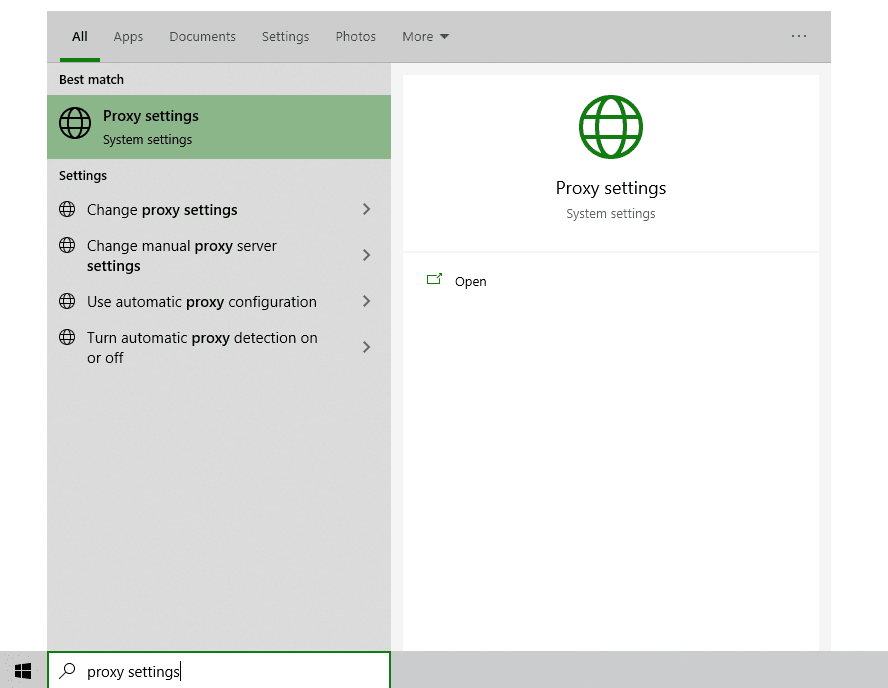
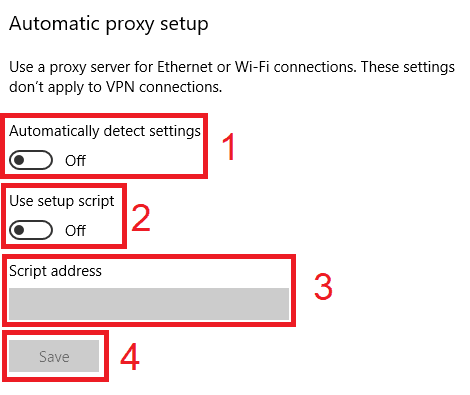
You are then given two options to choose from: Automatic proxy setup or Manual proxy setup. If you want windows to automatically detect your proxy settings, choose the first option. Choose the second option if you want to utilize a specific ip address and port number.
If you chose the first option, then:
- Turn on Automatically detect Settings
- Turn on Use setup script
- Enter the script address
- Click Save
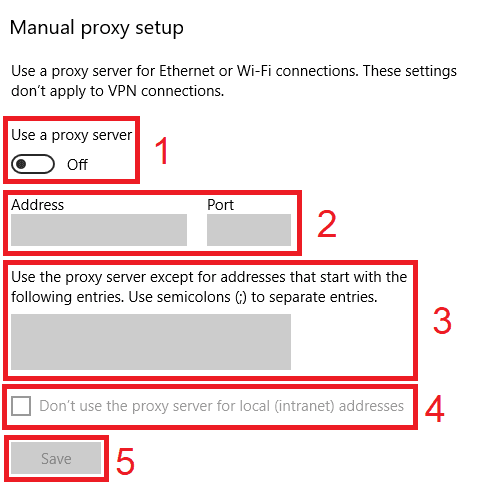
If you chose the second option, then:
- Turn on Use a proxy server
- Input both server address and port number
- If you have any addresses you would like to visit without a proxy, enter them here
- Turn on Don’t use the proxy server for local addresses check box if you want to access a local server without a proxy
- Click Save
For Mac.
To start configuring your proxy settings in MacOS, simply:
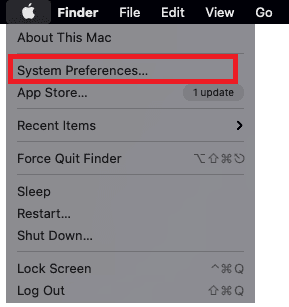
Step 1. Click on the Apple Icon.
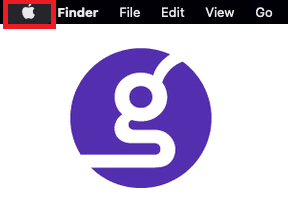
Step 2. On the drop down menu, click on “System Preferences”.
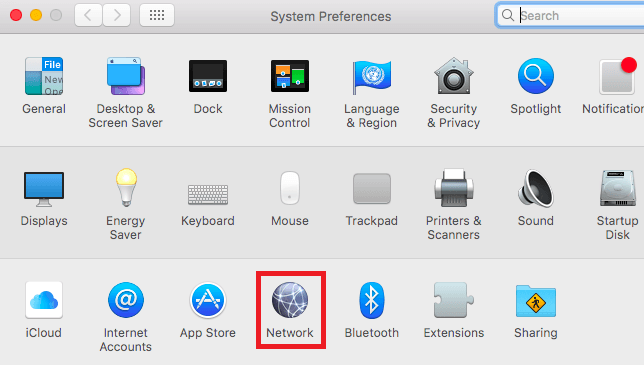
Step 3. Click on “Network”
Step 4. Click on “Advanced”
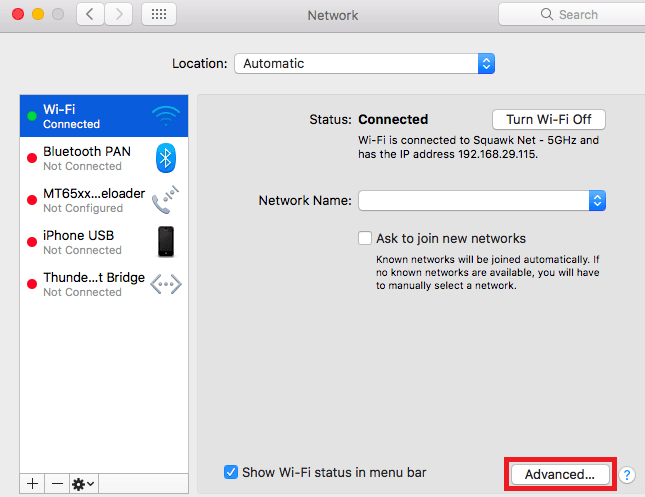
Note: Make sure to connect to your wi-fi first.
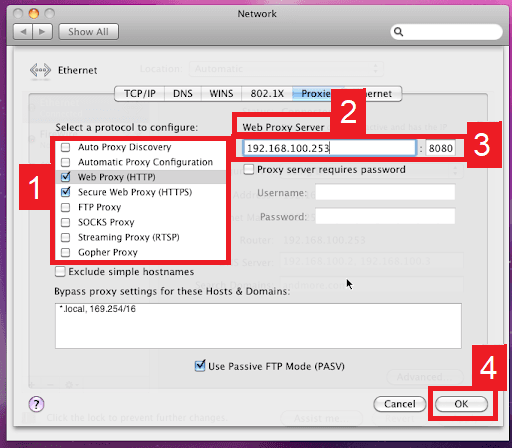
Step 5. Click on “Proxies”

This should then redirect you to MacOS proxy settings. MacOS is more straightforward compared to windows. You only have one option which is to manually configure your proxy server.
Here are the steps to follow:
- Select which proxy IP protocol you want to configure. This depends on which protocols your proxy service provider offers.
- Turn on Secure Web Proxy
- Input the Proxy Server Address and Port Number
- Click OK to save the configurations
Note: You may be prompted for your Mac user password to save your settings.
For Mobile:
To set up a mobile SoundCloud proxy server, simply change your phone’s proxy settings. SoundCloud will automatically copy your phone’s proxy settings whenever you use it. This is applicable for both Android and IOS. Here’s a thorough guide for Android and another one for iPhone.
Congratulations! You have now finished configuring a SoundCloud proxy server. Note that the first time you visit it, there will be a pop up asking for your login credentials.


