Gmail is an email service that was provided by Google for free where users can send and receive emails, block spam, and do all other basic email tasks. Users can access Gmail on any web browser or on their mobile devices. Gmail has more than 1.5 billion users worldwide because of its simplicity and it takes little effort to master using it. It’s also free to create a Gmail account. Businesses and individuals alike can benefit from data scraping to gather useful information from Gmail, such as email addresses and customer data, which can be helpful for marketing and networking purposes.
Even with Gmail’s popularity and worldwide use, not every country and location has enabled access to it. Some countries such as Iran, China, Cuba, and many others have restricted access to Gmail. Even some networks, like in schools, have banned Gmail. The only way to bypass these restrictions is to set up a Gmail proxy.
One effective method to find a reliable proxy for Gmail is by searching for a free proxy list for Gmail on the internet. These lists provide numerous proxy options that are specifically tailored for use with Gmail, enabling you to bypass restrictions and access your emails safely and securely.
Gmail proxies are simply regular proxies that hide your IP address from the internet. Any website you visit or software that connects to the internet would only be able to see the IP address of the proxy server you’re using and wouldn’t be able to see your actual IP address. Through a Gmail proxy, you can choose your IP address and corresponding location to bypass any geo and network restriction you may face.
Gmail proxies also have other uses for you. By constantly changing your IP address with rotating proxies, you can prevent any hackers or users with malicious intent from tracking your location while also giving you total anonymity when browsing the internet. A Gmail proxy can even help you reduce your loading times when using Gmail.
Let’s set up a Gmail proxy server.
For Windows:
To set up proxies in Windows, simply search for “Proxy Settings” in your windows search bar and open the search result.
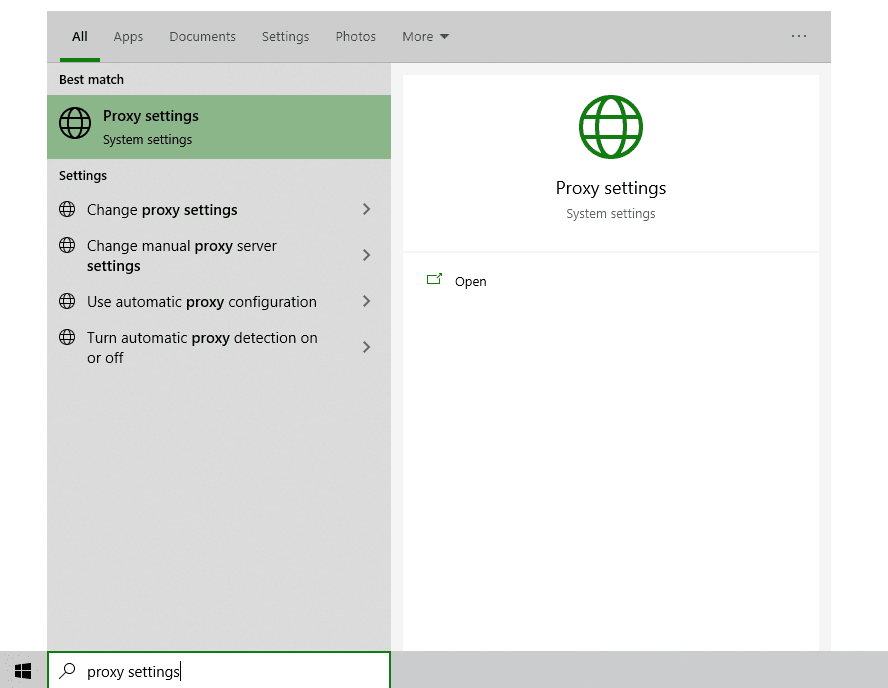
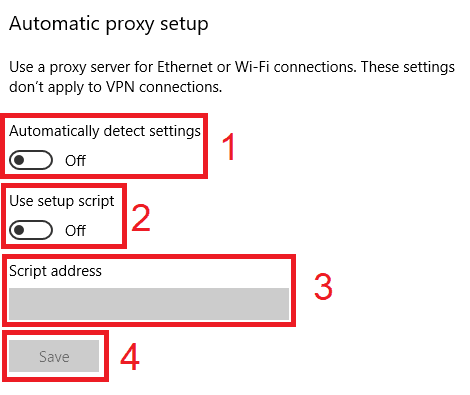
You are then given two options to choose from: Automatic proxy setup or Manual proxy setup. If you want windows to automatically detect your proxy settings, choose the first option. Choose the second option if you want to utilize a specific ip address and port number.
If you chose the first option, then:
- Turn on Automatically detect Settings
- Turn on Use setup script
- Enter the script address
- Click Save
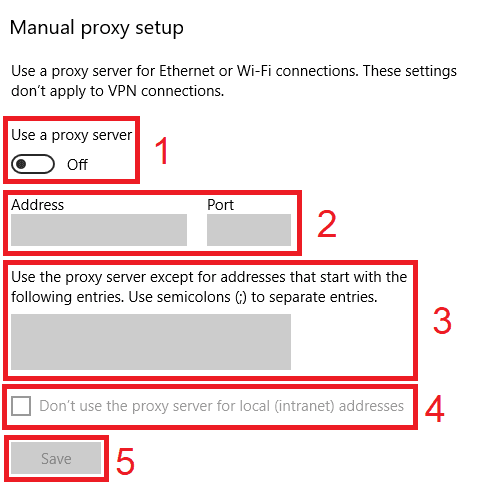
If you chose the second option, then:
- Turn on Use a proxy server
- Input both server address and port number
- If you have any addresses you would like to visit without a proxy, enter them here
- Turn on Don’t use the proxy server for local addresses check box if you want to access a local server without a proxy
- Click Save
For Mac.
To start configuring your proxy settings in MacOS, simply:
Step 1. Click on the Apple Icon.
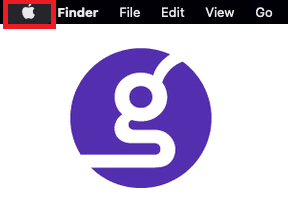
Step 2. On the drop down menu, click on “System Preferences”.
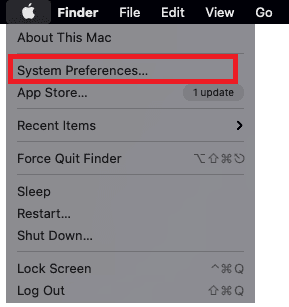
Step 3. Click on “Network”
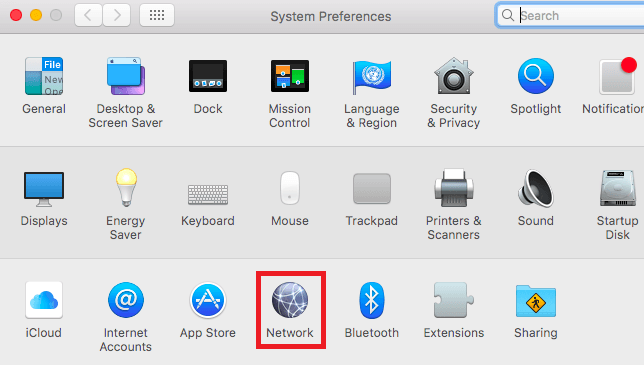
Step 4. Click on “Advanced”
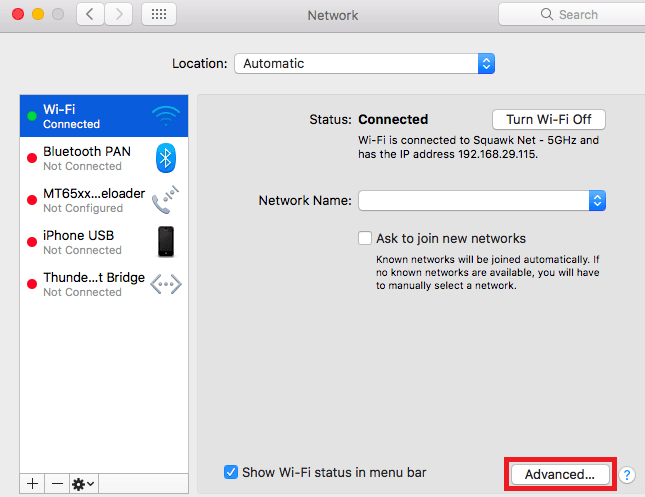
Note: Make sure to connect to your wi-fi first.
Step 5. Click on “Proxies”

This should then redirect you to MacOS proxy settings. MacOS is more straightforward compared to windows. You only have one option which is to manually configure your proxy server.
Here are the steps to follow:
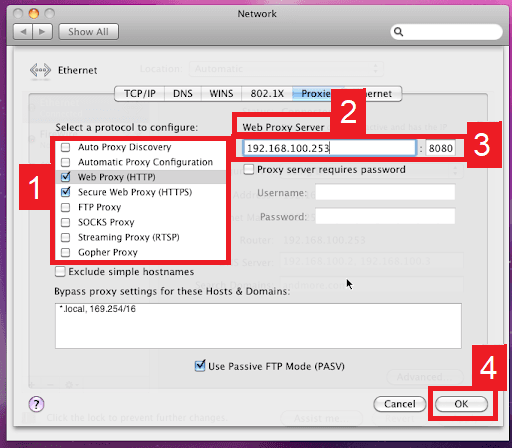
- Select which proxy IP protocol you want to configure. This depends on which protocols your proxy service provider offers.
- Turn on Secure Web Proxy
- Input the Proxy Server Address and Port Number
- Click OK to save the configurations
Note: You may be prompted for your Mac user password to save your settings.
For Mobile:
To set up a mobile Gmail proxy server, simply change your phone’s proxy settings. Gmail will automatically copy your phone’s proxy settings whenever you use it. This is applicable for both Android and IOS. Here’s a thorough guide for Android and another one for iPhone.
Congratulations! You have now finished configuring a Gmail proxy server. Note that the first time you visit it, there will be a pop up asking for your login credentials.


