IMDb, which stands for Internet Movie Database, is the internet’s largest and most popular database for movies. It has a comprehensive collection of everything related to movie data, including movie trailers and release dates, box office information, user reviews, TV and entertainment programs, and many more. IMDb has helped users explore new movies or shows and find out what they want to watch.
IMDb’s extensive list of movie data makes it a perfect place to extract that type of information from. To gather movie data quickly and efficiently, you need to use a web scraper bot. A web scraping tool will extract data from IMDb, or any other website, faster than any human can do.
The problem with using web scraping bots and any other automation tools is that websites like IMDb don’t allow its usage. If you get caught using one, your account and IP address will be immediately banned from the website. You need to utilize proxies to avoid getting banned, as a proxy server will trick websites into thinking that your bot is a genuine user, so websites will not ban it. The best proxies for IMDb would be residential proxies or datacenter proxies.
Let’s set up a proxy server when scraping IMDb.
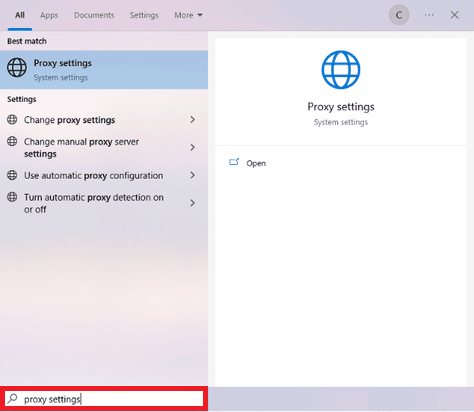
Step 1. In Window’s search bar, type in “Proxy Settings”.
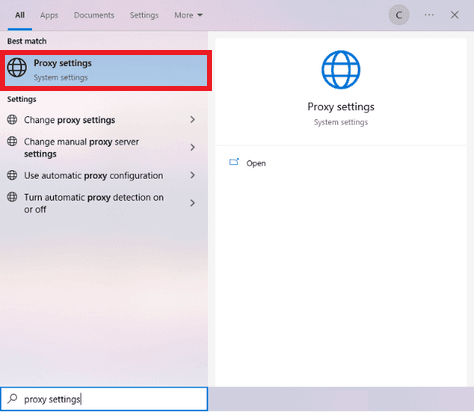
Step 2. Click on the "Proxy Settings" search result.
Step 3. You’ll be given the choice of Automatic Proxy Setup or Manual Proxy Setup. For example purposes, we’ll be choosing “Manual Proxy Setup”.
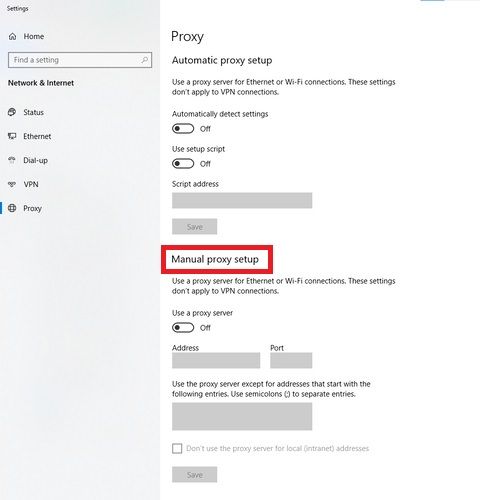
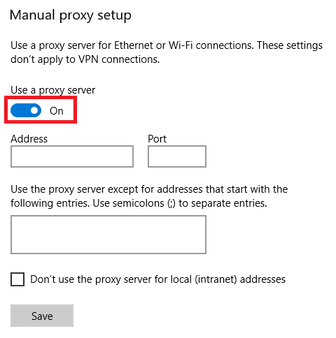
Step 4. Turn on "Use a proxy server".
Now, you need to go to your proxy provider and acquire the proxy server details. If you want to get it from Geonode, you can jump to “Acquiring Proxy Server Details With Geonode”.
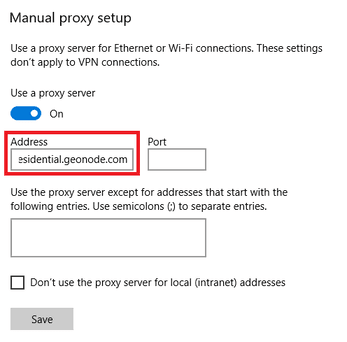
Step 5. Enter your proxy’s “Hostname” or “IP address”. This is the first part before the semicolon, which in our example is “premium-residential.geonode.com”.
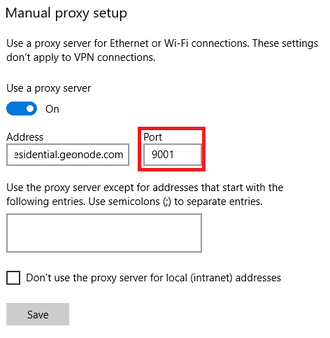
Step 6. Enter your proxy’s “Port Number”. This is the second part before the semicolon, which in our example is “9001”.
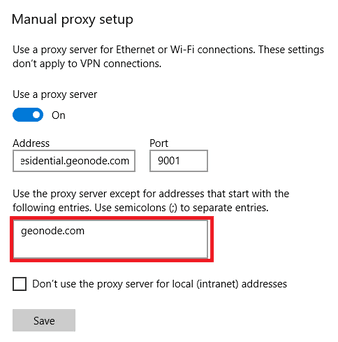
Step 7. Enter any “website addresses” you would like to visit without a proxy.
If you want to access a local server without a proxy, turn on the "Don’t use the proxy server for local addresses" check box.
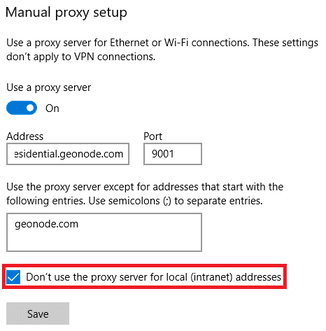
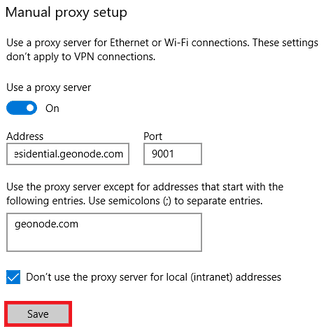
Step 8. Click “Save”.
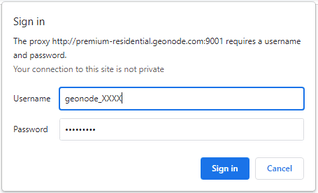
Step 9. Lastly, visit any website on Google Chrome and a pop-up window will appear asking for your account credentials. Enter your account’s “Username” and “Password”. Then, click on “Sign In”.
Congratulations! You have now set up a proxy server for your Windows operating system.
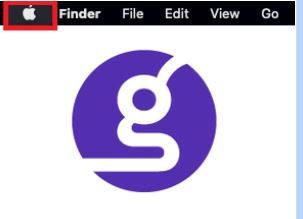
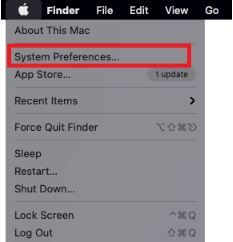
Step 1. Click on the "Apple Icon".
Step 2. On the drop down menu, click on “System Preferences”.
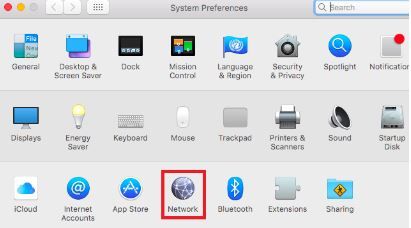
Step 3. Click on “Network”.
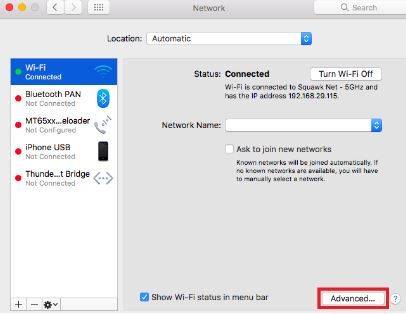
Step 4. Click on “Advanced” Note: Make sure to connect to your wi-fi first.
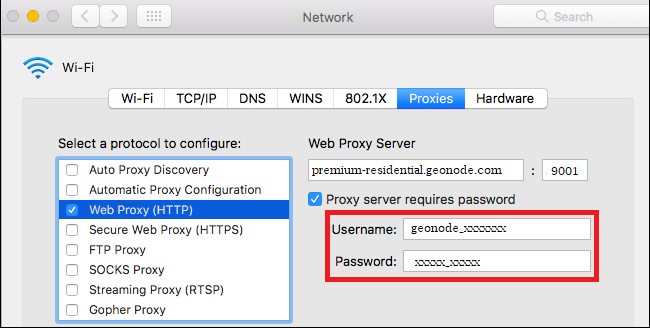
Step 5. Click on “Proxies”
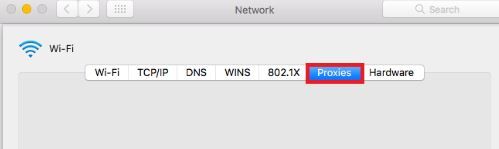
This should redirect you to MacOS proxy settings. Now, you need to go to your proxy provider and acquire the proxy server details. If you want to get it from Geonode, you can jump to “Acquiring Proxy Server Details With Geonode”.
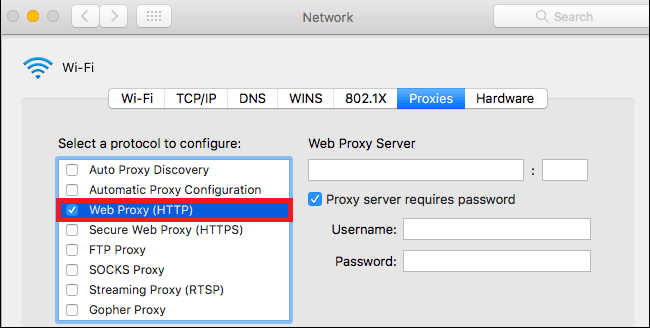
Step 6. Select the correct protocol that you’ll be using. For our example, we’ll be selecting “Web Proxy (HTTP)”.
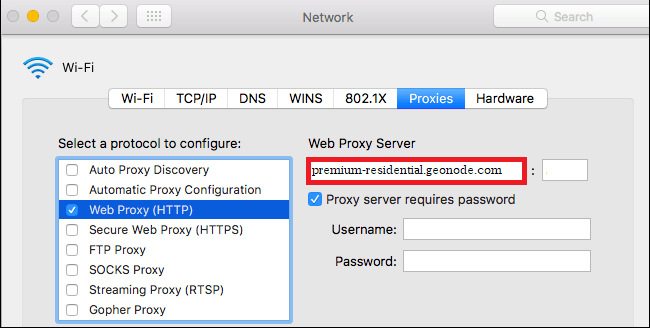
Step 7. Enter your proxy’s “Hostname” or “IP address”. This is the first part before the semicolon, which in our example is “premium-residential.geonode.com”.
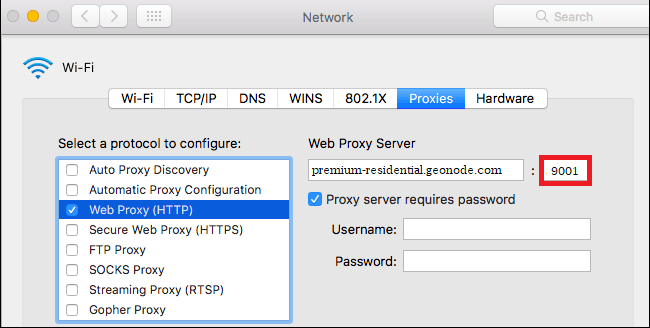
Step 8. Enter your proxy’s “Port Number”. This is the second part before the semicolon, which in our example is “9001”.
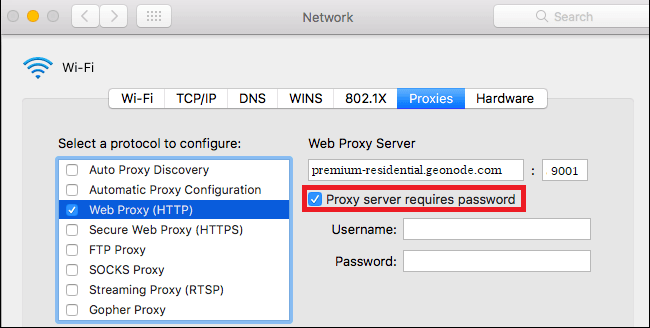
Step 9. Turn on “Proxy server requires password”.
Step 10. Enter your proxy account’s “Username” and “Password”.
Congratulations! You have now set up your proxy for your Mac operating system.
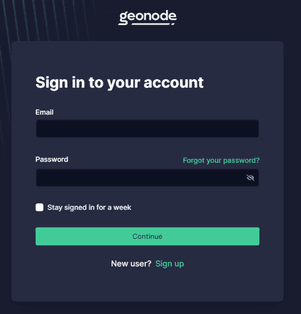
Step 1. Go to Geonode and log in with your existing account or sign up to create a new one.
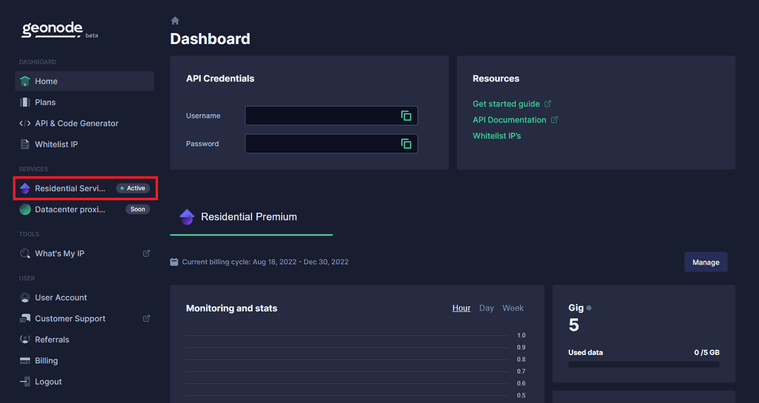
Step 2. On the Home Page, click on “Residential Services”.
Step 3. Scroll down until you see “Endpoints”.
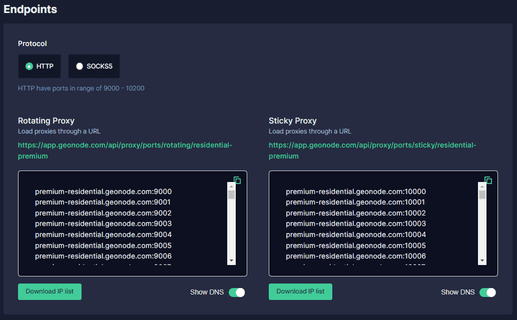
Step 4. Choose which “Proxy Protocol” you want to utilize: “HTTP Protocol” or “SOCKS5 Protocol”.
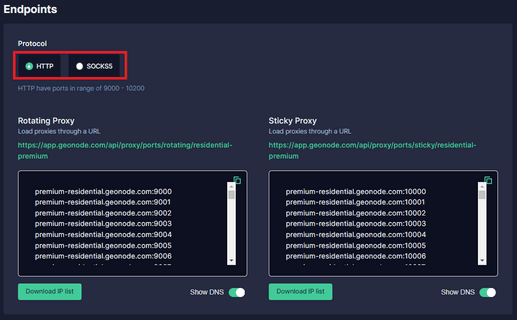
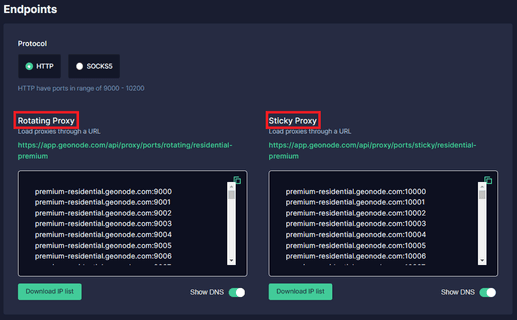
Step 5. Select which "Session Type" you want to utilize: “Rotating Proxy” or Sticky Proxy.
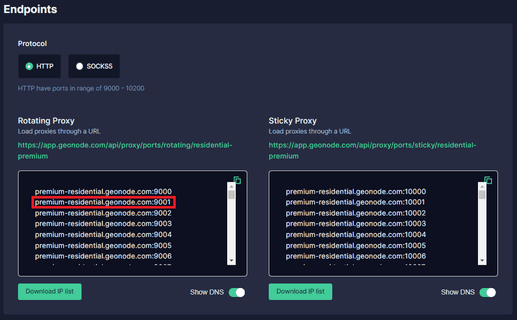
Step 6. Choose which proxy you want to utilize. For example purposes, we’ll be using the highlighted proxy “premium-residential.geonode.com:9001”.
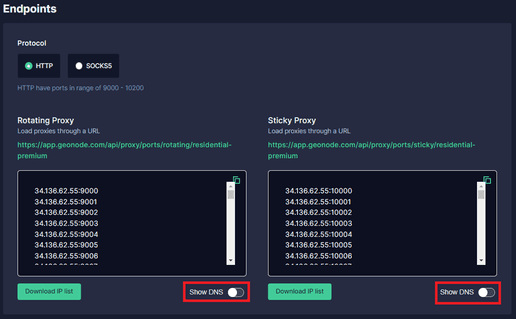
If you want to use an IP address instead of a DNS, simply turn off the Show DNS button, and IP addresses will show up.
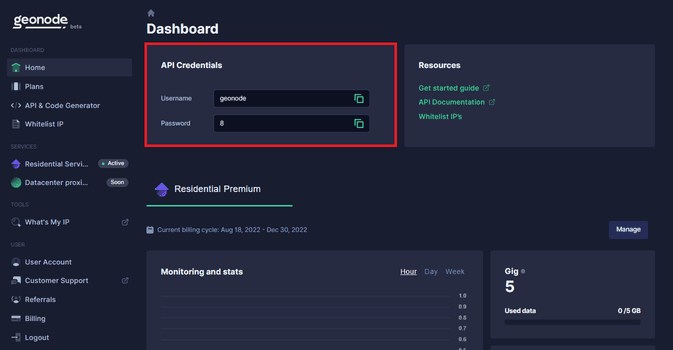
Step 7. Now you need your proxy account’s “Authentication Details”. For Geonode, this is on your account’s home page.