Twitch is a live video streaming platform that allows people to broadcast in real-time their respective content whether it be gaming, entertainment, sports, music and many more. Twitch was launched in 2011 and was originally geared towards gamers and gaming in general but has since diversified to other categories. Twitch was bought by Amazon in 2014 for 1 billion dollars and has massively grown in value and popularity since.
There are 9.2 million people that live stream on Twitch monthly, also known as “streamers”, so it’s difficult to stand out from the crowd and join Twitch’s affiliate program. You can slowly build up your audience through hard work and a lot of dedicated time but, you can streamline this process with the help of a Twitch viewer bot. Additionally, understanding your audience and competitors through extracting data from Twitch can provide valuable insights to improve your content and engagement strategies. To avoid being banned and effectively use your bot, free proxies and even a good proxy isn’t enough, you need an exceptional Twitch proxy.
A Twitch proxy hides your own IP address from Twitch, only letting Twitch see the proxy server’s IP address. Residential proxies utilize real residential IP addresses and you can choose the location you want it to be tied to. By using high quality residential proxies, you can make your bots appear as if they’re real people even to the strictest anti-bot systems. Datacenter proxies, although faster, don’t have enough security to ensure that you won’t get blocked.
A Twitch proxy, much like a vpn, is also helpful when unblocking a Twitch account when it's been blocked by Twitch or if the network you’re using has blocked Twitch. It also gives you more anonymity and stronger security and privacy when using Twitch. Another great advantage is having a smoother experience when streaming on Twitch as you’re given access to a more reliable and faster connection. Let’s set up a Twitch proxy server.
Note: It isn’t recommended to use free Twitch proxies from random Twitch proxy sites as they aren’t reliable and will most likely result in you getting banned anyways.
For Windows:
To set up proxies in Windows, simply search for “Proxy Settings” in your windows search bar and open the search result.
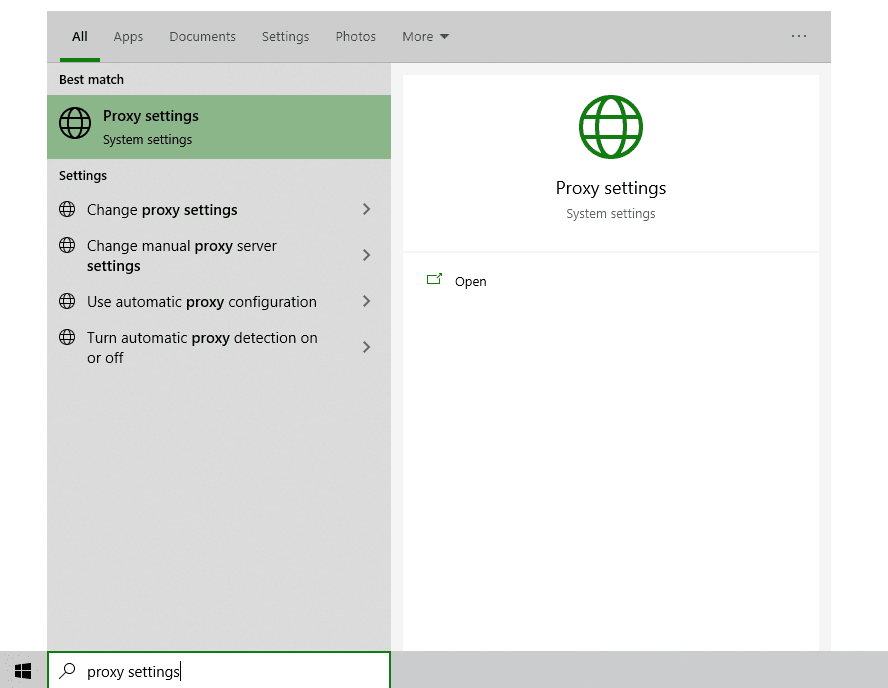
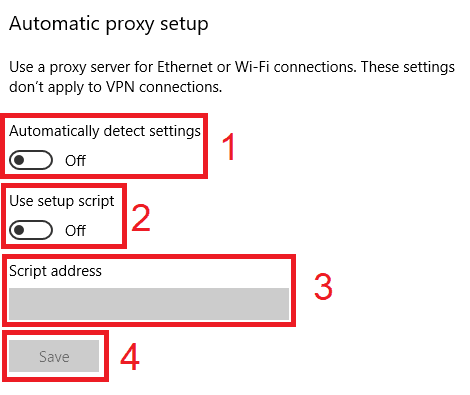
You are then given two options to choose from: Automatic proxy setup or Manual proxy setup. If you want windows to automatically detect your proxy settings, choose the first option. Choose the second option if you want to utilize a specific ip address and port number.
If you chose the first option, then:
- Turn on Automatically detect Settings
- Turn on Use setup script
- Enter the script address
- Click Save
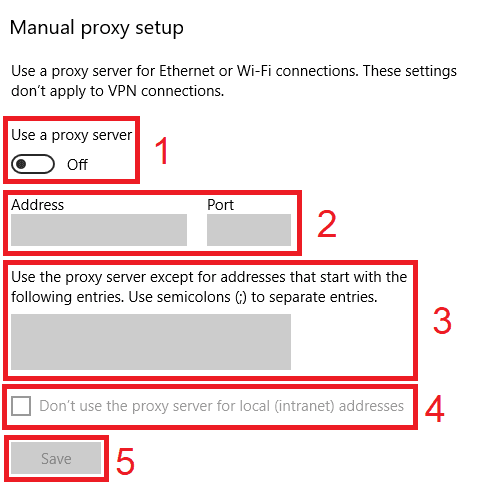
If you chose the second option, then:
- Turn on Use a proxy server
- Input both server address and port number
- If you have any addresses you would like to visit without a proxy, enter them here
- Turn on Don’t use the proxy server for local addresses check box if you want to access a local server without a proxy
- Click Save
For Mac.
To start configuring your proxy settings in MacOS, simply:
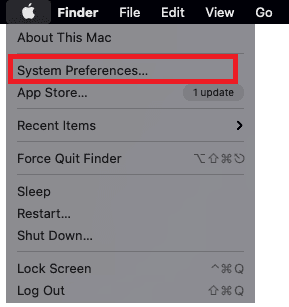
Step 1. Click on the Apple Icon.

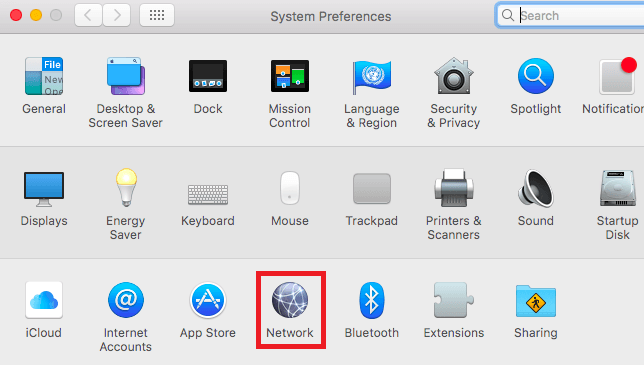
Step 2. On the drop down menu, click on “System Preferences”.
Step 3. Click on “Network”
Step 4. Click on “Advanced”
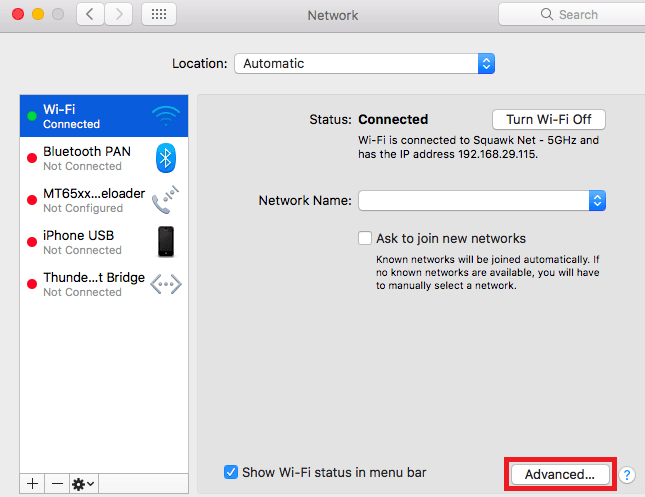
Note: Make sure to connect to your wi-fi first.
Step 5. Click on “Proxies”

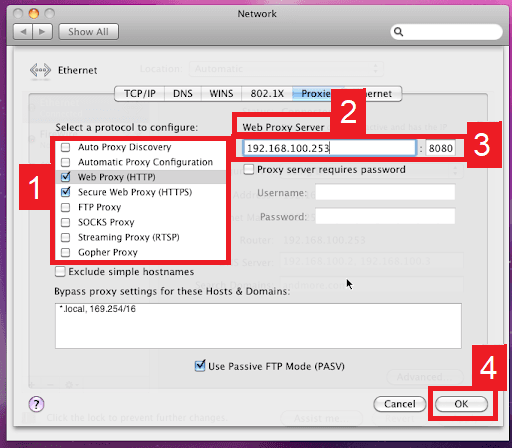
This should then redirect you to MacOS proxy settings. MacOS is more straightforward compared to windows. You only have one option which is to manually configure your proxy server.
Here are the steps to follow:
- Select which proxy IP protocol you want to configure. This depends on which protocols your proxy service provider offers.
- Turn on Secure Web Proxy
- Input the Proxy Server Address and Port Number
- Click OK to save the configurations
Note: You may be prompted for your Mac user password to save your settings.
For Mobile:
To configure Twitch mobile proxies, simply change your phone’s proxy settings. Twitch will copy your phone’s proxy settings whenever you use it. This is applicable for both Android and IOS. Here’s a thorough guide for Android and another one for iPhone.
Note: Make sure that the web browser you’re using for Twitch is automatically copying your computer’s proxy settings. It’s recommended to use Google Chrome because it automatically does this.
Congratulations! You have now finished setting up a proxy server for Twitch. Note that the first time you visit it, there will be a pop up asking for your login credentials.
Read more similar post... Sitemap


