Windows, or Microsoft Windows, is the operating system that Microsoft develops for personal computers. It’s the most popular operating system in the world, with more than 1.4 billion devices running on Windows. Since its first initial release, there have been multiple versions of Windows, with the latest version being Windows 11.
Users can optimize their experience with Windows by using a Windows proxy server. A proxy server acts as a middleman between your device and the internet, allowing you to browse the web using a different IP address and location.
Why Use a Windows Proxy Server?
A Windows proxy server can offer several benefits to users, including:
- Protecting Your Online Identity: A Windows proxy server can help protect your online identity by hiding your IP address from websites you visit. This can prevent websites from tracking your online activity and personal information, such as location, device type, and browsing history. It can also protect you from cyber threats like hacking, phishing, or identity theft.
- Improving Internet Speed: A Windows proxy server can help improve your internet speed by connecting you to a faster network or server. This can reduce buffering or lagging while browsing, streaming, or gaming, especially using a shared or public Wi-Fi network. It can also help bypass internet censorship or throttling by your internet service provider (ISP).
- Performing Advanced Tasks: A Windows proxy server can enable you to perform advanced tasks like automation or web scraping while preventing your account and IP address from being banned. It can make your bot or script appear as a genuine user instead of a suspicious or malicious bot, which can help you extract data or automate tasks more efficiently.
- Accessing Region-Restricted Content: A Windows proxy server can help you access region-restricted content or websites unavailable in your country or region. It can also help you bypass geo-blocking or content filtering by your ISP or government, allowing you to browse the internet more freely and securely.
In this guide, we will show you how to set up a Windows proxy server step by step, so you can enjoy these benefits and enhance your online experience.
Window’s Proxy Settings
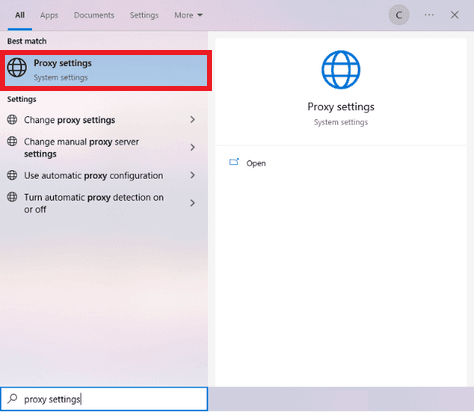
Step 1. In Window’s search bar, type in “Proxy Settings.”
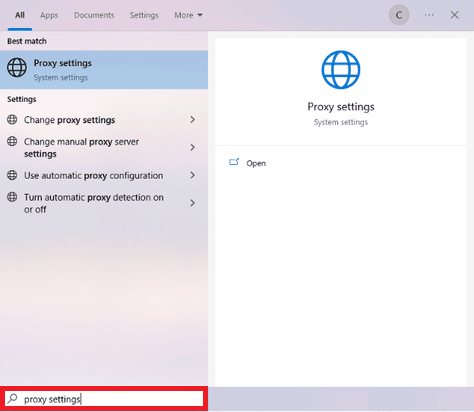
Step 2. Click on the "Proxy Settings" search result.
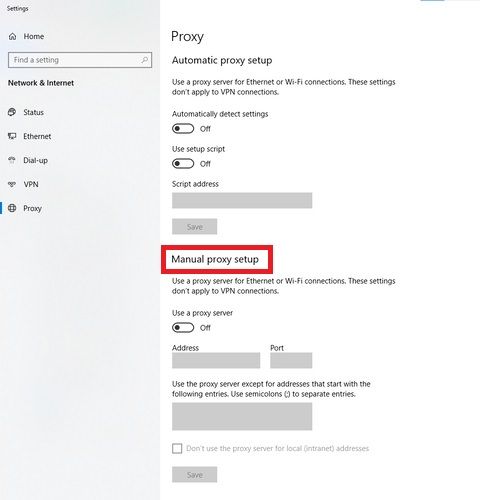
Step 3. You’ll be given the choice of “Automatic Proxy Setup” or “Manual Proxy Setup”. For example purposes, we’ll be choosing “Manual Proxy Setup.”
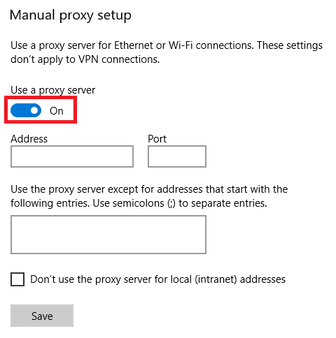
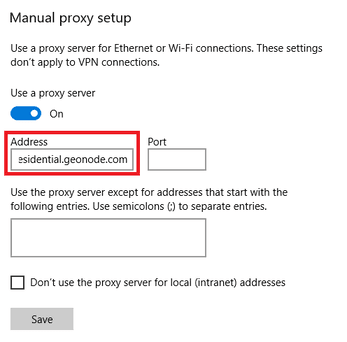
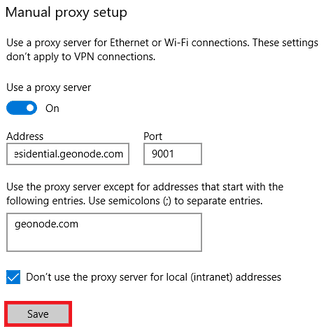
Step 4. Turn on "Use a proxy server."
Now, you need to go to your proxy provider and acquire the proxy server details. If you want to get it from Geonode, you can jump to “Acquiring Proxy Server Details With Geonode”.
Step 5. Enter your proxy’s “Hostname” or “IP address”. This is the first part before the semicolon, which in our example is “premium-residential.geonode.com.”
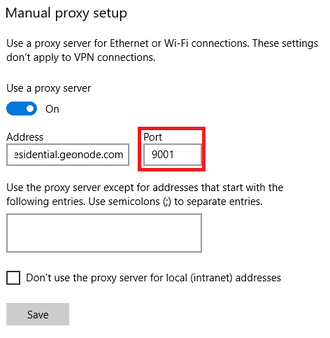
Step 6. Enter your proxy’s “Port Number.” This is the second part before the semicolon, which is “9001” in our example.
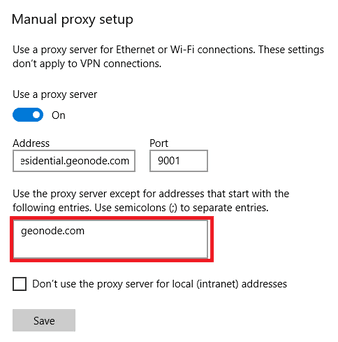
Step 7. Enter any “website addresses” you want to visit without a proxy.
If you want to access a local server without a proxy, turn on the "Don’t use the proxy server for local addresses" check box.
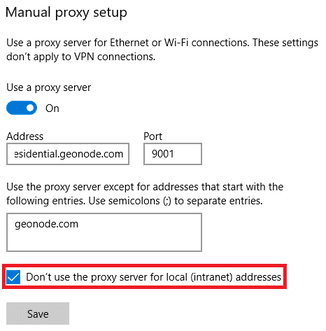
Step 8. Click “Save.”
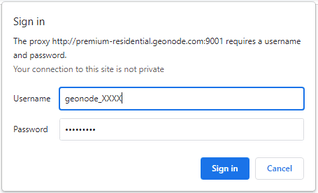
Step 9. Lastly, visit any website on Google Chrome, and a pop-up window will appear asking for your account credentials. Enter your account’s “Username” and “Password.” Then, click on “Sign In.”
Congratulations! You have now set up a proxy server for your Windows operating system.
Acquiring Proxy Server Details With Geonode
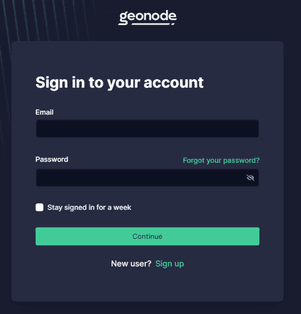
Step 1. Go to Geonode and log in with your existing account or sign up to create a new one.
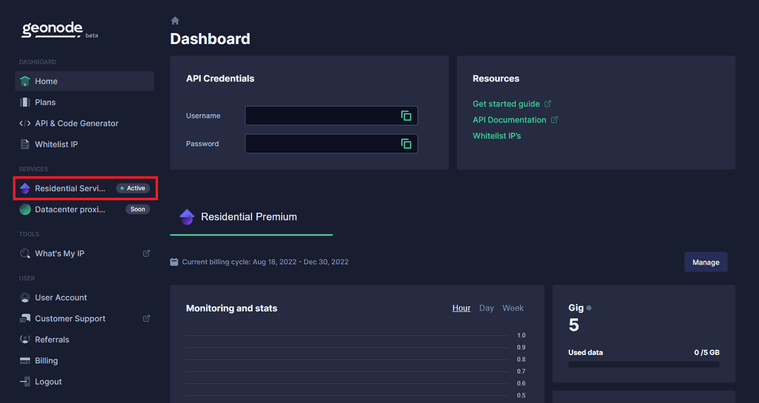
Step 2. On the Home Page, click on “Residential Services.”
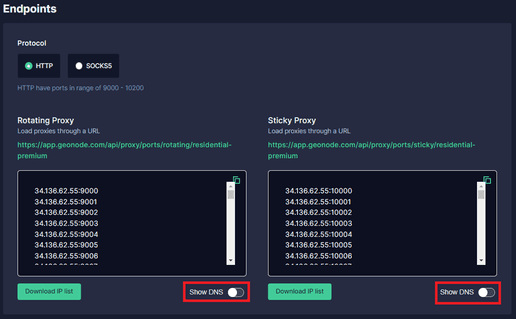
Step 3. Scroll down until you see “Endpoints.”
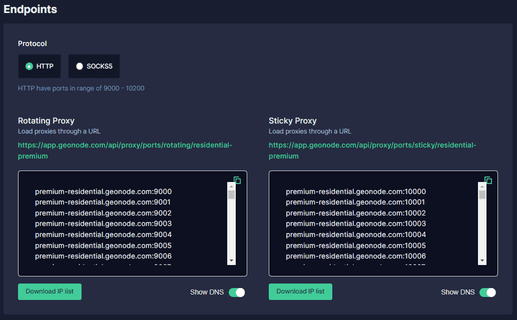
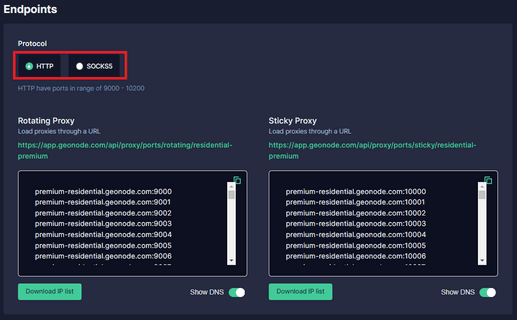
Step 4. Choose which “Proxy Protocol” you want to utilize: “HTTP Protocol” or “SOCKS5 Protocol.”
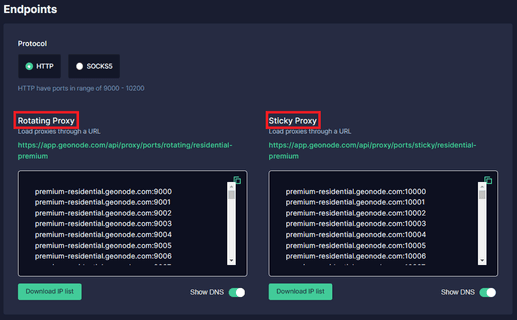
Step 5. Select which "Session Type" you want to utilize: “Rotating Proxy” or Sticky Proxy.
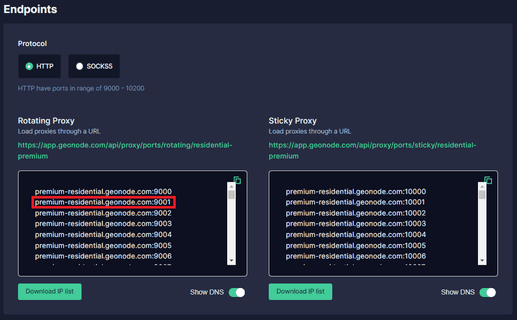
Step 6. Choose which proxy you want to utilize. For example purposes, we’ll be using the highlighted proxy “premium-residential.geonode.com:9001.”
If you want to use an IP address instead of a DNS, simply turn off the Show DNS button, and IP addresses will show up.
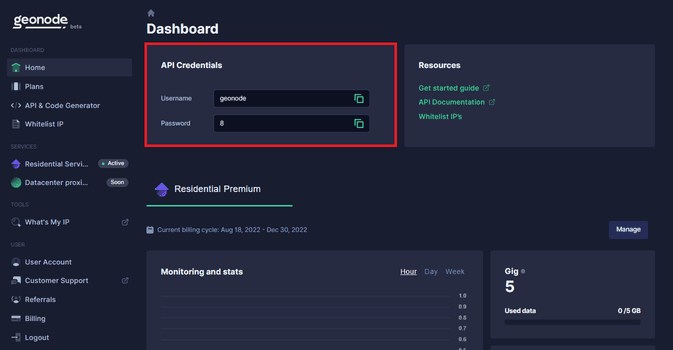
Step 7. Now you need your proxy account’s “Authentication Details.” For Geonode, this is on your account’s homepage.
Troubleshooting Common Issues
Configuring a proxy server for Windows can sometimes be challenging, especially for users new to proxy servers or with limited technical knowledge. Here are some of the common issues that users may encounter when setting up a Windows proxy server, along with their solutions:
- Incorrect Proxy Settings: If you cannot connect to the internet after setting up your Windows proxy server, the first thing to check is your proxy settings. Ensure you've entered the correct proxy server details, including the hostname, port number, and authentication details. You should also select the correct proxy protocol (e.g., HTTP or SOCKS) and session type (e.g., rotating or sticky).
- Firewall or Antivirus Blocking: If you're unable to access certain websites or services after setting up your Windows proxy server, it's possible that your firewall or antivirus software is blocking the proxy server. Try temporarily disabling your firewall or antivirus and see if the issue is resolved. If so, you may need to add the proxy server to your firewall or antivirus exception list.
- Slow Internet Speed: If you're experiencing slow internet speed after setting up your Windows proxy server, try connecting to a different proxy server or switching to a different proxy protocol. You should also ensure that your proxy server is not overloaded or experiencing high traffic, which can slow down your internet speed.
- Incompatibility with Websites or Services: If you're experiencing issues with certain websites or services after setting up your Windows proxy server, it's possible that the proxy server is not compatible with those websites or services. Try switching to a different proxy server or protocol, or contact the website or service provider for assistance.
- Legal or Policy Issues: If you're using a Windows proxy server to access region-restricted content or websites unavailable in your country or region, be aware of the potential legal or policy issues. Some countries or regions may have strict laws or policies regarding using proxy servers, and using a proxy server to bypass these restrictions may result in legal or policy consequences.
Setting up a Windows proxy server can be a great way to enhance your online experience, whether you want to browse the web anonymously, access region-restricted content, or perform advanced tasks like automation or web scraping.
If you're looking for a reliable and high-quality proxy server provider for your Windows device, check out Geonode's residential proxies. Visit our website to learn more about our residential proxies for Windows. Happy browsing!
