Instagram, a platform boasting over a billion users worldwide, has become an essential tool for individuals, businesses, and influencers alike. However, to truly unlock its potential, understanding the use of proxies with Instagram is crucial. This comprehensive guide will walk you through the process and benefits of using Instagram proxies.
Understanding Instagram Proxies
Instagram proxies are tools that provide an additional layer of privacy and security to your Instagram experience. They act as intermediaries, routing your connection through an alternate network, thus masking your IP address and location. This is particularly useful for accessing geo-restricted content, managing multiple accounts, and enhancing your online privacy.
Note: If you’re using an Instagram proxy specifically for managing an automation bot then your process would be slightly different but you can usually find the instructions on how to do that at where you got your bot.
Setting Up Instagram Proxies: A Step-by-Step Guide
Instagram doesn't offer in-app proxy settings. However, you can configure your device's native proxy settings to work with Instagram. Here's how:
For Windows:
To set up proxies in Windows, simply search for “Proxy Settings” in your windows search bar and open the search result.
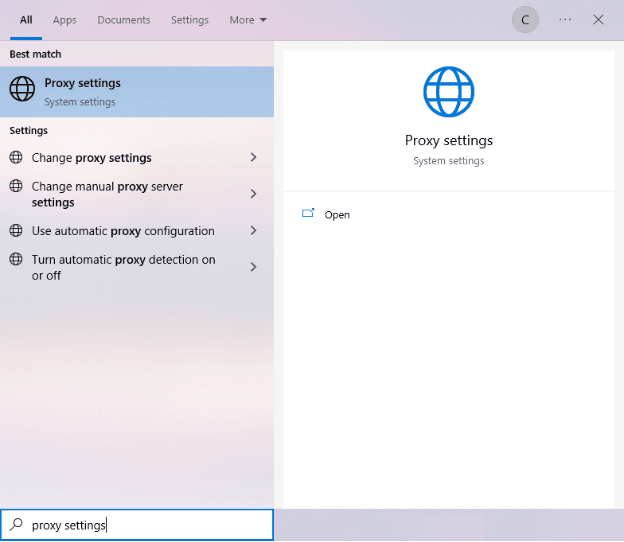
You are then given two options to choose from: Automatic proxy setup or Manual proxy setup. If you want windows to automatically detect your proxy settings, choose the first option. Choose the second option if you want to utilize a specific ip address and port number.
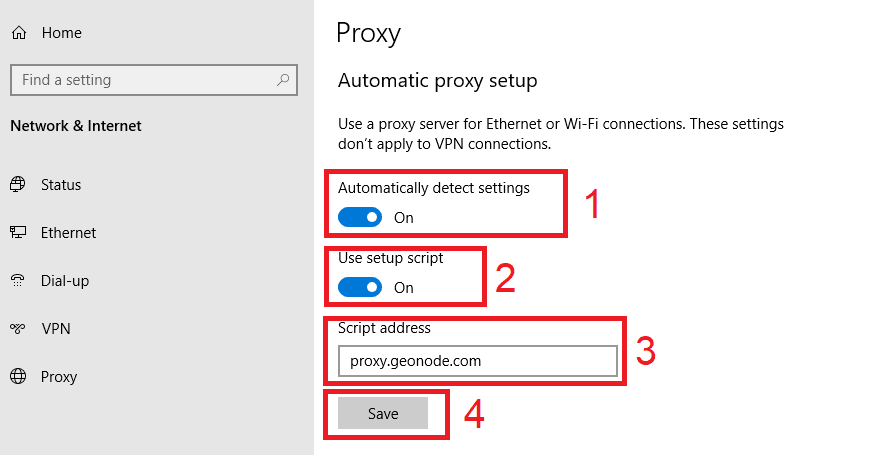
If you chose the first option, then:
- Turn on Automatically detect Settings
- Turn on Use setup script
- Enter the script address
- Click Save
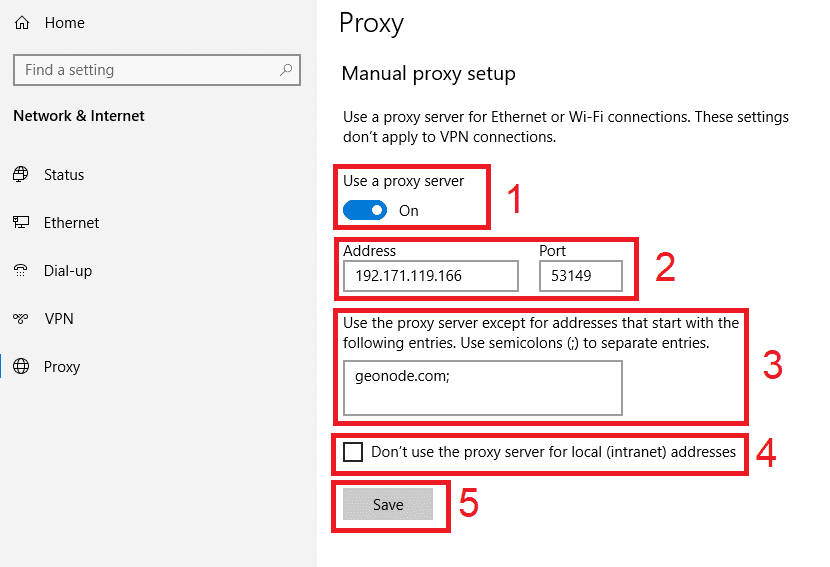
If you chose the second option, then:
- Turn on Use a proxy server
- Input both server address and port number
- If you have any addresses you would like to visit without a proxy, enter them here
- Turn on Don’t use the proxy server for local addresses check box if you want to access a local server without a proxy
- Click Save
For Mac.
To start configuring your proxy settings in MacOS, simply:
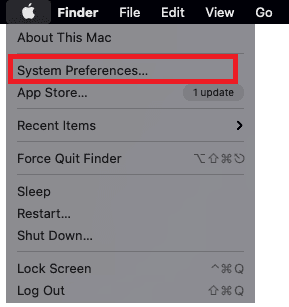
Step 1. Click on the Apple Icon.
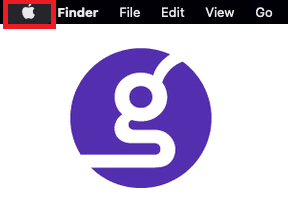
Step 2. On the drop down menu, click on “System Preferences”.
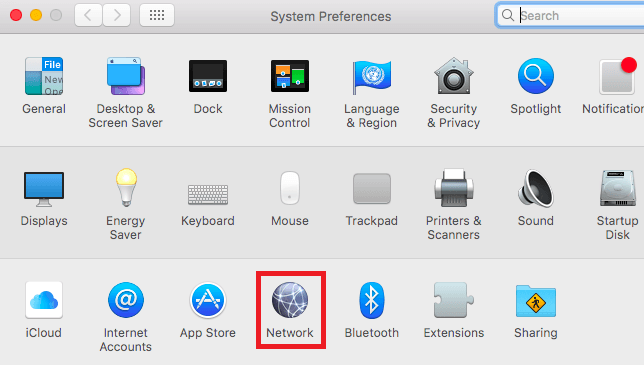
Step 3. Click on “Network”
Step 4. Click on “Advanced”
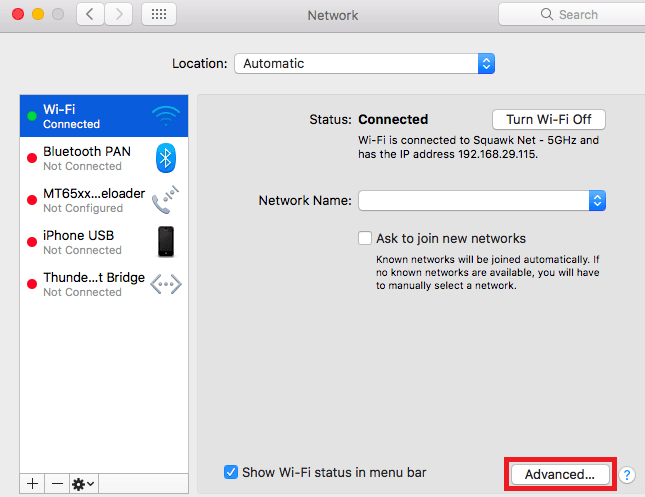
Note: Make sure to connect to your wi-fi first.
Step 5. Click on “Proxies”
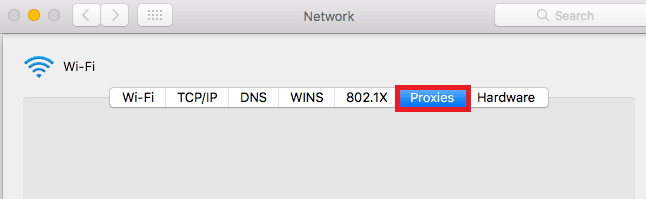
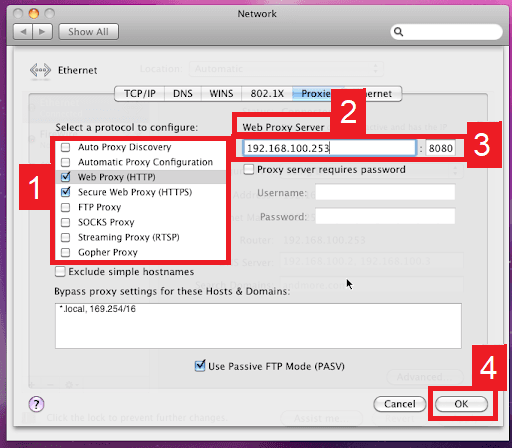
This should then redirect you to MacOS proxy settings. MacOS is more straightforward compared to windows. You only have one option which is to manually configure your proxy server.
Here are the steps to follow:
- Select which proxy IP protocol you want to configure. This depends on which protocols your proxy service provider offers.
- Turn on Secure Web Proxy
- Input the Proxy Server Address and Port Number
- Click OK to save the configurations
Note: You may be prompted for your Mac user password to save your settings.
Congratulations! You have now set up a proxy server for Instagram. If you’re using a web browser, remember to double-check if it’s set to copy your system’s proxy settings.
For Mobile:
To set up mobile proxies for Instagram, simply configure your phone’s proxy settings . Instagram would automatically copy your phone’s proxy settings whenever you’re on Instagram. Here’s a thorough guide for Android and another one for iPhone.
Congratulations! You have now finished configuring a proxy for Instagram. Note that the first time you visit Instagram, there will be a pop up asking for your login credentials.
Note: If you’re using a web browser for Instagram, then make sure that the browser you’re using is set to copy your system’s proxy settings. Would recommend Google Chrome because it automatically does this.
Frequently Asked Questions:
Why Use Instagram Proxies?
Instagram proxies offer numerous benefits:
• Privacy: They mask your IP address, enhancing your online privacy.
• Security: They protect your data from third-party access.
• Unblocking Content: They allow you to access Instagram if it's restricted in your location.
• Managing Multiple Accounts: They enable you to manage multiple Instagram accounts without the risk of being flagged or banned.
When choosing an Instagram proxy, opt for residential proxies as they provide the most security and minimize the risk of being flagged or banned.
Are Instagram Proxies Safe?
Yes, Instagram proxies are safe to use, especially if you opt for residential proxies. They provide the most security and minimize the risk of being flagged or banned. However, it's important to use proxies from reputable providers to ensure the best security.
Can I Use Free Proxies for Instagram?
While there are free proxies available, they are not recommended for Instagram. Free proxies often have many users, which can lead to slow speeds and unreliable connections. They may also lack the security features provided by paid proxies. For the best experience, it's recommended to use paid proxies from reputable providers.
Conclusion
Whether you're an individual user, a business, or an influencer, using proxies for Instagram can greatly enhance your experience on this popular platform. Enjoy the creativity, connectivity, and security that Instagram offers while leveraging proxies to maximize your experience.
